The document describes assembly labeling procedures including:
1. Using labeling software to print labels with a barcoded serial number, item number, and revision from production data.
2. Specifications for labels, ribbons, and a separate printer for revision labels.
3. Requirements for vendors including unique barcoded serial numbers in a standardized format.
1 of 6
Download to read offline
More Related Content
Labeler Guide
1. ASSEMBLY LABELING PROCEDURES REV. D 06/28/2006
9000101-00
Assembly Labeling
Starting Labeler ........................................................1
Printing Labels ..........................................................2
Supplies.....................................................................4
Care...........................................................................4
Printing Revision Labels ..........................................5
Revision Label Printer ..............................................5
Revision Label & Specifications...............................5
Print Revision Labels................................................5
Vendor Requirements for Assembly Labels
Barcode Format........................................................6
Materials....................................................................6
MNI Assembly Label System
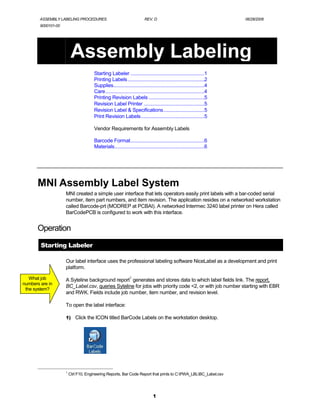
MNI created a simple user interface that lets operators easily print labels with a bar-coded serial
number, item part numbers, and item revision. The application resides on a networked workstation
called Barcode-prt (MODREP at PCBAI). A networked Intermec 3240 label printer on Hera called
BarCodePCB is configured to work with this interface.
Operation
Starting Labeler
Our label interface uses the professional labeling software NiceLabel as a development and print
platform.
What job 1
A Syteline background report generates and stores data to which label fields link. The report,
numbers are in
BC_Label.csv, queries Syteline for jobs with priority code <2, or with job number starting with EBR
the system?
and RWK. Fields include job number, item number, and revision level.
To open the label interface:
1) Click the ICON titled BarCode Labels on the workstation desktop.
1
Ctrl F10, Engineering Reports, Bar Code Report that prints to C:PWA_LBLBC_Label.csv
1
2. ASSEMBLY LABELING PROCEDURES REV. D 06/28/2006
9000101-00
2) The interface connects to the associated label file, data file, and the print engine.
3) And, then opens the interface; below.
??Figure 1. Bar-Code Label Interface
Printing Labels
To create labels for your assembly:
1) Select the JOB NUMBER for the assembly from the selection list.
2
3. ASSEMBLY LABELING PROCEDURES REV. D 06/28/2006
9000101-00
A Job Number may
display when you first
open the screen, so
re-select your job to
ensure you apply
current Syteline data.
??Figure 2. JOB Selection List
The interface then displays the item part number, ITEM P/N, and item revision, REV, as listed in
Syteline for the selected job; see Figure 3.
??Figure 3. Part Number and Revision Level Displays
LABEL PREVIEW shows the layout and data of your printed labels. Serial number is MMDDYY
plus a counter ¨C a serialized date code. The counter stores last number used, so no two labels
print with the same date-counter code.
??Figure 4. Label Preview
The label uses a linear bar code, type 128, that is 0.125-inch high with an expansion factor of 2.
Annotated bar-code text, item numbers, and revision levels use Arial, 6-pt, bold font. These
settings give the 1.25 x 0.25¡± label room for text and bar code.
2) Enter the number of labels you want to print.
??Figure 5. Entry for Number of Labels
QUANTITY is a user entry to process partials or print extra labels.
3) Click PRINT to start the print job.
3
4. ASSEMBLY LABELING PROCEDURES REV. D 06/28/2006
9000101-00
The printer prints the number of labels you entered in QUANTITY.
Maintenance
Supplies
We use a thermal transfer printable label, which means the printer also has to have a thermal
transfer ribbon. The Brady THT-13-473-10 label we use has the following specifications:
Material: Glossy white static-dissipative
polyester
Media Size: 2.75-inch width web
Label Size: 31.75 mm x 6.35 mm (1.25 in x
0.25 in) labels
The label set up for the PWA/LRU Labeler has margins of: 0.14¡± left, 0.0¡± right, 0.01¡± top, and
0.002¡± bottom.
The printer transfer ribbon is Intermec; part number 13062806.
Ribbon alignment is critical for quality printing. See the Intermec 3240 manual to replace labels or ribbon. Align and
adjust printing as indicated.
Care
Use the maintenance procedures listed in the Model 3240 product manual and getting started
guide to ensure print quality.
4
5. ASSEMBLY LABELING PROCEDURES REV. D 06/28/2006
9000101-00
Printing Revision Labels
Revision Label Printer
A Brady Model TLS2200 thermal-transfer printer, located on the production floor at PCBA, loaded
with 0.5 x 0.275 labels is available for use when an assembly change requires a revision change
on the original label.
Brady TLS2200 printer
The printer uses a ribbon cartridge; Brady R6010.
Revision Label & Specifications
Use Brady label number PTL-6-478
Product #: 80779
Size: 0.500quot; W x 0.275quot; H (12.70 mm W x 6.99 mm H)
Printable Area: 0.500quot; W x 0.275quot; H (12.70 mm W x 6.99 mm H)
Color: White
Finish: Gloss
Material Type: Polyimide
Material Description: Static Dissipative Polyimide
Adhesive: Static Dissipative Permanent Acrylic
Agency Approval(s)/Compliance: ESD-approved for IEC 61340-5-1 and EN 100015-1, UL Recognized
RoHS Compatibility: Compliant with RoHS Directive
Special Properties: Low profile, Static dissipative adhesive & liner
Max Lines of Text For Font: 2
Max Characters Per Line For Font: 11
Print Revision Labels
To create labels for revised assemblies:
1) Type the new revision into code into the Brady printer.
2) Press Enter for each label you need
3) Use the built-in cutter to remove your revision label
4) Place the label over the revision on the original PCB or assembly label.
5
6. ASSEMBLY LABELING PROCEDURES REV. D 06/28/2006
9000101-00
Vendor Requirements for Assembly Labels
Vendor shall label assemblies where noted on assembly drawings with labels that include
?? a bar-coded serial number
?? the item part number
?? the item revision
Every serial number shall be unique
The bar-coded serial number is a serialized date code ¡ª CC plus MMDDYY plus counter ¡ª
typically concatenated so the entire barcode sequence is read as one symbol.
?? CC is the first letters of the first two words in the company title
Example: JJ for Jim's Job Shop Inc.
?? MMDDYY is the date of the completed assembly in month, day, and year
?? Counter is a three-digit sequence from 001 to 999
??Figure 6. Label Preview
Barcode Format
Barcode format:
?? Linear bar code, type 128
?? 0.125-inch high
?? Expansion factor 2
Text fonts:
?? annotated barcode text ¨C Arial, 8-pt, bold
?? item numbers ¨C Arial, 6-pt, bold
?? revision levels ¨C Arial, 6-pt, bold
These settings give the 1.25 x 0.25¡± label room for text and bar code
Materials
Printable label specifications:
?? Material ¨C Glossy white static-dissipative polyester
?? Label Size ¨C 31.75 mm x 6.35 mm (1.25 in x 0.25 in) labels
6