Usb hard drive data recovery case study wd5000 bmvv-11gnws
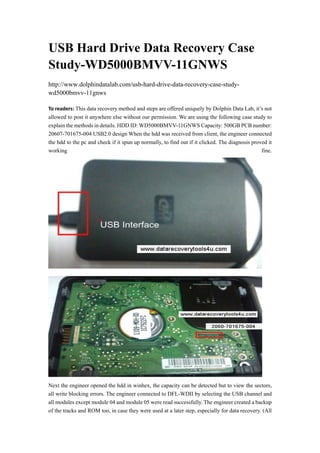
- 1. USB Hard Drive Data Recovery Case Study-WD5000BMVV-11GNWS http://www.dolphindatalab.com/usb-hard-drive-data-recovery-case-studywd5000bmvv-11gnws To┬Āreaders: This data recovery method and steps are offered uniquely by Dolphin Data Lab, itŌĆÖs not allowed to post it anywhere else without our permission. We are using the following case study to explain the methods in details. HDD ID: WD5000BMVV-11GNWS Capacity: 500GB PCB number: 20607-701675-004 USB2.0 design When the hdd was received from client, the engineer connected the hdd to the pc and check if it spun up normally, to find out if it clicked. The diagnosis proved it working fine. Next the engineer opened the hdd in winhex, the capacity can be detected but to view the sectors, all write blocking errors. The engineer connected to DFL-WDII by selecting the USB channel and all modules except module 04 and module 05 were read successfully. The engineer created a backup of the tracks and ROM too, in case they were used at a later step, especially for data recovery. (All
- 2. users should have the habit of backup whenever you can) To test the heads and view sectors and scan the hdds, all were good and luckily the module 04 and 05 didnŌĆÖt affect the data. Next the engineer tried to convert the USB interface to SATA interface following the instructions below: (Available for dfl users only in the user-only forums.) After converting the USB interface to SATA interface, the engineer connected the hdd to DFL-WDII and the hdd couldnŌĆÖt be ready too, using the digital multimeter to diagnose the connections and they were ok. Next the engineer found one compatible SATA PCB and moved the ROM chip from the original PCB to this SATA PCB. Install the donor SATA PCB to the original USB hdd and connect it to DFL-WDII, the MBR and DBR were displayed correctly now, when scanning the hdd, thereŌĆÖre just a few bad sectors. Connecting the hard drive to DFL-DDP USB3.0 data recovery equipment, the partitions could be listed directly and the data were recovered successfully. Download the full case study here of the USB hdd recovery and check inside the technique details. Data Recovery Tools: ’éĘ ’éĘ ’éĘ ’éĘ ’éĘ ┬Ā HDD Repair Tools http://www.dolphindatalab.com/product-category/hdd-repair-tools/ Data Recovery Hardware http://www.dolphindatalab.com/product-category/datarecovery-hardware/ DFL-STII Seagate HDD Firmware Repair Tool http://www.dolphindatalab.com/product/seagate-hdd-firmware-repair-tool-dfl-stii/ DFL-DE Data Recovery Hardware http://www.dolphindatalab.com/product/dataextractor-dfl-de/ DFL-DDP Data Recovery Equipment http://www.dolphindatalab.com/product/dfldata-dr-pro-usb-3-data-recovery-equipment/


