17 effect tutorial
- 1. For the first shot I placed text onscreen in a text that I thought looked most appropriate. I wanted it to appear very cold and emotionless so I chose a font that I felt fitted this tone. I decided to keep the text 2D as it felt more grounded to use instead of more flamboyant 3D text. I added a “type on” animation effect and adjusted the timing and speed to give it the most dramatic impact. To enhance this further I made the text red.
- 2. For the effect of a gun being fired I placed a pre made visual effect of a blast and added it on top of the footage I had already recorded. I again adjusted the timing and duration of the effect so that it appeared for the appropriate amount of time. I also made changes to the size and shape of the blast to make it look as believable as possible. This, combined with its briefness on screen, makes a convincing final result. I did this process again for every time a gun is fired and matched it, by frame, to the barrel of the weapon.
- 3. Following the gun shot effect, I added various blood splatter effects to show the damage the gun caused. Like before I tinkered with the timing to make it look as realistic as I could. The timing here was especially important as the effect had to begin a reasonable amount of time after the gun was fired to convey the speed of the bullet. This timing would also vary for each time it is included as distance between actors would impact the speed between the gun firing and the bullet impacting the body.
- 4. I also matched the movement of the effect to that of the actor the effect is being applied to. So in this situation where the actor recoils after being fired at, the blood splatter effect is matched to his head to stay with him as he moves.
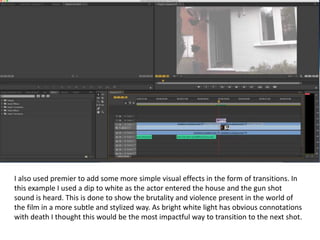
- 5. I also used premier to add some more simple visual effects in the form of transitions. In this example I used a dip to white as the actor entered the house and the gun shot sound is heard. This is done to show the brutality and violence present in the world of the film in a more subtle and stylized way. As bright white light has obvious connotations with death I thought this would be the most impactful way to transition to the next shot.
- 6. At the end of the film I added a dip to black to make the text fade in and fade out. With the timing of the transition slowed down this gave the text a much more somber feeling. Especially with the shot prior to this showing the main character overwhelmed. It compliments the atmosphere I wanted to create and fits in well with the films overall grim and hopeless tone.


