


3 d printing pen final
- 2. WELCOME
- 5. a finger in the air you can use the 3Doodler.
- 6. CONTENTS âĒ WHAT IS 3DOODLER? âĒ KNOW YOUR DOODLER âĒ STEPS TO USE 3DOODLER âĒ LOAD THE PLASTIC âĒ SELECT THE SPEED âĒ DOUBLE CLICK FOR CONTINUOUS FLOW âĒ UNLOAD THE PLASTIC âĒ SPECIFICATIONS âĒ USES âĒ CONCLUSION âĒ REFERENCES
- 7. 3D PRINTING âĒ The technology used for printing physical 3d objects from digital out is called 3d printing. âĒ It was first developed by Charles Haul in 1984. âĒ It is also called RAPID PROTOTYPES. âĒ In 1993, Massachusetts Institute of Technology (MIT) patented another technology, named "3 Dimensional Printing techniques", which is similar to the inkjet technology used in 2D Printers.
- 8. WHAT IS 3DOODLER? âĒ The 3doodler is a first 3D pen developed by Peter Dilworth and Maxwell Bogue of WobbleWorks LLC. âĒ It is capable of drawing in the air or on surfaces. âĒ The 3D printing pen uses ABS plastic which is the same material used by many 3D printers. âĒ The 3Doodler contains a mains-powered electric heater that melts plastic which then cools as it comes out of the end of the pen like a cake-icer.
- 9. Founders âĒ Launched on February19, 2013 âĒ First ones â end of December Peter Dilworth Maxwell Bogue
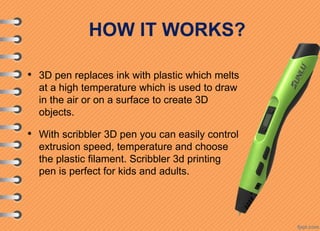
- 10. HOW IT WORKS? âĒ 3D pen replaces ink with plastic which melts at a high temperature which is used to draw in the air or on a surface to create 3D objects. âĒ With scribbler 3D pen you can easily control extrusion speed, temperature and choose the plastic filament. Scribbler 3d printing pen is perfect for kids and adults.
- 11. KNOW YOUR DOODLER 1. Nozzle 2. Extrusion Speed Control (Fast) 3. Extrusion Speed Control (Slow) 4. Cooling Fan 5. LED Indicator 6. Power Cord 7. Maintenance Cover 8. Cleaning Tool 9. ON/OFF Switch 10. Temperature Adjuster 11. Control Port 12. Plastic/Filament Loader 13. Mini Screwdriver 14. Nozzle Removal Tool
- 12. STEPS TO USE 3DOODLER: 1. Plug in your pen and turn it on. 2. Allow your doodle to heat up before loading plastic/filament 3. Load the pen 4. Extrude/Select your speed 5. Double click for continuous flow 6. Unloading/Reversing the plastic filament
- 13. TURN ON DOODLER âĒ Turn the pen on by selecting the correct heating temperature for the type of plastic/filament you are using. âĒ Set the slide switch to HI (âHighâ) for high temperature plastics/filaments like ABS or FLEXY, or LO (âLowâ) for low temperature plastics/filaments like PLA or WOOD. âĒ The 3Doodler takes approximately 1.5 minutes to heat up. During that time the LED indicator will be RED and it will not be possible to use the pen. Once the correct melting temperature is reached and the pen is ready, the LED indicator will change to BLUE (HI) or GREEN (LO)
- 14. LOAD THE PLASTIC âĒ Load the plastic/filament into the plastic loader at the back of the pen, feeding it down the length of the 3Doodler until you feel it gripped by the gears inside the pen. It can take up to 30 seconds for a newly loaded strand to begin extruding from the nozzle of the pen. âĒ If you do not feel the plastic/filament being gripped by the gears inside the pen, please give it a gentle clockwise twist while pushing it down the shaft of the 3Doodler.
- 15. SELECT THE SPEED âĒ Press and hold the button for the desired extrusion speed (FAST (3) or SLOW (4) ) and wait for the heated material to emerge from the pen tip. âĒ Releasing the chosen speed button will cause the pen to stop extruding the heated material.
- 16. DOUBLE CLICK FOR CONTINUOUS FLOW âĒ Your 3Doodler can be set to continuously extrude plastic/filament without you having to hold down on the extrusion buttons. âĒ Simply double-click on the desired extrusion speed (FAST (3) or SLOW (4) ) and your 3Doodler will continuously extrude plastic/filament for up to ten minutes before stopping. âĒ To stop the continuous flow of plastic/filament, simply click on either the FAST (3) or SLOW (4) button on your 3Doodler. âĒ To temporarily pause the continuous flow of plastic/filament, hold down on either the FAST (3) or SLOW (4) button on your 3Doodler and then release to resume continuous flow.
- 17. UNLOAD THE PLASTIC âĒ Hold down BOTH the FAST (3) and SLOW (4) extrusion buttons at the same time. The LED indicator (5) will flash. âĒ When the plastic/filament stops moving in reverse you may gently take it out from the back of the pen . SPECIFICATIONS âĒ Output Power: 6W âĒ Output Voltage: 5V âĒ Input Voltage: 5V
- 18. USES There are many ways 3Doodler can be used. Some of them are: âĒ Basic 3D shapes and 3D models. âĒ Jewellery, pendants and hanging ornaments âĒ Decorative art and fridge magnets âĒ Personalization of everyday objects (iPhone cases, laptops, pens, etc.) âĒ A mini Eiffel Tower or a soccer pitch for your Lego men âĒ And much much moreâĶ
- 26. Related Artwork
- 33. ï More Affordable ï Mitigate Risk ï Quick Production ï Easy to Customize ï Tool-less ï Producing New Shapes And Structure Is Easy ï Diverse Material ï Better Quality ï Environmentally Friendly ï Accessibility
- 34. o It consumes a lot of plastic, which is not environmentally friendly and can be very expensive. o The plastic itself when it comes out of the 3Doodler is very hot (it acts like hot glue), this can cause substantial injuries especially among children. o The tip of the color gun tends to clog and it reaches a temperature of 270 degrees Celsius. o When changing colors, at the beginning of the change the colors are not pure. which requires unnecessary waste of plastic. o The product appears to be very fragile and breaks easily. o There is a learning curve with the 3Doodler, patience is required to use this product and to learn how to utilize the material to form the shapes imagined.
- 35. CONCLUSION âĒ 3Doodler can be used whether you are an artist, hobbyist or 3D printing fanatic. âĒ 3Doodler is not a toy. The recommended age for use of it is 12 or above.
- 36. REFERENCES âĒ http://the3doodler.com âĒ http://3dprintingsystems.com/products/3doodler/ âĒ http://www.telegraph.co.uk/technology/technology- video/9882624/3Doodler-explained-how-the-3D-printing- pen-works.html âĒ http://threedoodler.blogspot.in/2015/03/disadvantages.html âĒ https://www.allthat3d.com/3d-printing-benefits/