叠濒耻别尘颈虫で骋奥罢アプリケーションを动かす
- 1. 叠濒耻别尘颈虫で骋奥罢
- 2. 概要 ? GWTは、Googleが提供しているクライアント?サイド用のツールキット ? JavaからJavaScriptに変換して実行するため、クライアントサイドもJavaで書くこ とができる ? 今回は、これを使って簡単なアプリケーションを作成して、Bluemixにデプロイ してみます
- 4. 前提 ? Java SE 7 残念ながら、Bluemixのruntimeは、まだIBM JDK 7ベースなので、Java8で そのままコンパイルすると動きません。Java8を開発に使う場合用は、-target 1.7、-source 1.7を指定し、Java8で追加されたライブラリを使わないように注 意する必要があります。 ? Eclipse LUNA Eclipse IDE for Java EE Developersをインストールしておいてください。 ? Bluemix Bluemixへのアカウント登録と、Cloud Foundry CLIのインストールは終わっ ていることを前提とします。 ? GWT 紙面の都合上、GWTの詳細については解説しませんので、適宜GWTの解説 書を参照してください。
- 5. GWTプラグインのインストール ? Eclipseを起動して、プラグインをインストールする ? Help => Install New Software... ? ダイアログ右上のAdd...をクリック ? 以下のように入力
- 7. Hello World
- 8. プロジェクト作成 ? まずはHello Worldを確認します。 ? Eclipseで、File => New => otherを選びます ? 下のダイアログが表示されるので、Google => Web Application Projectを 選びます
- 9. プロジェクト作成 ? Nextを押して、以下のようにします(Use Google App Engineのチェックを外 してください)
- 10. プロジェクト設定 ? Finishを押すとプロジェクトが出来ます。 ? 既にサンプルが作成されているので、Project Explorerでhelloを右クリックし て、Run As => Web Application(GWT Super Dev Mode)を選びます。 ? しばらくすると、Development Modeビューに以下のようにURLが表示される ので、ダブルクリックするとデフォルトのブラウザが開きます。
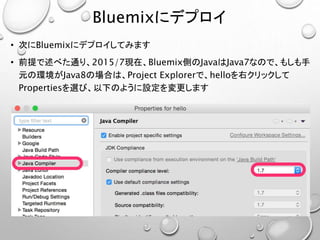
- 12. Bluemixにデプロイ ? 次にBluemixにデプロイしてみます ? 前提で述べた通り、2015/7現在、Bluemix側のJavaはJava7なので、もしも手 元の環境がJava8の場合は、Project Explorerで、helloを右クリックして Propertiesを選び、以下のように設定を変更します
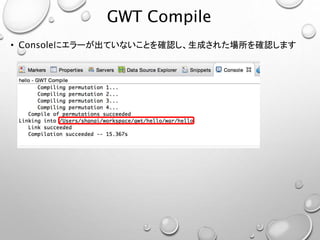
- 14. GWT compile ? GWT compileを実行します これによって、クライアント側のJavaのコードがJavaScriptに変換されます。 Project Explorerからhelloを右クリックしGoogle => GWT Compileを選び ます
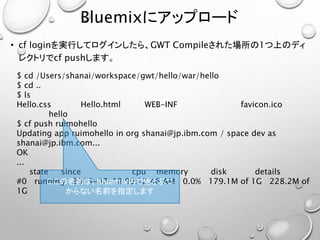
- 16. Bluemixにアップロード ? cf loginを実行してログインしたら、GWT Compileされた場所の1つ上のディ レクトリでcf pushします。 $ cd /Users/shanai/workspace/gwt/hello/war/hello $ cd .. $ ls Hello.css Hello.html WEB-INF favicon1.ico hello $ cf push ruimohello Updating app ruimohello in org shanai@jp.ibm.com / space dev as shanai@jp.ibm.com... OK ... state since cpu memory disk details #0 running 2015-07-18 09:12:46 AM 0.0% 179.1M of 1G 228.2M of 1G ここの名前は、Bluemix内で他とぶつ からない名前を指定します
- 18. 叠濒耻别尘颈虫で実行
- 19. 地図アプリケーションの作成
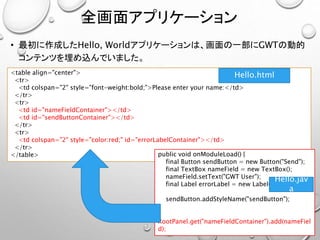
- 21. 全画面アプリケーション ? 最初に作成したHello, Worldアプリケーションは、画面の一部にGWTの動的 コンテンツを埋め込んでいました。 <table align="center"> <tr> <td colspan="2" style="font-weight:bold;">Please enter your name:</td> </tr> <tr> <td id="nameFieldContainer"></td> <td id="sendButtonContainer"></td> </tr> <tr> <td colspan="2" style="color:red;" id="errorLabelContainer"></td> </tr> </table> Hello.html public void onModuleLoad() { final Button sendButton = new Button("Send"); final TextBox nameField = new TextBox(); nameField.setText("GWT User"); final Label errorLabel = new Label(); sendButton.addStyleName("sendButton"); RootPanel.get("nameFieldContainer").add(nameFiel d); Hello.jav a
- 24. 画面の雛形 ? 画面の雛形を作成します。 ? src/mymap/ client/Mymap.javaの onModuleLoad()を右のよ うに変更します。 RootPanel DockLayoutPanel SplitLayoutPanel public void onModuleLoad() { DockLayoutPanel dlp = new DockLayoutPanel(Style.Unit.EM); dlp.addStyleName("rootLayout"); dlp.addNorth(new HTML("My application"), 2); SplitLayoutPanel slp = new SplitLayoutPanel(); slp.addEast(new HTML("施設リスト"), 120); slp.add(new HTML("<div id='map- canvas'></div>")); dlp.add(slp); RootPanel.get().add(dlp); } 施設リスト My application <div id='map- canvas'> </div>
- 25. 画面の雛形 ? 一方、war/Mymap.htmlの方は、<body>内のh1やtableタグを削除します。 <body> <!-- OPTIONAL: include this if you want history support --> <iframe src=/slideshow/bluemixgwt/50742406/"javascript:& id="__gwt_historyFrame" tabIndex='-1' style="position:absolute;width:0;height:0;border:0"></iframe> <!-- RECOMMENDED if your web app will not function without JavaScript enabled --> <noscript> <div style="width: 22em; position: absolute; left: 50%; margin-left: - 11em; color: red; background-color: white; border: 1px solid red; padding: 4px; font-family: sans-serif"> Your web browser must have JavaScript enabled in order for this application to display correctly. </div> </noscript> </body>
- 26. 画面の雛形 ? Mymap.cssの内容は、元あったものを全て削除して以下のようにします。 これで全画面アプリケーションになります html, body { height: 100%; margin: 0px !important; } .rootLayout { height: 100%; width: 100%; } GWT標準のcssが、bodyにマー ジンを設定してしまうので、これで 削除しないと、余計なスクロール バーが出てしまう
- 27. 画面の確認 ? ここまでできたら、Hello, Worldの時と同様に、Run As => Web Application (Gwt Super Dev Mode)で起動して画面を確認します。GWTの レイアウト?パネルのおかげでリサイズしても画面の構成が維持されることが確 認できます。 マウスで境界をドラッグ可能
- 28. コード変更時の注意 ? htmlやcssを修正した場合 ブラウザをリロードしてください。それでも表示されない場合は、1つ下の「クライ アント側のJavaコードを修正した時」の方法を実行 ? クライアント側のJavaコードを修正した時 ブラウザ右下のアイコンをクリック ? サーバ側のJavaコードを修正した時 サーバをリロードします
- 29. 地図を表示する ? それでは地図を表示してみましょう。 ? Google Map APIの使用には設定が必要です https://console.developers.google.com/ にアクセスして自分のGoogle アカウントでログインしてください。 ? 以下のようにして、Google Mapを有効にします。
- 30. API Keyを取得する ? 以下の手順でAPI Keyを取得します。 今回は開発用なのでリファラ制限を 指定していませんが、公開する際 にはリファラの設定をしてください。 無料で使用できるのは、現在1000 リクエスト/日までなので、キーが漏 れて他の人に使われてしまうとAPI が使えなくなってしまいます。 (Bluemix上にデプロイした際の URLを指定)
- 32. Google Mapの組込み <script type="text/javascript" language="javascript" src=/slideshow/bluemixgwt/50742406/"mymap/mymap.nocache.js"></script> <script type="text/javascript" src="https://maps.googleapis.com/maps/api/js?key=xxxxxxxxxxxxxxxx"> </script> <script type="text/javascript"> function initialize() { currentLoc(function(latitude, longitude) { showMap(latitude, longitude); }); } 続く... war/Mymap.htmlにscript タグを追加します。 ここにAPI Keyを指定します 初期化メソッド。currentLoc()で現 在地を取得して、showMap()で地 図を表示(どちらも次頁で解説)
- 33. Google Mapの組込み 前頁から続き function currentLoc(f) { if (navigator.geolocation) { navigator.geolocation.getCurrentPosition( function(pos) { f(pos.coords.latitude, pos.coords.longitude); }, function(e) { alert('現在地の取得が許可されていません。'); } ); } else { alert('現在地が取得できません。'); } } function showMap(latitude, longitude) { map = new google.maps.Map(document.getElementById('map-canvas'), { center: new google.maps.LatLng(latitude, longitude), zoom: 15 }); } </script> navigatorを使って現 在地を取得するメソッド 指定された場所 の地図を表示 これは、地図を表示す るdivタグのid属性 (Mymap.javaと対応)
- 34. GWT側からJavaScriptを呼び出し ? あとは、このinitialize()メソッドを呼び出せばokです。通常であればページの onloadなどをトリガーにすれば良いのですが、今回は、GWT側の初期化が終 わってから呼ばれるようにします。 ? GWTは、JavaをJavaScriptに変換する仕組みですが、生のJavaScriptとやりと りするための仕組みが用意されています。 ? Mymap.javaを以下のように変更します。 public class Mymap implements EntryPoint { native void initialize() /*-{ $wnd.initialize(); }-*/; public void onModuleLoad() { initialize(); DockLayoutPanel dlp = new DockLayoutPanel(Style.Unit.EM); dlp.addStyleName("rootLayout"); dlp.addNorth(new HTML("My application"), 2); このように特殊なタグで囲むと、JavaScriptを 直接書くことができる。$wndを指定すると、 Windowオブジェクトを取得できるので、これ でMymap.html側のinitialize()を呼び出せ る
- 35. 地図の表示 ? 最後に、Mymap.cssを変更して地図がパネル内にフィットするようにします。 #map-canvas, .rootLayout { height: 100%; width: 100%; } アプリケーションを実行すると、以下のよ うに現在地の地図が表示されます この状態のアプリケーションは、 mymap00.zipで公開されていま す
- 36. 施设情报の表示
- 37. 緯度、経度から施設情報を取得 ? 地図がクリックされたら、クリックされた場所をもとに緯度、経度を取得して、そ の周辺の施設情報を取得します。 ? これは、GoogleのPlaces APIで取得できます。Mapの時と同じように以下のよ うにしてAPIを有効化します。
- 38. 施設情報の取得 ? Places APIは以下のようなGETリクエストを送ることで、JSONで情報を取得で きます。 https://maps.googleapis.com/maps/api/place/nearbysearch/json? location=35.587981,139.663820&radius=500&key=xxxxxxxxxxx xxxxx ? locationパラメータが緯度、経度 ? radiusが半径 ? keyには、Mapの時と同じキーを指定 ? GETなので普通にブラウザでアクセスすれば、JSONが表示されます。
- 39. 施設情報の取得 { ... "results" : [ { "geometry" : { "location" : { "lat" : 35.5887497, "lng" : 139.674198 }, ... }, "icon" : "http://maps.gstatic.com/mapfiles/place_api/icons/geocode-71.png", "id" : "dc3f145c15f68b3fa5f0b3a41d59f819f3975dd1", "name" : "田園調布1丁目", "place_id" : "ChIJpUK62EH1GGARS_Z2KSq8N88", ... }, { "geometry" : { "location" : { "lat" : 35.587554, "lng" : 139.668713 } }, ... "icon" : "http://maps.gstatic.com/mapfiles/place_api/icons/generic_business-71.png", "id" : "10fbe9518e5a11444c7b7c358eb0dd270e0ab6ee", "name" : "多摩川浅間神社", 位置と施設のセットが複数返ってくる
- 40. SOP(Same Origin Policy) ? GWTで他のサーバにhttpリクエストを上げようとすると、SOPに引っかかります。 ? GWTはJavaで書いたコードをJavaScriptに変換して、ブラウザで動かす仕組み なので、ホストページ(今回なら、Mymap.html)を取得したサーバとは別の サーバにhttpリクエストすることは直接にはできません。 ? これを回避する方法は幾つかあるのですが、ここではもっとも無難と思われる、 自分のサーバを経由する方法を使います。
- 44. サーバキーを取得する メモする
- 45. キーを管理するクラスを作る ? 今のようにキーをhtmlファイルなどに埋め込んでいると、キーを変更したい時 に面倒ですし、うっかりキーが漏れてしまう危険性もあります。 ? 今回はBluemix(Cloud Foundry)を使うこともあるので、キーは環境変数でア プリケーションに渡すようにします。 ? そのためにキーを管理するクラスを作成しておきます。
- 46. キーを管理するクラス package mymap.client; import java.io.Serializable; import static java.util.Objects.requireNonNull; public class Settings implements Serializable { private static final long serialVersionUID = -6808664382199552658L; String apiKey; String serverApiKey; Settings() { apiKey = ""; serverApiKey = ""; } public Settings(String apiKey, String serverApiKey) { this.apiKey = requireNonNull(apiKey, "apiKey"); this.serverApiKey = requireNonNull(serverApiKey, "serverApiKey"); } public String getApiKey() { return this.apiKey; } public String getServerApiKey() { return this.serverApiKey; } } サーバ、クライアント間でやりとり できるように直列化可能とする GWTの直列化の制限により、デフォルトコンストラ クタを用意(アプリケーションからは使えないように パッケージプライベートに)。フィールドも残念なが らGWTの制限でfinal宣言できないので注意 nullでないことが保証 されているイミュータ ブルクラス
- 47. Settingsのファクトリ package mymap.server; import static java.util.Objects.requireNonNull; import mymap.client.Settings; public class SettingsFactory { static final SettingsFactory THE_INSTANCE = new SettingsFactory(); final Settings settings; public SettingsFactory() { settings = new Settings (requireNonNull(System.getenv("apiKey"), "Set Google api key by setting environment variable 'apiKey'"), requireNonNull(System.getenv("serverApiKey"), "Set Gooogle api server key by setting environment variable 'serverApiKey'")); } public Settings getSettings() { return settings; } public static SettingsFactory getInstance() { return THE_INSTANCE; } } Settingsのファクトリクラス 環境変数 apiKey/serverApiKeyから 取得
- 48. GWT RPCを作成 ? 今回は開発の手間を減らすため、クライアント?サーバ間の通信に、GWT RPC を使います。 ? JSONのパースがどこかで必要ですが、残念ながらJavaは標準ではJSONの パーサが無く、ライブラリの追加など面倒なので、今回はサーバからはJSONを 文字列でそのまま返して、クライアント側でパースすることにします。 ? まずサーバとのインターフェイスを作成します。 package mymap.client; import com.google.gwt.user.client.rpc.RemoteService; import com.google.gwt.user.client.rpc.RemoteServiceRelativePath; @RemoteServiceRelativePath("places") public interface PlacesService extends RemoteService { String places(double latitude, double longitude); } 緯度、経度を受け取って、結 果をJSON文字列で返す
- 50. Asyncインターフェイスの作成 そのままFinishで作成 package mymap.client; import com.google.gwt.user.client.rpc.AsyncCallback; public interface PlacesServiceAsync { void places(double latitude, double longitude, AsyncCallback<String> callback); } クライアント側は、このインターフェイ スで呼び出すことになります
- 51. サーバ間通信 ? サーバ間通信はJava標準のHttpURLConnectionを使いますが、資源管理を 楽にするためヘルパクラスを作っておきます。 package mymap.server; import java.net.HttpURLConnection; import java.net.URI; public abstract class WithUrlConnection<T> { public T process(String url) throws Exception { URI uri = new URI(url); HttpURLConnection conn = (HttpURLConnection)uri.toURL().openConnection(); try { return perform(conn); } finally { conn.disconnect(); } } abstract protected T perform(HttpURLConnection conn) throws Exception; } 典型的なテンプレート?メソッドパ ターンで資源管理を行うだけ
- 52. Places APIの呼び出し package mymap.server; import java.io.ByteArrayOutputStream; import java.io.IOException; import java.io.InputStream; import java.io.OutputStream; import java.net.HttpURLConnection; import mymap.client.PlacesService; import mymap.client.Settings; import com.google.gwt.user.server.rpc.RemoteServiceServlet; @SuppressWarnings("serial") public class PlacesServiceImpl extends RemoteServiceServlet implements PlacesService { static final Settings settings = SettingsFactory.getInstance().getSettings(); @Override public String places(double latitude, double longitude) { final String url = "https://maps.googleapis.com/maps/api/place/nearbysearch/json?location=" + latitude + "," + longitude + "&radius=200&key=" + settings.getServerApiKey(); 続く PlacesServiceを実装 Settingsを取得 キーを埋め込んだPlaces APIのURL
- 53. Places APIの呼び出し try { return new WithUrlConnection<String>() { @Override protected String perform(HttpURLConnection conn) throws Exception { ByteArrayOutputStream baos = new ByteArrayOutputStream(); copy(conn.getInputStream(), baos); return new String(baos.toByteArray(), "utf-8"); } }.process(url); } catch (Exception e) { e.printStackTrace(); return null; } } void copy(InputStream is, OutputStream os) throws IOException { byte[] buf = new byte[4096]; int readLen; while ((readLen = is.read(buf)) != -1) { os.write(buf, 0, readLen); } } } さきほどのヘルパクラスでPlaces APIをリクエストし、レスポンスを utf-8文字列として返す本番ではエラーレスポンス を返すなりしてください
- 54. Mapのクリックを検知する ? サーバ側ができたので、今度はクライアント側を作成します。だいたい以下のよ うな流れになります。 ? まずMapのクリックを検知できるようにします。 ? クリックされたら、先ほど作ったPlacesServiceを使って施設情報を取得します。 ? 取得されたら施設情報をクライアントにポップアップします。
- 55. ロギング設定を追加しておく ? そろそろプログラムが複雑になってきたので、クライアント側にログを追加して おきます。src/mymap/Mymap.gwt.xmlを変更します。 <?xml version="1.0" encoding="UTF-8"?> <!-- When updating your version of GWT, you should also update this DTD reference, so that your app can take advantage of the latest GWT module capabilities. --> <!DOCTYPE module PUBLIC "-//Google Inc.//DTD Google Web Toolkit 2.6.0//EN" "http://google-web-toolkit.googlecode.com/svn/tags/2.6.0/distro-source/core/src/gwt-module.dtd"> <module rename-to='mymap'> <!-- Inherit the core Web Toolkit stuff. --> <inherits name='com.google.gwt.user.User'/> <inherits name="com.google.gwt.logging.Logging"/> ... <!-- allow Super Dev Mode --> <add-linker name="xsiframe"/> <set-property name='gwt.logging.popupHandler' value='DISABLED'/> </module> 追加 これを指定しないと、アプリケーション 画面にオーバーレイでロギングが表 示されて、わずらわしい
- 56. クリックの検知 package mymap.client; import java.util.logging.Level; import java.util.logging.Logger; ... public class Mymap implements EntryPoint { Logger logger = Logger.getLogger("MymapLogger"); private final PlacesServiceAsync placesService = GWT .create(PlacesService.class); native void initialize() /*-{ var that = this; $wnd.onMapClicked = function(latitude, longitude) { that.@mymap.client.Mymap::onMapClicked(DD)(latitude, longitude); }; $wnd.initialize(); }-*/; public void onModuleLoad() { logger.log(Level.INFO, "Application start"); initialize(); ... } public void onMapClicked(double latitude, double longitude) { logger.log(Level.INFO, "Map clicked on (" + latitude + ", " + longitude + ")"); } } ロギングの import ロガー生成 PlacesのRPCは、この ようにして生成する html側に、onMapClicked 変数を用意して、そこに、下 のonMapClicked関数を代 入しておく(詳細は後述)。
- 57. クリックの検知 ? html側を変更して、Mapのクリックを検出できるようにする function showMap(latitude, longitude) { map = new google.maps.Map(document.getElementById('map-canvas'), { center: new google.maps.LatLng(latitude, longitude), zoom: 15 }); google.maps.event.addListener(map, 'click', function(e) { onMapClicked(e.latLng.lat(), e.latLng.lng()); }); } native void initialize() /*-{ var that = this; $wnd.onMapClicked = function(latitude, longitude) { that.@mymap.client.Mymap::onMapClicked(DD)(latitude, longitude); }; $wnd.initialize(); }-*/; addListenerでクリッ クのリスナを登録 onMapClickedは、 GWT側で登録したもの JavaScriptから、Java側を呼びたい時は、@完全修飾クラス名::メソッド名(引数のシ グニチャ)(引数)を指定する。このシグニチャは、バイトコードでの指定方法と同じ。詳 細は以下の4.3.2, 4.3.3を参照 (http://docs.oracle.com/javase/specs/jvms/se7/html/jvms-4.html)
- 60. Map APIのキーも埋め込まないように ? Mymap.htmlは、Mymap.jspにして、key部分はSettingsから取るようにする。 Mymap.htmlをMymap.jspにコピーして以下を変更する <%@ page import="mymap.server.SettingsFactory"%> <!doctype html> <script type="text/javascript" language="javascript" src=/slideshow/bluemixgwt/50742406/"mymap/mymap.nocache.js"></script> <script type="text/javascript" src="https://maps.googleapis.com/maps/api/js?key=<%= SettingsFactory.getInstance().getSettings().getApiKey() %>"> </script> ? web.xmlのwelcomeページを変更する <welcome-file-list> <welcome-file>Mymap.jsp</welcome-file> </welcome-file-list> 実際は1行で
- 64. Places APIを呼び出す ? まず施設のモデルクラスを作成します package mymap.client; import static java.util.Objects.requireNonNull; import com.google.gwt.json.client.JSONObject; import java.io.Serializable; public class Place implements Serializable { private static final long serialVersionUID = 286987229306285007L; private String name; private double latitude; private double longitude; Place() { name = ""; latitude = 0; longitude = 0; } このあたりのGWT特有の注意は、 Settingsの時と同じ
- 65. Places APIを呼び出す 続き public Place(String name, double latitude, double longitude) { this.name = requireNonNull(name); this.latitude = latitude; this.longitude = longitude; } public String getName() {return name;} public double getLatitude() {return latitude;} public double getLongitude() {return longitude;} public static Place parse(JSONObject placeJson) { JSONObject geo = placeJson.get("geometry").isObject(); JSONObject loc = geo.get("location").isObject(); return new Place (placeJson.get("name").isString().stringValue(), loc.get("lat").isNumber().doubleValue(), loc.get("lng").isNumber().doubleValue()); } } イミュータブルクラス GWTが提供しているJSON パーサで施設名と位置を取 り出す
- 66. Places APIの呼び出し public void onMapClicked(double latitude, double longitude) { logger.log(Level.INFO, "Map clicked on (" + latitude + ", " + longitude + ")"); placesService.places (latitude, longitude, new AsyncCallback<String>() { public void onFailure(Throwable t) { logger.log(Level.SEVERE, "Cannot get places.", t); } public void onSuccess(String json) { List<Place> places = getPlaces(json); logger.log(Level.INFO, "Got places. count = " + places.size()); } }); } List<Place> getPlaces(String placesApiJsonResponse) { JSONObject jo = JSONParser.parseStrict(placesApiJsonResponse).isObject(); JSONArray results = jo.get("results").isArray(); List<Place> places = new ArrayList<>(); for (int i = 0; i < results.size(); ++i) { places.add(Place.parse(results.get(i).isObject())); } return places; } 正常時と異常時の 処理を実装する JavaScriptからのRPC呼び出しは 非同期に行うので、このように コールバックを渡す Places APIが返した JSONの中からresults の項目をパース
- 69. 施设をポップアップする
- 70. 施設のポップアップ ? これまでは、こういうケースはダイアログで施設の一覧を表示するのが一般的 だったように思いますが、今はポップアップで表示するのがはやりのようなので、 今回もポップアップします。ポップアップは、ポップアップ外の領域のクリックで 消すことができます。 ? GWTにはPopupPanelというパーツが用意されているので、ポップアップの生 成自体は簡単です。ただJava 7なので骋鲍滨の构筑コードが少々长いです...
- 72. ポップアップの生成 ? さきほどの、Places API呼び出しのonSuccess()側にポップアップ生成処理を 実装します。 public void onSuccess(String json) { List<Place> places = getPlaces(json); final PopupPanel pp = new PopupPanel(true); final Button closeButton = new Button("閉じる"); closeButton.addStyleName("closeButton"); DataGrid<Place> ct = new DataGrid<Place>(); TextColumn<Place> nameColumn = new TextColumn<Place>() { @Override public String getValue(Place p) { return p.getName(); } }; ct.addStyleName("placesDataGrid"); ct.addColumn(nameColumn, "名称"); ct.setRowData(0, places); 続く DataGridは、各行の表示するモデル クラスを型パラメータで指定する DataGridの列の定義。モデルクラスの何 を表示するかを実装(この場合は名称) 列のヘッダ DataGridにデータを設定。第一引数は、 設定を開始する行位置(0なので先頭)
- 73. ポップアップの生成 續き final SingleSelectionModel<Place> selectionModel = new SingleSelectionModel<Place>(); ct.setSelectionModel(selectionModel); selectionModel.addSelectionChangeHandler(new SelectionChangeEvent.Handler() { public void onSelectionChange(SelectionChangeEvent event) { Place selected = selectionModel.getSelectedObject(); if (selected != null) { addMyPlace(selected); pp.hide(); } } }); DockLayoutPanel dl = new DockLayoutPanel(Unit.EM); dl.addNorth(closeButton, 2); dl.add(ct); pp.setWidget(dl); closeButton.addClickHandler(new ClickHandler() { public void onClick(ClickEvent event) { pp.hide(); } }); pp.setPopupPosition(30, 30); pp.show(); logger.log(Level.INFO, "onMapClicked ended."); } void addMyPlace(Place newPlace) { // 施設の登録 } DataGridの行をクリックした時の処理を実装 (addMyPlace()で施設を登録する(後述)) ポップアップは、ポップアップ外のクリックでも 消せるが、ボタンも配置しておく このあと実装する
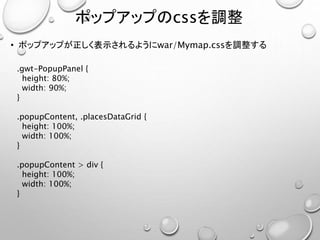
- 74. ポップアップのcssを調整 ? ポップアップが正しく表示されるようにwar/Mymap.cssを調整する .gwt-PopupPanel { height: 80%; width: 90%; } .popupContent, .placesDataGrid { height: 100%; width: 100%; } .popupContent > div { height: 100%; width: 100%; }
- 76. 选んだ施设をサーバに登録する
- 77. 施設登録用のRPCを作成 ? PlacesServiceにAPIを追加する。 public interface PlacesService extends RemoteService { String places(double latitude, double longitude); void addMyPlace(Place newPlace); } すると、Async側と不整 合があるというエラーに なるので、電球をクリック してAsync側を生成する
- 79. 施設登録用のRPCを作成 ? サーバ側は、とりあえずメモリに保持するだけの実装にします(将来はデータ ベースに保管) public class PlacesServiceImpl extends RemoteServiceServlet implements PlacesService { static final Settings settings = SettingsFactory.getInstance().getSettings(); static final ArrayList<Place> places = new ArrayList<>(); ... @Override public void addMyPlace(Place newPlace) { synchronized (places) { places.add(newPlace); } } } とりあえずメモリに保 持する仮実装
- 80. RPCを呼び出す public class Mymap implements EntryPoint { ... void addMyPlace(Place newPlace) { placesService.addMyPlace (newPlace, new AsyncCallback<Void>() { public void onFailure(Throwable t) { logger.log(Level.SEVERE, "Cannot add my place.", t); } public void onSuccess(Void v) { updateEastContent(); } }); } void updateEastContent() { // サーバから登録施設を取り出して表示する。 logger.log(Level.INFO, "Update place list."); } } addMyPlaceでRPCを実行 ここで登録施設を表示する
- 82. 登録施设の表示
- 83. 登録施设の表示 ? 登録施设の表示は、以下のようになります。 ? 現在地図に表示されている緯度、経度の情報から、その中に含まれる施設のみを 選んで取り出します。 ? これを画面右側の領域に一覧として表示します。 ? 現在のGWTのDataGridは、0件の場合に更新中のアニメーションが表示されたま まになってしまうバグがあるようなので、0件の場合はDataGridのかわりに、「結果 が無い」というテキストを表示するようにします。
- 84. 地図領域の取得 ? 地図領域の取得のために、Mymap.jspの中で、mapにbounds_changedイ ベントのリスナを登録します <script type="text/javascript"> var currentMapBounds = [0, 0, 0, 0]; function initialize() { ... google.maps.event.addListener(map, 'click', function(e) { onMapClicked(e.latLng.lat(), e.latLng.lng()); }); google.maps.event.addListener(map, 'bounds_changed', function() { currentMapBounds[0] = map.getBounds().getNorthEast().lat(); currentMapBounds[1] = map.getBounds().getNorthEast().lng(); currentMapBounds[2] = map.getBounds().getSouthWest().lat(); currentMapBounds[3] = map.getBounds().getSouthWest().lng(); }); } </script> これで、Map領域が変更された時に自動的に、 currentMapBoundsが更新されます
- 85. 領域から登録施設取得RPCの作成 ? これまで同様に、RPCにAPIを追加します。 public interface PlacesService extends RemoteService { String places(double latitude, double longitude); List<Place> myPlaces(double latitude0, double longitude0, double latitude1, double longitude1); void addMyPlace(Place newPlace); } public class PlacesServiceImpl extends RemoteServiceServlet implements PlacesService { ... @Override public List<Place> myPlaces(double latitude0, double longitude0, double latitude1, double longitude1) { synchronized (places) { return new ArrayList<>(places); } } } 今回もとりあえず現在メモリに保持してい る登録施設を全て返す簡易実装
- 86. 施設一覧領域を作成する ? Mymap.javaに施設一覧領域を作成します。 public class Mymap implements EntryPoint { ... DockLayoutPanel eastContentPanel = new DockLayoutPanel(Unit.EM) { Widget primaryChild; @Override public void add(Widget widget) { if (primaryChild != null) { remove(primaryChild); primaryChild = null; } super.add(widget); this.primaryChild = widget; } }; Button refreshEastContentButton = new Button("更新"); ... public void onModuleLoad() { logger.log(Level.INFO, "Application start"); refreshEastContentButton.addClickHandler(new ClickHandler() { public void onClick(ClickEvent event) { updateEastContent(); } }); eastContentPanel.addNorth(refreshEastContentButton, 2); initialize(); ... } } 0件の時にDataGridとテキスト表示を切り 替えたいのでDockLayoutPanelの子ウィ ジェットを置き換えたいが、そういうメソッド が無いので継承して拡張する 登録施設一覧の更新処理 をボタンに登録
- 87. 施設一覧領域を作成する public void onModuleLoad() { ... initialize(); DockLayoutPanel dlp = new DockLayoutPanel(Style.Unit.EM); dlp.addStyleName("rootLayout"); dlp.addNorth(new HTML("My application"), 2); SplitLayoutPanel slp = new SplitLayoutPanel(); slp.addEast(mainEastContent(), 120); slp.add(new HTML("<div id='map-canvas'></div>")); ... } ... Widget mainEastContent() { updateEastContent(); return eastContentPanel; } native double[] getCurrentMapBounds() /*-{ return $wnd.currentMapBounds; }-*/; } これまで固定文字列を入れてい た施設一覧を、ここで作成 更新処理をしてから、施設一覧 のパネルを返す Mymap.jsp側の currentMapBoundsを取得
- 88. 施設一覧領域を作成する ? 施設一覧の更新処理です。 void updateEastContent() { logger.log(Level.INFO, "Update place list."); double[] cmb = getCurrentMapBounds(); if (cmb == null) return; placesService.myPlaces (cmb[0], cmb[1], cmb[2], cmb[3], new AsyncCallback<List<Place>>() { public void onFailure(Throwable t) { logger.log(Level.SEVERE, "Cannot get my places.", t); } 続く 現在の地図領域で登録 施設を検索
- 89. 施設一覧領域を作成する public void onSuccess(List<Place> places) { if (places.isEmpty()) { eastContentPanel.add(new HTML("レコード無し")); } else { DataGrid<Place> myPlaces = new DataGrid<Place>(); TextColumn<Place> nameColumn = new TextColumn<Place>() { @Override public String getValue(Place p) { return p.getName(); } }; myPlaces.addColumn(nameColumn, "名称"); myPlaces.setRowData(0, places); final SingleSelectionModel<Place> selectionModel = new SingleSelectionModel<Place>(); myPlaces.setSelectionModel(selectionModel); selectionModel.addSelectionChangeHandler(new SelectionChangeEvent.Handler() { public void onSelectionChange(SelectionChangeEvent event) { Place selected = selectionModel.getSelectedObject(); // TODO: 施設がクリックされた時の処理 } }); eastContentPanel.add(myPlaces); } } }); } 結果0件なら「レコード 無し」表示 このあたりのDataGridの扱 いはポップアップの時と同様 登録施設がクリックされた時 の処理は今後ここに実装
- 92. ピンを立てる ? 登録施設一覧から施設がクリックされたら、地図上にピンを立ててみましょう。 まずMymap.jspにピンを立てるメソッドを用意します。 var map; var currentPin = null; ... function pinPlace(name, latitude, longitude) { if (currentPin !== null) { currentPin.setMap(null); currentPin = null; } var latlng = new google.maps.LatLng(latitude, longitude); currentPin = new google.maps.Marker({ position: latlng, map: map, title: name }); map.setCenter(latlng); } function initialize() { 後でピンを消す時にはピンのインスタ ンスが必要になるので保存しておく 既にピンが立っていれば消す 指定位置にピンを立てる
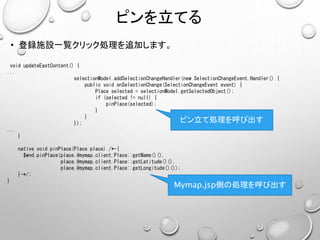
- 93. ピンを立てる ? 登録施設一覧クリック処理を追加します。 void updateEastContent() { ... selectionModel.addSelectionChangeHandler(new SelectionChangeEvent.Handler() { public void onSelectionChange(SelectionChangeEvent event) { Place selected = selectionModel.getSelectedObject(); if (selected != null) { pinPlace(selected); } } }); ... } native void pinPlace(Place place) /*-{ $wnd.pinPlace(place.@mymap.client.Place::getName()(), place.@mymap.client.Place::getLatitude()(), place.@mymap.client.Place::getLongitude()()); }-*/; } ピン立て処理を呼び出す Mymap.jsp側の処理を呼び出す
- 95. 现在地にもピンを立てる
- 96. 现在地にもピンを立てる ? 現在地にもピンが無いと分かりにくですね。現在地には別の色のピンを立てま しょう。これはMymap.jsp側の変更だけで実現できます。 var currentLocPin = null; ... function pinCurrentLoc() { if (currentLocPin != null) { currentLocPin.setMap(null); currentLocPin = null; } currentLoc(pinCurrentLocAt); } function pinCurrentLocAt(latitude, longitude) { var latlng = new google.maps.LatLng(latitude, longitude); currentLocPin = new google.maps.Marker({ position: latlng, map: map, title: '現', icon: 'http://chart.apis.google.com/chart?chst=d_map_pin_letter&chld=現 |00FFFF|000000' }); } function showMap(latitude, longitude) { ... pinCurrentLocAt(latitude, longitude); setInterval(pinCurrentLoc, 5000); } 5秒に1回、現在地のピンを更新 少し違うピンを立てます(後述) 現在地ピンも、後で消せるように保存
- 97. 違う色のピン ? ピンには引数でビットマップを渡せるのですが、ビットマップを手で作るのは面 倒です。GoogleのDynamic Iconというサービスを使うと、引数を渡せば作っ てくれます。 https://developers.google.com/chart/image/docs/gallery/dynamic _icons ? 今回は次のように指定しています http://chart.apis.google.com/chart?chst=d_map_pin_letter&chld= 現|00FFFF|000000 「現」がピン内の文字、その後が背景色(シアン)、その後が文字色(黒)です
- 99. Bluemixで確認 ? 最後にBluemixで確認します。 ? 方法はHello Worldの時と全く同じです。EclipseでGWT Compileをしてから、 cf pushでuploadしてください。 ? ただし既に述べた通りAPI keyを環境変数で設定する必要があります。 ダッシュボードで、アイコン部分をクリッ クします(今回はruimomapという名 前でcf pushしました)
- 100. 环境変数の设定
- 102. サンプル
- 103. サンプル ? サンプルは以下の場所で取得できます http://www.ruimo.com/bluemix/samples/gwt/ ? mymap00.zip 地図を表示する(war/Mymap.html内のTODOの場所に、自分のAPI Keyを指定 してください) ? mymap01.zip 地図のクリックで、ブラウザのコンソールに位置がログされる。自分のAPI Keyを、 Eclipseの実行構成に設定する必要があります。詳細は本文を参照。 ? mymap02.zip 施設一覧のポップアップを実装。 ? mymap03.zip 施設を登録できるように。 ? mymap04.zip ピンを立てるように。








![Places APIの呼び出し
try {
return new WithUrlConnection<String>() {
@Override
protected String perform(HttpURLConnection conn) throws Exception {
ByteArrayOutputStream baos = new ByteArrayOutputStream();
copy(conn.getInputStream(), baos);
return new String(baos.toByteArray(), "utf-8");
}
}.process(url);
} catch (Exception e) {
e.printStackTrace();
return null;
}
}
void copy(InputStream is, OutputStream os) throws IOException {
byte[] buf = new byte[4096];
int readLen;
while ((readLen = is.read(buf)) != -1) {
os.write(buf, 0, readLen);
}
}
}
さきほどのヘルパクラスでPlaces
APIをリクエストし、レスポンスを
utf-8文字列として返す本番ではエラーレスポンス
を返すなりしてください](https://image.slidesharecdn.com/gwt-bluemix1-150721042631-lva1-app6891/85/Bluemix-GWT-53-320.jpg)




![地図領域の取得
? 地図領域の取得のために、Mymap.jspの中で、mapにbounds_changedイ
ベントのリスナを登録します
<script type="text/javascript">
var currentMapBounds = [0, 0, 0, 0];
function initialize() {
...
google.maps.event.addListener(map, 'click', function(e) {
onMapClicked(e.latLng.lat(), e.latLng.lng());
});
google.maps.event.addListener(map, 'bounds_changed', function() {
currentMapBounds[0] = map.getBounds().getNorthEast().lat();
currentMapBounds[1] = map.getBounds().getNorthEast().lng();
currentMapBounds[2] = map.getBounds().getSouthWest().lat();
currentMapBounds[3] = map.getBounds().getSouthWest().lng();
});
}
</script>
これで、Map領域が変更された時に自動的に、
currentMapBoundsが更新されます](https://image.slidesharecdn.com/gwt-bluemix1-150721042631-lva1-app6891/85/Bluemix-GWT-84-320.jpg)


![施設一覧領域を作成する
public void onModuleLoad() {
...
initialize();
DockLayoutPanel dlp = new DockLayoutPanel(Style.Unit.EM);
dlp.addStyleName("rootLayout");
dlp.addNorth(new HTML("My application"), 2);
SplitLayoutPanel slp = new SplitLayoutPanel();
slp.addEast(mainEastContent(), 120);
slp.add(new HTML("<div id='map-canvas'></div>"));
...
}
...
Widget mainEastContent() {
updateEastContent();
return eastContentPanel;
}
native double[] getCurrentMapBounds() /*-{
return $wnd.currentMapBounds;
}-*/;
}
これまで固定文字列を入れてい
た施設一覧を、ここで作成
更新処理をしてから、施設一覧
のパネルを返す
Mymap.jsp側の
currentMapBoundsを取得](https://image.slidesharecdn.com/gwt-bluemix1-150721042631-lva1-app6891/85/Bluemix-GWT-87-320.jpg)
![施設一覧領域を作成する
? 施設一覧の更新処理です。
void updateEastContent() {
logger.log(Level.INFO, "Update place list.");
double[] cmb = getCurrentMapBounds();
if (cmb == null) return;
placesService.myPlaces
(cmb[0], cmb[1], cmb[2], cmb[3],
new AsyncCallback<List<Place>>() {
public void onFailure(Throwable t) {
logger.log(Level.SEVERE, "Cannot get my places.", t);
}
続く
現在の地図領域で登録
施設を検索](https://image.slidesharecdn.com/gwt-bluemix1-150721042631-lva1-app6891/85/Bluemix-GWT-88-320.jpg)


