Booting an image as a forensically sound vm in virtual box
?
5 likes?8,060 views

This document provides a 3-step process for booting a forensic image as a forensically-sound VM in VirtualBox: 1. Mount the suspect's image using FTK Imager and note the physical disk number. 2. Use VBoxManage to create a VMDK file pointing to the physical disk, create a VM using this VMDK, take a snapshot, and modify the VM to use the snapshot instead of the VMDK. 3. Add the Nordahl-Hagen boot CD to blank passwords from the snapshot, allowing dynamic analysis in the VM.


Booting an image as a forensically sound vm in virtual box
- 1. Booting an image as a forensically-sound VM in VirtualBox Brent Muir
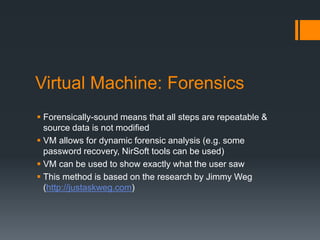
- 2. Virtual Machine: Forensics ? Forensically-sound means that all steps are repeatable & source data is not modified ? VM allows for dynamic forensic analysis (e.g. some password recovery, NirSoft tools can be used) ? VM can be used to show exactly what the user saw ? This method is based on the research by Jimmy Weg (http://justaskweg.com)
- 3. VirtualBox ? All Open Source / freeware tools: ? VirtualBox (v 4.2x) ? FTK Imager (v 3.x) ? Nordahl-Hagen NT Password Reset Boot CD (for blanking SAM passwords) ? OpenGates (for hardware/driver issues)
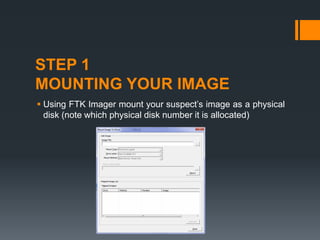
- 4. STEP 1 MOUNTING YOUR IMAGE ? Using FTK Imager mount your suspectˇŻs image as a physical disk (note which physical disk number it is allocated)
- 5. STEP 2 CREATE & MODIFY A VM ? To use VirtualBox you must create a blank .VMDK ? Open CMD and navigate to the VirtualBox program folder (C:Program FilesOracleVirtualBox) ? Use the following command to create a VMDK file pointing to the physical disk of the mounted HD image: VBoxManage internalcommands createrawvmdk -filename ˇ°path_to_wherever_you_want_to_store.vmdk" -rawdisk .PhysicalDriveX X ¨C being the physical drive number of the mounted image
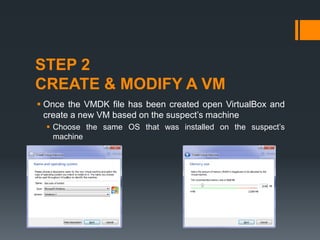
- 6. STEP 2 CREATE & MODIFY A VM ? Once the VMDK file has been created open VirtualBox and create a new VM based on the suspectˇŻs machine ? Choose the same OS that was installed on the suspectˇŻs machine
- 7. STEP 2 CREATE & MODIFY A VM ? Point to the newly created VMDK as the virtual HD
- 8. STEP 2 CREATE & MODIFY A VM ? Remove the NIC
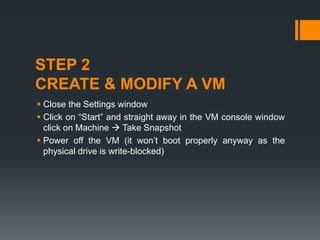
- 9. STEP 2 CREATE & MODIFY A VM ? Close the Settings window ? Click on ˇ°Startˇ± and straight away in the VM console window click on Machine ? Take Snapshot ? Power off the VM (it wonˇŻt boot properly anyway as the physical drive is write-blocked)
- 10. STEP 2 CREATE & MODIFY A VM ? Go back into settings and highlight the Storage options ? Remove the newly created VMDK file as the option and add the snapshot VMDK file instead (C:Usersuser_accountVirtualBox VMs...Snapshots)
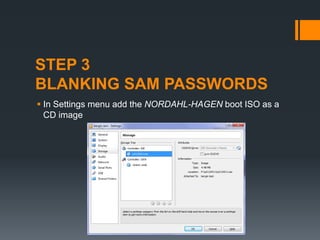
- 11. STEP 3 BLANKING SAM PASSWORDS ? In Settings menu add the NORDAHL-HAGEN boot ISO as a CD image
- 12. STEP 3 BLANKING SAM PASSWORDS ? Start the VM ? Choose to boot from CD ? Follow the command prompts to blank the desired password/s and reboot the VM
- 13. STEP 4 BOOTING YOUR VM ? You should now be able to boot the image as a VM ? Ensure that you still have the image mounted under FTK Imager as the same Physical Disk number ? Essentially what you have done is created a VMDK reference file which points to the Physical Disk and blanked the SAM passwords from the HD (or in this case the snapshot of the system OS)
- 14. OpenGates ? Windows OSes often complain about hardware and system changes in relation to licensing/activation ? can result in an inaccessible VM ? OpenGates allows you to: ? Patch the registry in order to enable legacy IDE drivers ? Remove drivers that could conflict with the new hardware ? Determine used HAL ? If you encounter this issue start VM with OpenGates ISO as first boot option and follow the prompts
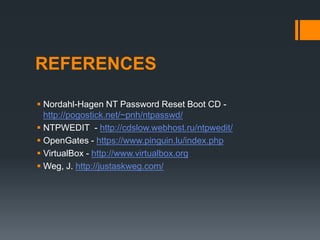
- 15. REFERENCES ? Nordahl-Hagen NT Password Reset Boot CD - http://pogostick.net/~pnh/ntpasswd/ ? NTPWEDIT - http://cdslow.webhost.ru/ntpwedit/ ? OpenGates - https://www.pinguin.lu/index.php ? VirtualBox - http://www.virtualbox.org ? Weg, J. http://justaskweg.com/