Byod(bring your own databse)
- 1. BYOD(Bring your own database)
- 2. Session Overview What is BYOD? Objective Steps for setting up BYOD Demo
- 3. What is BYOD?  The BYOD feature was released in Microsoft Dynamics 365 with platform update 2 (August 2016)  BYOD feature lets administrators configure their own database, and then export one or more data entities that are available in Finance and Operations into it.
- 4. What is BYOD?  The BYOD feature allows you to push data into a database that you manage.  This is done with the use of data entities. This means you can use existing entities or build your own entities to structure the data how you need for your external database.
- 5. Objective  You have data in D365 running in the cloud but you still have other applications that you run on premise or somewhere else.  So you need to get data from D365 into a common environment that you could then report on or use in those other applications.  Data analysis using external reporting tools including (but not limited to) Power BI.
- 6. Objective  When you must export data from Finance and Operations into your own data warehouse.  Those tools require T-SQL access to data.  Use the rich scheduling capabilities of the Finance and Operations batch framework to enable periodic exports.
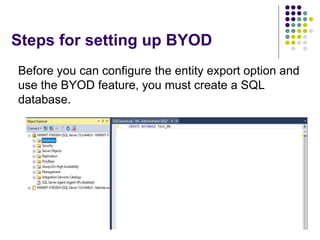
- 7. Steps for setting up BYOD Before you can configure the entity export option and use the BYOD feature, you must create a SQL database.
- 8. Steps for setting up BYOD Create SQL user account for sign-in to the database.
- 9. Steps for setting up BYOD Configure entity export option and validate connection string.
- 10. Steps for setting up BYOD Publish the required entity schema to database.
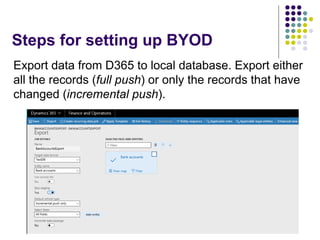
- 11. Steps for setting up BYOD Export data from D365 to local database. Export either all the records (full push) or only the records that have changed (incremental push).
- 12. Steps for setting up BYOD Data have been exported from data entity to staging table of local database.
- 13. References  https://docs.microsoft.com/en- us/dynamics365/unified-operations/dev- itpro/analytics/export-entities-to-your-own-database  https://community.dynamics.com/ax/b/organicaxco m/archive/2017/08/11/setting-up-a-byod-database  https://organicax.com/2017/08/11/setting-up-a- byod-database/
Editor's Notes
- #10: Connection string format: Data Source=<logical server name>,1433; Initial Catalog=<your DB name>; Integrated Security=False; User ID=<SQL user ID>; Password=<password>

