Create a new questionnaire step by step
ŌĆó
0 likesŌĆó189 views

1. To create a new questionnaire in Moodle, click "Turn editing on" and select "Add an activity or resource" then "Questionnaire" from the menu. 2. On the setup page, enter the name, description, timing options, response options, and content and submission options. 3. Click "Save and Display" to open the questionnaire page where you can add questions by selecting the question type from the dropdown and clicking "Add selected question type". Common question types include checkboxes, dropdowns, essays, labels, numbers, radios, ratings, and yes/no.


Create a new questionnaire step by step
- 1. Create a new Questionnaire step by step 1.First of all On the course home page, click Turn editing on, and you will have a red botton like this: Click Add an activity or resource, and select Questionnaire from the menu. On the Adding a new Questionnaire page, click Expand all then under the General section, enter a Name and if a Description. Timing: The questionnaire must to be available immediately? Ō”ü If yes, leave the Timing fields unchanged and continue to the next step. Ō”ü If no, click the Use Open Date and Use Close Date check boxes and select dates. Select the Response options: 1
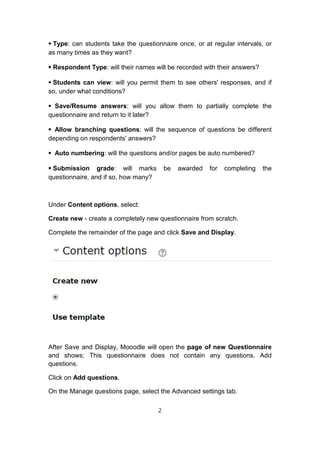
- 2. Ō”ü Type: can students take the questionnaire once, or at regular intervals, or as many times as they want? Ō”ü Respondent Type: will their names will be recorded with their answers? Ō”ü Students can view: will you permit them to see others' responses, and if so, under what conditions? Ō”ü Save/Resume answers: will you allow them to partially complete the questionnaire and return to it later? Ō”ü Allow branching questions: will the sequence of questions be different depending on respondents' answers? Ō”ü Auto numbering: will the questions and/or pages be auto numbered? Ō”ü Submission grade: will marks be awarded for completing the questionnaire, and if so, how many? Under Content options, select: Create new - create a completely new questionnaire from scratch. Complete the remainder of the page and click Save and Display. After Save and Display, Mooodle will open the page of new Questionnaire and shows: This questionnaire does not contain any questions. Add questions. Click on Add questions. On the Manage questions page, select the Advanced settings tab. 2
- 3. On the Advanced settings page, under Content options: Select which Questionnaire Type you are creating, Private, Public or Template. Title: add a Title to appear at the top of every page of the questionnaire Specify any Subtitle or Additional information you want to display. Under Submission options: Confirmation URL: the URL to which a user is redirected after completing this questionnaire. Confirmation page: Title and body text for the "Confirm" page displayed after a user has completed this survey. If the URL is present, it takes precedence over the confirmation text; instead, if you leave this field empty, the default message will be displayed: Thank you for completing this Questionnaire. Enter the Email address to which you want submissions to be forwarded. Click Save and display. Now, Mooodle will open again the page of new Questionnaire; Click on Add questions. On the Manage questions page in the Add questions section, from the drop- down box select the appropriate question type, then click Add selected question type. 3
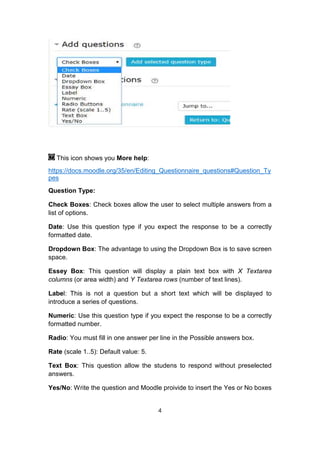
- 4. This icon shows you More help: https://docs.moodle.org/35/en/Editing_Questionnaire_questions#Question_Ty pes Question Type: Check Boxes: Check boxes allow the user to select multiple answers from a list of options. Date: Use this question type if you expect the response to be a correctly formatted date. Dropdown Box: The advantage to using the Dropdown Box is to save screen space. Essey Box: This question will display a plain text box with X Textarea columns (or area width) and Y Textarea rows (number of text lines). Label: This is not a question but a short text which will be displayed to introduce a series of questions. Numeric: Use this question type if you expect the response to be a correctly formatted number. Radio: You must fill in one answer per line in the Possible answers box. Rate (scale 1..5): Default value: 5. Text Box: This question allow the studens to respond without preselected answers. Yes/No: Write the question and Moodle proivide to insert the Yes or No boxes 4
- 5. Click Save changes when you have set up each question. The Manage questions page displays with all the created questions listed in the Manage questions section, where you can move, edit or delete them, or change whether a response is required for each one.. 5