cuttingtechniques-vegetables.pptx
- 2. Tip: Used for slicing and handlingsmall items such as shallots, mushrooms, and onions. Edge: This is where all of the work takes place, the part you cut with. Spine: Smooth top part of the knife. It allows you to grip the knife between the thumb and forefinger for good control during cutting and chopping. Parts of the Knife Adapted from Cooking 101, a trademark of Very Edible Productions, LLC. U.S.A. Copyright 2005
- 3. Heel: Last few inches of the cutting edge. This part of the blade is used when maximum leverage is needed or for heavy cutting tasks. Bolster: Part between the blade and the handle that assists in the balance of the knife. Tang: Metal that extends into the handle. On a good knife, the tang will extend all the way to the butt of the handle, and the rivets will go through the tang (known as a full tang). This helps create a well balanced knife. Adapted from Cooking 101, a trademark of Very Edible Productions, LLC. U.S.A. Copyright 2005
- 4. Chef's Knife The most versatile knife in the kitchen. Makes slicing, dicing, mincing and chopping fun. Chef's knives are usually 6” - 12” long with 8” being the average. Adapted from Cooking 101, a trademark of Very Edible Productions, LLC. U.S.A. Copyright 2005
- 5. Boning Knife A thin bladed knife used for removing the bones of poultry, meat, and fish. The blade is generally 6 inches long and may be rigid or flexible. Adapted from Cooking 101, a trademark of Very Edible Productions, LLC. U.S.A. Copyright 2005
- 6. Slicer Has a very thin, sharp edge that quickly and easily cuts meats and fish without tearing. It comes especially handy during the holiday season to carve the perfect turkey. Adapted from Cooking 101, a trademark of Very Edible Productions, LLC. U.S.A. Copyright 2005
- 7. Serrated Bread Knife Commonly known as a bread knife. It is purposely designed with a long serrated blade and a blunt end. The teeth (serrations) allow it to cut bread using less vertical force, which keeps the bread from being compressed or crushed. It is the best knife available for angel food cake. Adapted from Cooking 101, a trademark of Very Edible Productions, LLC. U.S.A. Copyright 2005
- 8. Paring Knife Perhaps the most versatile of knives. It is a short knife with a 2 to 4- inch long blade. Because it is designed for peeling and trimming fruits and vegetables, the paring knife's edge must be kept sharp. These knives are also used for carving specialty shapes and garnishes. Adapted from Cooking 101, a trademark of Very Edible Productions, LLC. U.S.A. Copyright 2005
- 9. Steel A steel is used to hone, not sharpen, knives. It is made of hard, high-carbon steel or ceramic. It comes as a long, tapered, round rod, but some people prefer the flat model. Use a steel on a knife before each use and throughout food preparation to keep the blade razor sharp. To use a steel, hold the knife at a 20° angle and pull across in a swift motion from the heel to the tip of the knife 6 to 8 times, alternating sides. Adapted from Cooking 101, a trademark of Very Edible Productions, LLC. U.S.A. Copyright 2005
- 11. To make a chiffonade (very thin strips) of a leafy green such as baby spinach, stack individual leaves on top one another, then tightly roll them up lengthwise. Using a chef's knife,cut the rolled bundle of leaves crosswise into thin slices. Unroll the strips and use them as desired. Chiffonade
- 12. Seeding Tomato: ?Using the paring knife, cut a circle around the stem and pull it out. ?Next, place the tomato on the cutting board and slice it crosswise using the serrated knife or chef's knife. ?Pick up a tomato half and hold the cut side over the bowl. ?Gently squeeze, letting the tomato seeds drip into the bowl.
- 13. To cut vegetables for stir-fry, hold the knife at about a 45- degree angle to the cutting board, with the edge of the knife facing away from you. Slice vegetables into equally thick pieces. More surface area results in faster cooking, which is required for stir fry.
- 14. A julienne (also called a "matchstick") is a type of cut that makes a long thin strip. It's a good technique to use for vegetables and other ingredients when you want to heighten their presentation Julienne Cuts
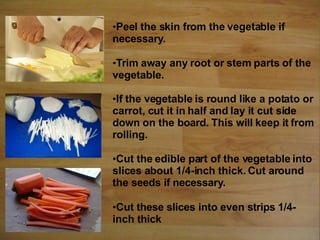
- 15. ?Peel the skin from the vegetable if necessary. ?Trim away any root or stem parts of the vegetable. ?If the vegetable is round like a potato or carrot, cut it in half and lay it cut side down on the board. This will keep it from rolling. ?Cut the edible part of the vegetable into slices about 1/4-inch thick. Cut around the seeds if necessary. ?Cut these slices into even strips 1/4- inch thick
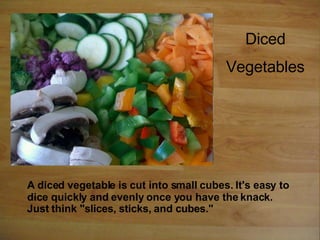
- 16. A diced vegetable is cut into small cubes. It's easy to dice quickly and evenly once you have the knack. Just think "slices, sticks, and cubes." Diced Vegetables
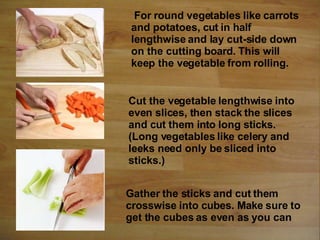
- 17. Cut the vegetable lengthwise into even slices, then stack the slices and cut them into long sticks. (Long vegetables like celery and leeks need only be sliced into sticks.) Gather the sticks and cut them crosswise into cubes. Make sure to get the cubes as even as you can For round vegetables like carrots and potatoes, cut in half lengthwise and lay cut-side down on the cutting board. This will keep the vegetable from rolling.
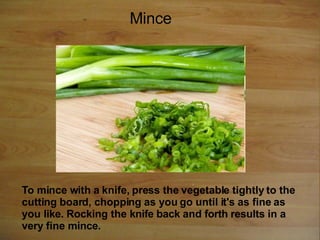
- 18. Mince To mince with a knife, press the vegetable tightly to the cutting board, chopping as you go until it's as fine as you like. Rocking the knife back and forth results in a very fine mince.
- 19. Mincing does take some time, but for some recipes it's important to do it. Not just for the texture, but also because it helps the flavor of the vegetable to meld better with the other ingredients.
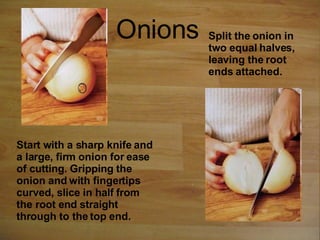
- 20. Start with a sharp knife and a large, firm onion for ease of cutting. Gripping the onion and with fingertips curved, slice in half from the root end straight through to the top end. Split the onion in two equal halves, leaving the root ends attached. Onions
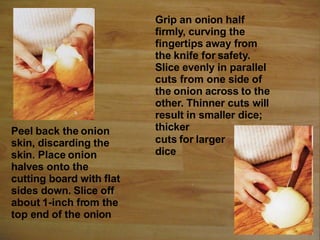
- 21. Peel back the onion skin, discarding the skin. Place onion halves onto the cutting board with flat sides down. Slice off about 1-inch from the top end of the onion Grip an onion half firmly, curving the fingertips away from the knife for safety. Slice evenly in parallel cuts from one side of the onion across to the other. Thinner cuts will result in smaller dice; thicker cuts for larger dice
- 22. Move your fingers out of the way and grip the onion at the root end. Make a parallel cut, slightly angled down toward the cutting board. Make a second parallel slice above the first one and also slightly angled toward the cutting board (and away from your fingers)
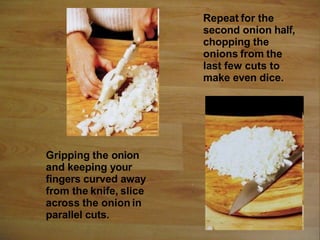
- 23. Gripping the onion and keeping your fingers curved away from the knife, slice across the onion in parallel cuts. Repeat for the second onion half, chopping the onions from the last few cuts to make even dice.
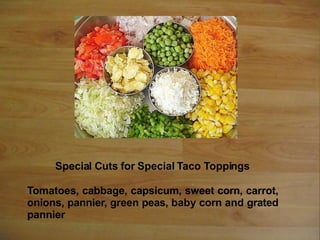
- 24. Special Cuts for Special Taco Toppings Tomatoes, cabbage, capsicum, sweet corn, carrot, onions, pannier, green peas, baby corn and grated pannier
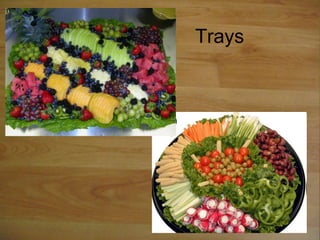
- 26. Trays
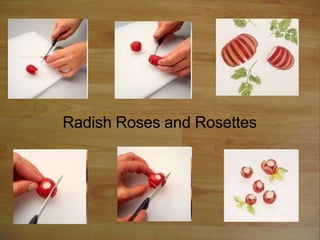
- 28. Radish Roses and Rosettes
- 30. And Fun!
- 32. Cold Tofu Salad 8 oz silken tofu, diced into 1 inch cubes 2 stalks green onions, minced 2 tbsp preserved mustard green, minced 2 tbsp pork sung 1 tsp sesame oil 1-2 tbsp soy sauce Good Practice

