Folder organizer
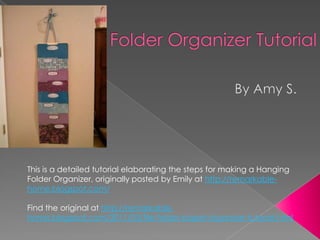
- 1. This is a detailed tutorial elaborating the steps for making a Hanging Folder Organizer, originally posted by Emily at http://remarkable- home.blogspot.com/ Find the original at http://remarkable- home.blogspot.com/2011/03/file-folder-paper-organizer-tutorial.html
- 2. ď‚ž 8 File Folders (more or less depending on your preference) ď‚ž Same number of scrapbook pages as number of file folders, in varying colors of your choice ď‚ž Scissors, hot glue, rubber cement/glue stick ď‚ž Laminator
- 3. ď‚ž Decide how many file folders you will want in your finished organizer. I used five on my first one, and found that it was too short and not enough. I used 8 on this one and it seems perfect. ď‚ž I numbered my folders to show which order they were going to go in, I just liked having a pattern. This is optional.
- 5.  In ReMarkable Home’s original post, she said to fold back the tabs. I chose to cut them off instead.
- 6. ď‚ž Next, trace your scrapbook paper to the exact shape of each file folder by placing the sheet inside the folder and tracing around it. Then cut the shapes out.
- 7.  I laid my scrapbook paper out in the pattern I wanted first so I would know which file folder to trace it onto! I decided on a “solid blue, pattern blue, solid purple, pattern purple, solid blue, pattern blue, solid purple, pattern purple” design.
- 8.  After your paper is cut out, you can glue it onto the front of the file folder using your preferred smooth adhesive (glue stick, rubber cement…). I used a glue dab stick I found at Joann’s that allowed me to spread the glue evenly.
- 10.  Next, it’s time to make your labels/tags. I made mine out of my leftover pieces of scrapbook paper layered with a piece of white paper. Since this will be a gift and I don’t know what they will want to organize, I left it blank so they can write on the laminating with a dry erase marker later.  If you already know what labels you want, you can use a computer.  I’m resisting buying ink for my printer, so I did mine by hand by making a template out of scrap paper and tracing in 8 times, then cutting.
- 12.  Using the same adhesive glue, put your tags on the front of your file folder, pretty close to the top (so they don’t get covered by papers that might stick out).
- 13. ď‚ž Laminate your folders. I was at a loss of whether I should laminate my folders while they were closed or open. I finally decided to laminate them closed and then cut them back open later. This worked out well, but you can do it your way.
- 14.  From ReMarkable Home: “Decide how much space you want between the tops of the front side of each folder. Figure out how much you want them to overlap. I made mine far enough apart so that an 8 ½” x 11” piece of paper could be in the pocket upright without covering the label of the pocket above it… Use a glue stick to glue the inside of the back side of one folder to the outside of the back side of the folder that will be above it. So the folders are like nesting inside each other and then spread out like a deck of cards. Make sure you measure the distance so you can make it the same on each folder. If you laminated (I did not) you may have to use a different type of glue.”
- 15. I used hot glue to adhere my folders together. It worked perfectly.
- 16. ď‚ž When ď‚ž But will finished still fall gluing, open your like this: folders should look like this:
- 17.  You are now going to use a sewing machine to sew two single lines down each side of the folders to seal them shut.  I didn’t use any special machine or type of needle, but I did go slowly and use caution.
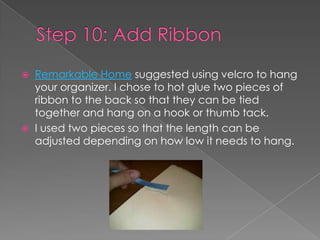
- 19. ď‚ž Remarkable Home suggested using velcro to hang your organizer. I chose to hot glue two pieces of ribbon to the back so that they can be tied together and hang on a hook or thumb tack. ď‚ž I used two pieces so that the length can be adjusted depending on how low it needs to hang.
- 21. And here’s an example of writing with the expo markers:
- 22. Please give all credit to Emily at ReMarkable Home – thank you Emily for such great inspiration!


