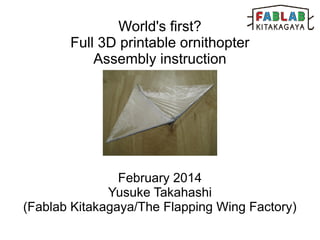
World's first? A full 3d printed ornithopter "Flying Pants" Assembly instruction
- 1. World's first? Full 3D printable ornithopter Assembly instruction February 2014 Yusuke Takahashi (Fablab Kitakagaya/The Flapping Wing Factory)
- 2. The ornithoper "Flying Pants" was originally developed by author as a FABLAB workshop item in 2013. The original version was made of hybrid materials such as SLS(*) printed parts and carbon rods. SLS(Selective Laser Sintative): One of the high-end 3D printing technologies
- 3. In 2014, personal 3D printers are becoming more and more affordable, so I revised the parts design suitable to these printers. The new design is suitable for any personal FFF(fused filament fabrication) type 3D printers like as Reprap, Replicator, and Cube, etc.
- 4. CAD data file of the parts can be freely downloaded at Thingiverse or 123dapp.com. Thingiverse: http://www.thingiverse.com/thing:239789 123dapp.com: http://www.123dapp.com/smb-123D_Design/Flying-Pants/2107482
- 5. You can also order the 3D printed parts to Shapeways or DMM.com. Shapeways: http://www.shapeways.com/model/1693498 DMM.com: http://make.dmm.com/item/30182/
- 6. Specification of "Flying Pants": Wing span: Length: Weight: Power source: Suitable materials: 300 mm 135 mm around 2.5 grams medium size rubber band * 2 polyamid(SLS*) or ABS(FFF) * Select "White Strong & Flexible" (Shapeways) " ¥Ê¥¤¥í¥ó ( ¥Ý¥ê¥¢¥ß¥É )"(DMM.com) You also need a small paper clip for the crank and a thin plastic bag for the wing membrane.
- 7. Step 1: Parts check and preparation Parts are often printed with a raft and supports. They should be removed and cleaned up carefully.
- 8. Step 2: Parts clean-up Finish carefully! A raft may be peeled off by hands. Supports should be removed using cutter knives. Parts surface can be finished by engineers files.
- 9. Step 3: Assembly of the right arm and the frame The right arm is fixed to the frame. They are designed as snap-fit, but you can fix them by a drop of instant glue.
- 10. Step 4: Assembly of the left arm and the frame The left arm is a moving parts. The arm should be able to flap freely. If it won't flap smoothly, enlarge the holes of the arm by drills or reamers.
- 11. Step 5: Making of the crankshaft The crankshaft can be made from a small paper clip. Bend it carefully using a needle nose plier and cut an excess off.
- 12. Step 6: Making of the crankshaft 3mm The crankshaft can be made from a small paper clip. Bend it carefully using a needle nose plier and cut an excess off.
- 13. Step 7: Making of the crankshaft -Finish 8mm 8mm 8mm The crankshaft can be made from a small paper clip. Bend it carefully using a needle nose plier and cut an excess off.
- 14. Step 8: Assembly of the crankshaft and the frame The crankshaft is inserted into the holes of the frame.
- 15. Step 9: Assembly of the crank and the rocking arm Slot the crank pin into the slit of the rocking arm.
- 16. Step 10: Hook rubber bands Hook a pair of rubber bands to the crank end and the frame.
- 17. Step 11: Test run Wind the crank up about thirty times. As the crank rewinds, the left arm will flap bouncingly.
- 18. Step 12: Cut out the wing membrane 300mm 135mm Cut the wing membrane out from a thin plastic bag* using cutter knives. * film thickness < 0.01 mm would be better
- 19. Step 13: Apply the wing membrane to the frame Apply thin strips of double-sided tape to the frame. And then apply the wing membrane carefully to the frame along the tapes.
- 20. Step 14: Assembly finished! Assembly finished. Bend the tail up slightly for a stable flight. Let's take it out for test flights!
- 21. Step 15: Test flight Test flights can be made either in the room or outdoors(in the calm, windless condition). Apply power by winding the crank up about thirty to fifty times. Hold the plane by your fingers horizontally, and push it off slightly upward,. If the plane dive straight to the ground, bend the tail up more or simply launch the plane upward. If it turns sharp to right of left, bend the opposite side of the wing chip slightly backward.
- 22. Some Hints of hacking the pants 1: Painting / marking Painting or marking on the wing is fun! Colorful marker pens would be suited to the job. Create your original pants.
- 23. Some Hints of hacking the pants 2: Weight reduction Cut Cut Carbon rod Carbon rod Fix by instant glue You can upgrade the wing arms by carbon rods*. The weight is dramatically reduced to under 2.0 grams and you can enjoy longer flight time. * 0.7mm dia 140mm long size * 2
- 24. About author: Yusuke Takahashi (Flappingwing) Location: Osaka, Japan A founder of The Flapping Wing Factory Personally engaged in the development of small ornithopters for 10 years. Member / operating staff of Fablab Kitakagaya Blog: http://blog.goo.ne.jp/flappingwing/ http://www.youtube.com/user/flappingwing http://www.slideshare.net/Flappingwing/


