How to find a missing layer in ArcMap
- 1. How to find a missing layer in ArcMap 10
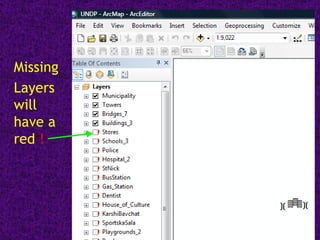
- 2. Missing Layers will have a red !
- 3. Right click on the missing layer to view the menu Look at the bottom of the menu and click on Properties
- 4. First Click on the Source tab at the top of the window Second Click on the Set Data Source button
- 5. Next Find the Folder where you saved your data All our UNDP data is in the MKShape Folder Then find the .shp file that matches the layer name. In this example we will select Stores.shp Then click the Add button
- 6. Next Click the Apply button and then the OK Button The Data Source Box will now have correct information
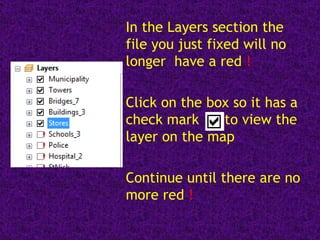
- 7. In the Layers section the file you just fixed will no longer have a red ! Click on the box so it has a check mark to view the layer on the map Continue until there are no more red !


