Installation of DSpace, Koha and other software using Liblivecd
•
1 like•1,587 views

This document provides step-by-step instructions for installing Lubuntu Linux, Koha, DSpace and other software using the LibLiveCD bootable disc. It describes starting the computer from the disc, navigating the installation wizard, selecting installation options such as partitioning disks, setting up user accounts, and completing the installation process. Upon restarting, the document explains how to log in and access pre-installed applications like DSpace, Koha, Joomla and Squirrelmail from the desktop environment.


Installation of DSpace, Koha and other software using Liblivecd
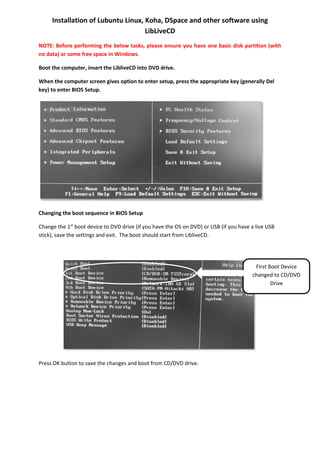
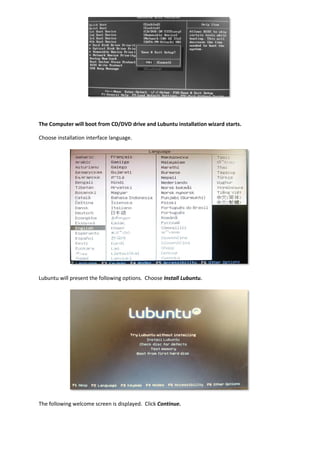
- 2. Installation of Lubuntu Linux, Koha, DSpace and other software using LibLiveCD NOTE: Before performing the below tasks, please ensure you have one basic disk partition (with no data) or some free space in Windows. Boot the computer, insert the LibliveCD into DVD drive. When the computer screen gives option to enter setup, press the appropriate key (generally Del key) to enter BIOS Setup. Changing the boot sequence in BIOS Setup Change the 1st boot device to DVD drive (if you have the OS on DVD) or USB (if you have a live USB stick), save the settings and exit. The boot should start from LibliveCD. Press OK button to save the changes and boot from CD/DVD drive. First Boot Device changed to CD/DVD Drive
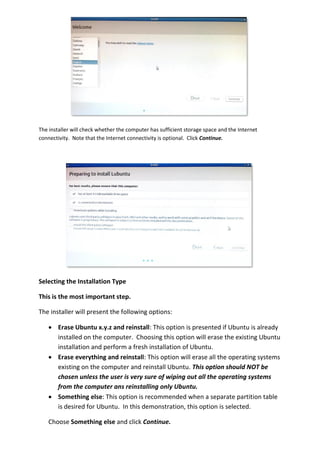
- 3. The Computer will boot from CD/DVD drive and Lubuntu installation wizard starts. Choose installation interface language. Lubuntu will present the following options. Choose Install Lubuntu. The following welcome screen is displayed. Click Continue.
- 4. The installer will check whether the computer has sufficient storage space and the Internet connectivity. Note that the Internet connectivity is optional. Click Continue. Selecting the Installation Type This is the most important step. The installer will present the following options: ď‚· Erase Ubuntu x.y.z and reinstall: This option is presented if Ubuntu is already installed on the computer. Choosing this option will erase the existing Ubuntu installation and perform a fresh installation of Ubuntu. ď‚· Erase everything and reinstall: This option will erase all the operating systems existing on the computer and reinstall Ubuntu. This option should NOT be chosen unless the user is very sure of wiping out all the operating systems from the computer ans reinstalling only Ubuntu. ď‚· Something else: This option is recommended when a separate partition table is desired for Ubuntu. In this demonstration, this option is selected. Choose Something else and click Continue.
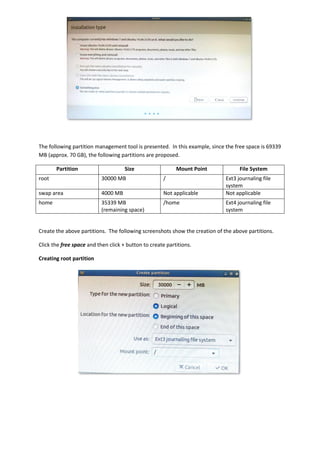
- 5. The following partition management tool is presented. In this example, since the free space is 69339 MB (approx. 70 GB), the following partitions are proposed. Partition Size Mount Point File System root 30000 MB / Ext3 journaling file system swap area 4000 MB Not applicable Not applicable home 35339 MB (remaining space) /home Ext4 journaling file system Create the above partitions. The following screenshots show the creation of the above partitions. Click the free space and then click + button to create partitions. Creating root partition
- 6. Creating swap area Creating /home partition After creating the above partitions, click Install Now in the following screen.
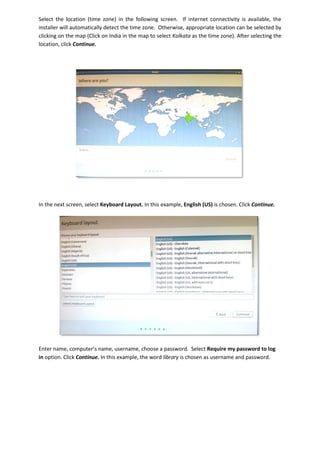
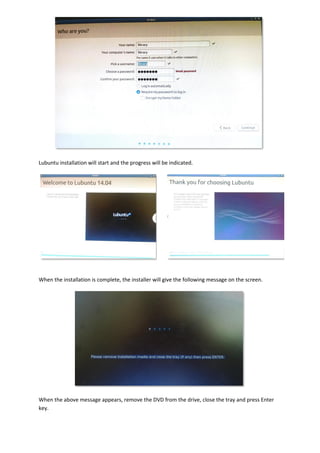
- 7. Select the location (time zone) in the following screen. If internet connectivity is available, the installer will automatically detect the time zone. Otherwise, appropriate location can be selected by clicking on the map (Click on India in the map to select Kolkata as the time zone). After selecting the location, click Continue. In the next screen, select Keyboard Layout. In this example, English (US) is chosen. Click Continue. Enter name, computer’s name, username, choose a password. Select Require my password to log in option. Click Continue. In this example, the word library is chosen as username and password.
- 8. Lubuntu installation will start and the progress will be indicated. When the installation is complete, the installer will give the following message on the screen. When the above message appears, remove the DVD from the drive, close the tray and press Enter key.
- 9. The computer will reboot and present the following screen to select the operating system. Select Ubuntu. Ubuntu operating system will be loaded and the log in screen will be presented. Log in with the username and password entered during installation. (username: library password: library) After log in, the following Desktop appears. DSpace, Koha, Joomla and Squirrelmail are pre-installed in libliveCD. Double click the ClickMe shortcut to open index.html file, which will guide further on opening other applications.