Introduction to Raspberry Pi.pdf
- 1. Intro ┬Āto ┬ĀRaspberry ┬ĀPi ┬Ā A ┬ĀSouthwest ┬ĀFlorida ┬ĀHackerspace ┬Ā Workshop ┬Ā Presented ┬Āby: ┬Ā Russell ┬ĀBenzing ┬Ā& ┬ĀEric ┬ĀSchi’¼äi ┬Ā Raspberry Pi Course for Beginners Step-by-Step to your first Raspberry Pi Project - compatible with Raspberry Pi 4, 3, 2 and Zero models Click here----
- 2. WHY ARE YOU HERE? ┬¦’é¦ŌĆ» Enjoy ┬ĀŌĆ£EnkeringŌĆØ ┬Āwith ┬Ātechnology. ┬Ā ┬Ā ┬¦’é¦ŌĆ» Do ┬Ānot ┬Āmind ┬ĀwriEng ┬Āa ┬ĀliJle ┬Ābit ┬Āof ┬Ācode. ┬Ā ┬Ā ┬¦’é¦ŌĆ» Have ┬Āexperience ┬Āin ┬ĀLinux, ┬ĀRobots, ┬ĀSensors, ┬Āetc. ┬Ā ┬Ā ┬¦’é¦ŌĆ» Recently ┬Āannounced ┬Āyou ┬Āhave ┬Āan ┬ĀaddicEon ┬Āto ┬Ā raspberry ┬Āpie. ┬Ā YOU: ┬Ā
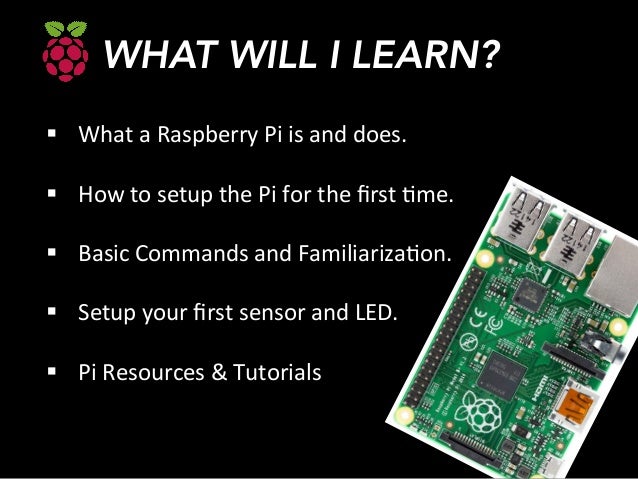
- 3. WHAT WILL I LEARN? ┬¦’é¦ŌĆ» What ┬Āa ┬ĀRaspberry ┬ĀPi ┬Āis ┬Āand ┬Ādoes. ┬Ā ┬Ā ┬¦’é¦ŌĆ» How ┬Āto ┬Āsetup ┬Āthe ┬ĀPi ┬Āfor ┬Āthe ┬Ā’¼ürst ┬ĀEme. ┬Ā ┬Ā ┬¦’é¦ŌĆ» Basic ┬ĀCommands ┬Āand ┬ĀFamiliarizaEon. ┬Ā ┬Ā ┬¦’é¦ŌĆ» Setup ┬Āyour ┬Ā’¼ürst ┬Āsensor ┬Āand ┬ĀLED. ┬Ā ┬Ā ┬¦’é¦ŌĆ» Pi ┬ĀResources ┬Ā& ┬ĀTutorials ┬Ā
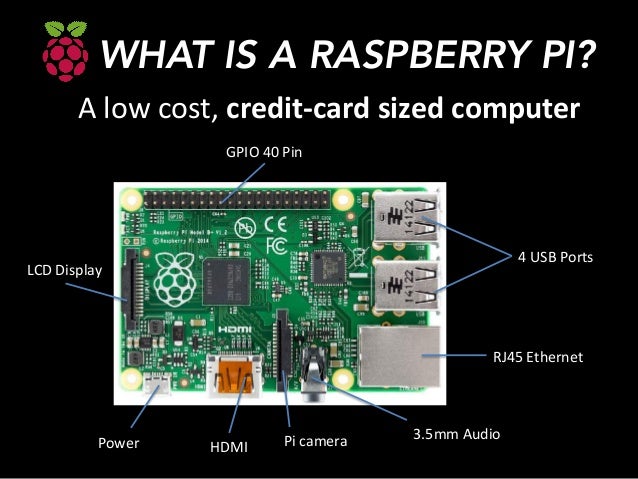
- 4. WHAT IS A RASPBERRY PI? A ┬Ālow ┬Ācost, ┬Ācredit-┬ŁŌĆÉcard ┬Āsized ┬Ācomputer ┬Ā GPIO ┬Ā40 ┬ĀPin ┬Ā 4 ┬ĀUSB ┬ĀPorts ┬Ā RJ45 ┬ĀEthernet ┬Ā 3.5mm ┬ĀAudio ┬Ā Pi ┬Ācamera ┬Ā LCD ┬ĀDisplay ┬Ā HDMI ┬Ā Power ┬Ā
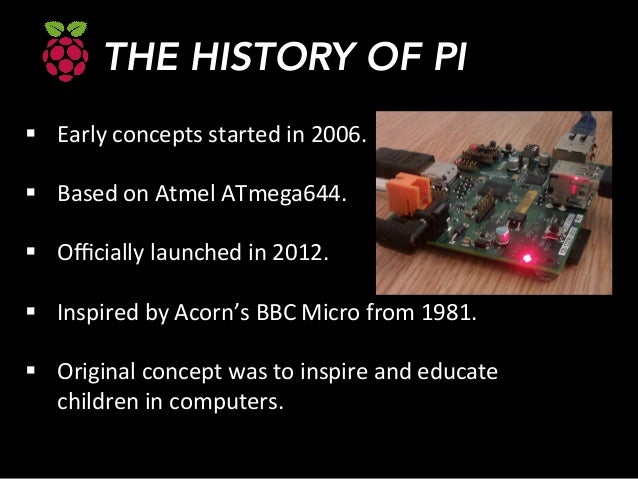
- 5. THE HISTORY OF PI ┬¦’é¦ŌĆ» Early ┬Āconcepts ┬Āstarted ┬Āin ┬Ā2006. ┬Ā ┬Ā ┬¦’é¦ŌĆ» Based ┬Āon ┬ĀAtmel ┬ĀATmega644. ┬Ā ┬Ā ┬¦’é¦ŌĆ» O’¼ācially ┬Ālaunched ┬Āin ┬Ā2012. ┬Ā ┬Ā ┬¦’é¦ŌĆ» Inspired ┬Āby ┬ĀAcornŌĆÖs ┬ĀBBC ┬ĀMicro ┬Āfrom ┬Ā1981. ┬Ā ┬Ā ┬¦’é¦ŌĆ» Original ┬Āconcept ┬Āwas ┬Āto ┬Āinspire ┬Āand ┬Āeducate ┬Ā children ┬Āin ┬Ācomputers. ┬Ā
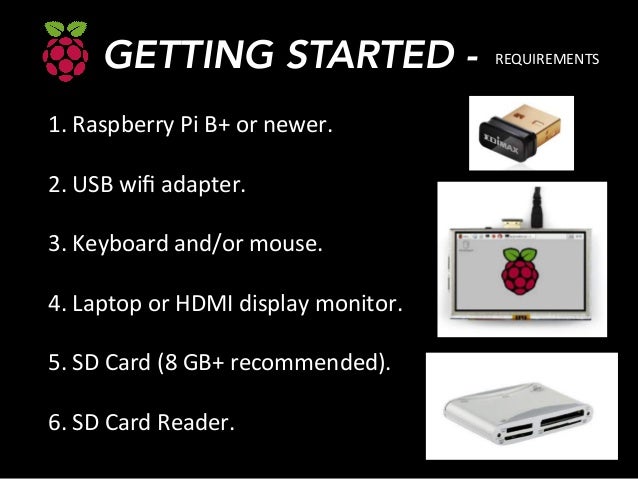
- 6. GETTING STARTED - REQUIREMENTS ┬Ā 1.ŌĆ»Raspberry ┬ĀPi ┬ĀB+ ┬Āor ┬Ānewer. ┬Ā ┬Ā 2.ŌĆ»USB ┬Āwi’¼ü ┬Āadapter. ┬Ā ┬Ā 3.ŌĆ»Keyboard ┬Āand/or ┬Āmouse. ┬Ā ┬Ā 4.ŌĆ»Laptop ┬Āor ┬ĀHDMI ┬Ādisplay ┬Āmonitor. ┬Ā ┬Ā 5.ŌĆ»SD ┬ĀCard ┬Ā(8 ┬ĀGB+ ┬Ārecommended). ┬Ā ┬Ā 6.ŌĆ»SD ┬ĀCard ┬ĀReader. ┬Ā
- 7. 1. ┬ĀDownload ┬ĀNOOBS ┬ĀŌĆō ┬Āvisit ┬ĀŌĆ£www.raspberrypi.orgŌĆØ ┬Āclicking ┬Āon ┬Ādownloads. ┬Ā ┬Ā 2. ┬ĀDownload ┬ĀSD ┬ĀFormaJer ┬ĀŌĆō ┬Āvisit ┬ĀŌĆ£www.sdcard.orgŌĆØ ┬Āclicking ┬Āon ┬Ādownloads. ┬Ā GETTING STARTED - DOWNLOAD ┬Ā
- 8. GETTING STARTED - EXTRACT ┬Ā& ┬ĀCOPY ┬Ā 1.ŌĆ» Format ┬Āyour ┬ĀSD ┬ĀCard ┬Āusing ┬Āthe ┬ĀSD ┬ĀFormaJer ┬ĀŌĆō ┬ĀMore ┬ĀinstrucEons ┬Āfound ┬Āonline. ┬Ā ┬Ā 2.ŌĆ» Extract ┬ĀNOOBS ┬Āto ┬Āa ┬Āfolder ┬Āand ┬Ādrag ┬Āand ┬Ādrop ┬Āonto ┬Āyour ┬Ānewly ┬ĀformaJed ┬ĀSD ┬Ā Card. ┬Ā
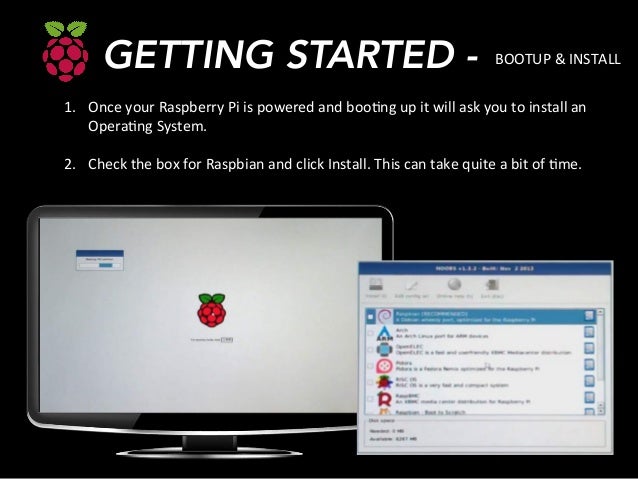
- 9. GETTING STARTED - BOOTUP ┬Ā& ┬ĀINSTALL ┬Ā 1.ŌĆ» Once ┬Āyour ┬ĀRaspberry ┬ĀPi ┬Āis ┬Āpowered ┬Āand ┬ĀbooEng ┬Āup ┬Āit ┬Āwill ┬Āask ┬Āyou ┬Āto ┬Āinstall ┬Āan ┬Ā OperaEng ┬ĀSystem. ┬Ā ┬Ā 2.ŌĆ» Check ┬Āthe ┬Ābox ┬Āfor ┬ĀRaspbian ┬Āand ┬Āclick ┬ĀInstall. ┬ĀThis ┬Ācan ┬Ātake ┬Āquite ┬Āa ┬Ābit ┬Āof ┬ĀEme. ┬Ā
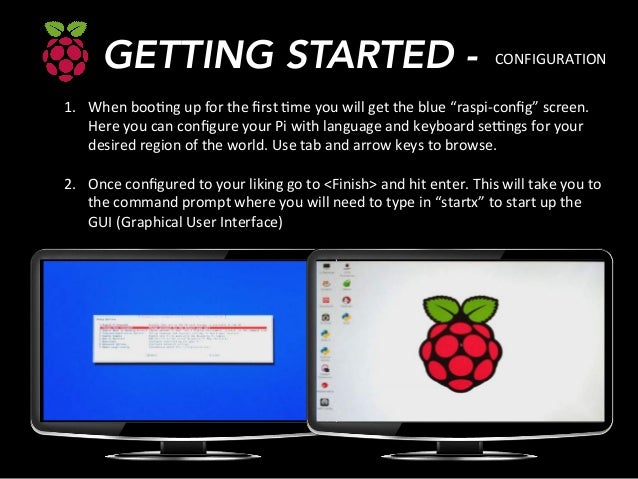
- 10. GETTING STARTED - CONFIGURATION ┬Ā 1.ŌĆ» When ┬ĀbooEng ┬Āup ┬Āfor ┬Āthe ┬Ā’¼ürst ┬ĀEme ┬Āyou ┬Āwill ┬Āget ┬Āthe ┬Āblue ┬ĀŌĆ£raspi-┬ŁŌĆÉcon’¼ügŌĆØ ┬Āscreen. ┬Ā Here ┬Āyou ┬Ācan ┬Ācon’¼ügure ┬Āyour ┬ĀPi ┬Āwith ┬Ālanguage ┬Āand ┬Ākeyboard ┬Āseongs ┬Āfor ┬Āyour ┬Ā desired ┬Āregion ┬Āof ┬Āthe ┬Āworld. ┬ĀUse ┬Ātab ┬Āand ┬Āarrow ┬Ākeys ┬Āto ┬Ābrowse. ┬Ā ┬Ā ┬Ā 2.ŌĆ» Once ┬Ācon’¼ügured ┬Āto ┬Āyour ┬Āliking ┬Āgo ┬Āto ┬Ā<Finish> ┬Āand ┬Āhit ┬Āenter. ┬ĀThis ┬Āwill ┬Ātake ┬Āyou ┬Āto ┬Ā the ┬Ācommand ┬Āprompt ┬Āwhere ┬Āyou ┬Āwill ┬Āneed ┬Āto ┬Ātype ┬Āin ┬ĀŌĆ£startxŌĆØ ┬Āto ┬Āstart ┬Āup ┬Āthe ┬Ā GUI ┬Ā(Graphical ┬ĀUser ┬ĀInterface) ┬Ā
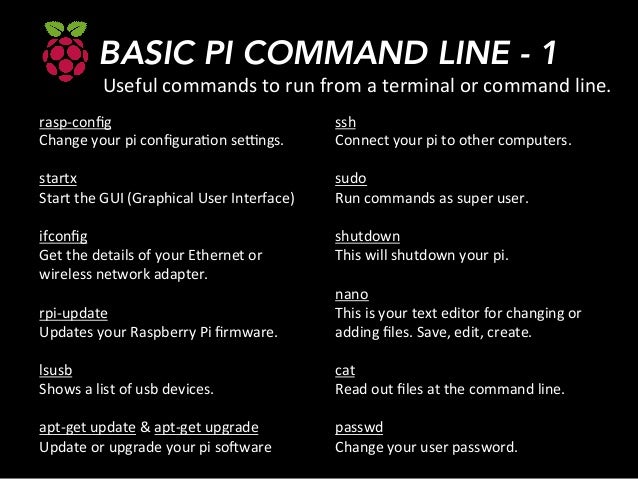
- 11. BASIC PI COMMAND LINE - 1 rasp-┬ŁŌĆÉcon’¼üg ┬Ā ┬Ā ┬Ā Change ┬Āyour ┬Āpi ┬Ācon’¼üguraEon ┬Āseongs. ┬Ā ┬Ā ┬Ā startx ┬Ā ┬Ā Start ┬Āthe ┬ĀGUI ┬Ā(Graphical ┬ĀUser ┬ĀInterface) ┬Ā ┬Ā ifcon’¼üg ┬Ā Get ┬Āthe ┬Ādetails ┬Āof ┬Āyour ┬ĀEthernet ┬Āor ┬Ā wireless ┬Ānetwork ┬Āadapter. ┬Ā ┬Ā rpi-┬ŁŌĆÉupdate ┬Ā Updates ┬Āyour ┬ĀRaspberry ┬ĀPi ┬Ā’¼ürmware. ┬Ā ┬Ā lsusb ┬Ā Shows ┬Āa ┬Ālist ┬Āof ┬Āusb ┬Ādevices. ┬Ā ┬Ā apt-┬ŁŌĆÉget ┬Āupdate ┬Ā& ┬Āapt-┬ŁŌĆÉget ┬Āupgrade ┬Ā Update ┬Āor ┬Āupgrade ┬Āyour ┬Āpi ┬Āsorware ┬Ā Useful ┬Ācommands ┬Āto ┬Ārun ┬Āfrom ┬Āa ┬Āterminal ┬Āor ┬Ācommand ┬Āline. ┬Ā ssh ┬Ā Connect ┬Āyour ┬Āpi ┬Āto ┬Āother ┬Ācomputers. ┬Ā ┬Ā sudo ┬Ā ┬Ā Run ┬Ācommands ┬Āas ┬Āsuper ┬Āuser. ┬Ā ┬Ā ┬Ā shutdown ┬Ā This ┬Āwill ┬Āshutdown ┬Āyour ┬Āpi. ┬Ā ┬Ā nano ┬Ā This ┬Āis ┬Āyour ┬Ātext ┬Āeditor ┬Āfor ┬Āchanging ┬Āor ┬Ā adding ┬Ā’¼üles. ┬ĀSave, ┬Āedit, ┬Ācreate. ┬Ā ┬Ā cat ┬Ā Read ┬Āout ┬Ā’¼üles ┬Āat ┬Āthe ┬Ācommand ┬Āline. ┬Ā ┬Ā passwd ┬Ā Change ┬Āyour ┬Āuser ┬Āpassword. ┬Ā
- 12. BASIC PI COMMAND LINE - 2 ls ┬Ā List ┬Āout ┬Āthe ┬Ācurrent ┬Ādirectory ┬Ā’¼üles. ┬Ā ┬Ā cd ┬Ā Go ┬Āto ┬Ādirectory ┬Āor ┬Āfolder. ┬Ā ┬Ā ’¼ünd ┬Ā Searches ┬Āwhole ┬Āsystem ┬Āfor ┬Ā’¼üles ┬Āor ┬Ā directories. ┬Ā ┬Ā clear ┬Ā Clears ┬Āthe ┬Āterminal ┬Āscreen. ┬Ā ┬Ā mv ┬Ā Move ┬Ā’¼üles ┬Āor ┬Āfolders. ┬Ā ┬Ā rm ┬Ā& ┬Ārmdir ┬Ā Remove ┬Ā’¼üles ┬Āand ┬Āremove ┬Ādirectories. ┬Ā Useful ┬Ācommands ┬Āto ┬Ārun ┬Āfrom ┬Āa ┬Āterminal ┬Āor ┬Ācommand ┬Āline. ┬Ā touch ┬Ā Create ┬Āa ┬Āblank ┬Ā’¼üle. ┬Ā ┬Ā mkdir ┬Ā Create ┬Āa ┬Ādirectory. ┬Ā ┬Ā ping ┬Ā Test ┬ĀconnecEvity ┬Ābetween ┬Ātwo ┬Ādevices. ┬Ā ┬Ā df ┬Ā-┬ŁŌĆÉh ┬Ā Shows ┬Ādisk ┬Āspace. ┬Ā ┬Ā iwcon’¼üg ┬Ā Wireless ┬Ācon’¼üguraEon ┬Ātool. ┬Ā ┬Ā cp ┬Ā Copy ┬Ā’¼üles ┬Āand ┬Āfolders. ┬Ā
- 13. ADDING OTHER FEATURES WIFI ┬ĀCon’¼üguraEon ┬Ā(GUI) ┬Ā 1. ┬ĀLaunch ┬ĀŌĆ£Wi’¼ü ┬ĀCon’¼ügŌĆØ ┬Āfrom ┬Āthe ┬Ādesktop. ┬Ā 2. ┬ĀClick ┬ĀŌĆ£ScanŌĆØ ┬Ā 3. ┬ĀDouble ┬Āclick ┬Āyour ┬Ādesired ┬Ānetwork. ┬Ā 4. ┬ĀIn ┬ĀŌĆ£PSKŌĆØ ┬Ā’¼üeld ┬Āenter ┬Āyour ┬Āwi’¼ü ┬Āpassword. ┬Ā 5. ┬ĀWhen ┬Ādone ┬Āclick ┬ĀŌĆ£AddŌĆØ ┬Āand ┬Āit ┬Āwill ┬Āconnect. ┬Ā SSH ┬ĀCon’¼üguraEon ┬Ā(command ┬Āline) ┬Ā 1. ┬ĀRun ┬ĀŌĆ£sudo ┬Āapt-┬ŁŌĆÉget ┬Āinstall ┬ĀsshŌĆØ ┬Āin ┬Ācommand ┬Āline. ┬Ā 2. ┬ĀRun ┬ĀŌĆ£sudo ┬Ā/etc/init.d/ssh/ ┬ĀstartŌĆØ ┬Āto ┬Āstart ┬Āssh. ┬Ā 3. ┬ĀTo ┬Āhave ┬ĀSSH ┬Āstart ┬Āalways ┬Āat ┬Āboot, ┬Ārun: ┬Ā ┬Ā ┬Ā ┬Ā ┬ĀŌĆ£sudo ┬Āupdate-┬ŁŌĆÉrc.d ┬Āssh ┬ĀdefaultsŌĆØ ┬Ā 4. ┬ĀNow ┬Āreboot: ┬ĀŌĆ£sudo ┬ĀrebootŌĆØ ┬Ā 5. ┬ĀYou ┬Āshould ┬Ānow ┬Ābe ┬Āable ┬Āto ┬Āconnect ┬ĀSSH ┬Āto ┬Āyour ┬Ā ┬Ā ┬Ā ┬Ā ┬Āpi ┬Āvia ┬Āthe ┬ĀIP ┬ĀAddress ┬Āusing ┬ĀPuTTy ┬Āor ┬Āsimilar ┬ĀSSH ┬Āclient. ┬Ā
- 14. CONGRATULATIONS! Take ┬Āthis ┬ĀEme ┬Āto ┬Ācelebrate ┬Āand ┬Āenjoy ┬Āsome ┬ĀPi ┬Ābefore ┬Āwe ┬Āgo ┬Āto ┬Āthe ┬Ānext ┬Ālevel. ┬Ā ┬Ā Your ┬Āon ┬Āyour ┬Āway ┬Āto ┬Ābeing ┬Āa ┬ĀPi ┬Āguru. ┬Ā WhatŌĆÖs ┬ĀNext? ┬Ā

