
Line follOwer
- 1. 7th – Following a line Nestor Benavides
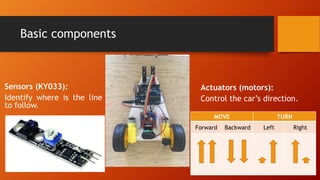
- 2. Basic components Actuators (motors): Control the car’s direction. MOVE TURN Forward Backward Left Right Sensors (KY033): Identify where is the line to follow.
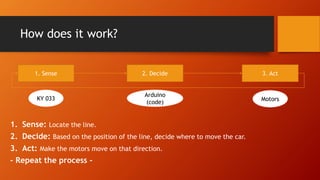
- 3. How does it work? 1. Sense 2. Decide 3. Act KY 033 Arduino (code) Motors 1. Sense: Locate the line. 2. Decide: Based on the position of the line, decide where to move the car. 3. Act: Make the motors move on that direction. - Repeat the process -
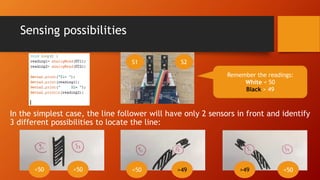
- 4. Sensing possibilities In the simplest case, the line follower will have only 2 sensors in front and identify 3 different possibilities to locate the line: S1 S2 Remember the readings: White < 50 Black > 49 <50 <50 <50 <50>49 >49
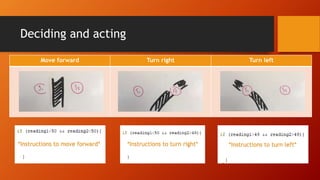
- 5. Deciding and acting Move forward Turn right Turn left *Instructions to move forward* *Instructions to turn right* *Instructions to turn left*
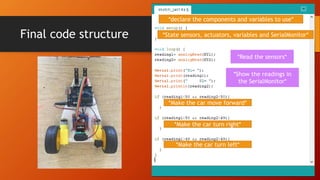
- 6. Final code structure *declare the components and variables to use* *State sensors, actuators, variables and SerialMonitor* *Read the sensors* *Show the readings in the SerialMonitor* *Make the car move forward* *Make the car turn right* *Make the car turn left*
- 7. Final advices 1. Test sensors and actuators separately, first make sure that the sensors are reading properly, then that the motors work as you want, only after that, you can combine everything. 2. Test the motors with low speed, when you see that the car works, start adjusting the speed as you desire. 3. The more sensors you use, more effective and smooth your line follower will be, however, you will need to code more and calculate more possibilities.