MIKE Stack Introduction - MongoDB, io.js, KendoUI, and Express

You don't need skinny jeans, mason jar lunches, and cups of pu-er cha to demonstrate your hipsterism. What you really need is the M.I.K.E. stack. Built using Mongo, io.js, Kendo UI, and Express, M.I.K.E. will bring your web apps into the world with a hot new JavaScript framework built for performance and ease of deployment. In this seminar, we'll walk through building a web app from scratch within Visual Studio and deployed as a Node-based, Mongo-powered project on Modulus.io, a superb Node hosting platform. We'll discuss building a web api using Express and then discuss fleshing out the frontend using KendoUI widgets, building a simple contact form styled with a responsive Bootstrap theme. Want to be that VS developer who's in the cool kids club? We'll show you how.


MIKE Stack Introduction - MongoDB, io.js, KendoUI, and Express
- 1. Zero to Hipster with the M.I.K.E. Stack Jen Looper and Charlie Key
- 2. Jen Looper Developer Advocate, Telerik @jenlooper
- 4. Signs of hipsterism Fixed-Gear Bicycles
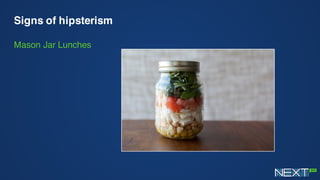
- 5. Signs of hipsterism Mason Jar Lunches
- 6. Signs of hipsterism Urban Beekeeping
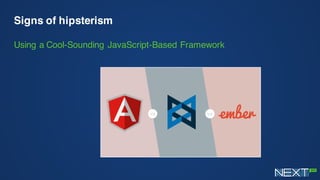
- 7. Signs of hipsterism Using a Cool-Sounding JavaScript-Based Framework
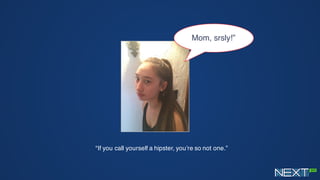
- 8. IŌĆÖm totally a hipster.
- 9. ŌĆ£If you call yourself a hipster, youŌĆÖre so not one.ŌĆØ Mom, srsly!ŌĆØ
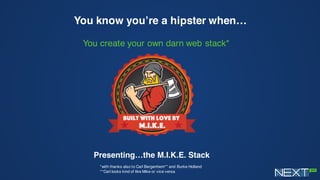
- 10. You know youŌĆÖre a hipster whenŌĆ” You create your own darn web stack* PresentingŌĆ”the M.I.K.E. Stack *with thanks also to Carl Bergenhem** and Burke Holland **Carl looks kind of like Mike or vice versa
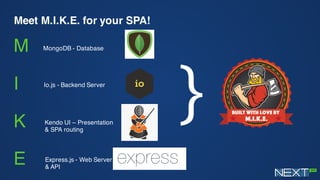
- 11. Meet M.I.K.E. for your SPA! M I K E MongoDB - Database Io.js - Backend Server Kendo UI ŌĆō Presentation & SPA routing Express.js - Web Server & API }
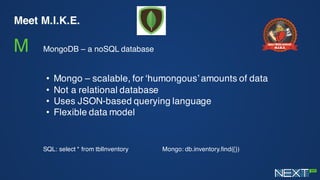
- 12. Meet M.I.K.E. M MongoDB ŌĆō a noSQL database ŌĆó Mongo ŌĆō scalable, for ŌĆśhumongousŌĆÖ amounts of data ŌĆó Not a relational database ŌĆó Uses JSON-based querying language ŌĆó Flexible data model SQL: select * from tblInventory Mongo: db.inventory.find({})
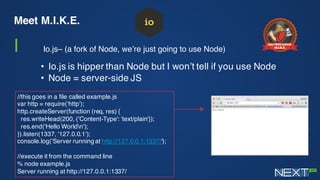
- 13. Meet M.I.K.E. I Io.jsŌĆō (a fork of Node, weŌĆÖre just going to use Node) ŌĆó Io.js is hipper than Node but I wonŌĆÖt tell if you use Node ŌĆó Node = server-side JS //this goes in a file called example.js var http = require('http'); http.createServer(function (req, res) { res.writeHead(200, {'Content-Type': 'text/plain'}); res.end('Hello Worldn'); }).listen(1337, '127.0.0.1'); console.log('Server running at http://127.0.0.1:1337/'); //execute it from the command line % node example.js Server running at http://127.0.0.1:1337/
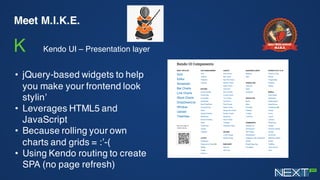
- 14. Meet M.I.K.E. K Kendo UI ŌĆō Presentation layer ŌĆó jQuery-based widgets to help you make your frontend look stylinŌĆÖ ŌĆó Leverages HTML5 and JavaScript ŌĆó Because rolling your own charts and grids = :ŌĆÖ-( ŌĆó Using Kendo routing to create SPA (no page refresh)
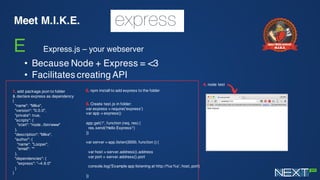
- 15. Meet M.I.K.E. E Express.js ŌĆō your webserver ŌĆó Because Node + Express = <3 ŌĆó Facilitates creating API . add package.json to folder & declare express as dependency { "name": "Mike", "version": "0.0.0", "private": true, "scripts": { "start": "node ./bin/www" }, "description": "Mike", "author": { "name": "Looper", "email": "" }, "dependencies": { "express": "~4.9.0" } } . npm install to add express to the folder . Create test.js in folder: var express = require('express') var app = express() app.get('/', function (req, res) { res.send('Hello Express!') }) var server = app.listen(3000, function () { var host = server.address().address var port = server.address().port console.log('Example app listening at http://%s:%s', host, port) }) . node test
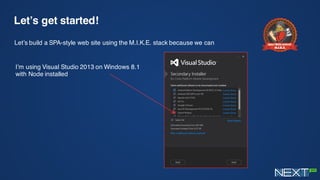
- 17. LetŌĆÖs get started! LetŌĆÖs build a SPA-style web site using the M.I.K.E. stack because we can IŌĆÖm using Visual Studio 2013 on Windows 8.1 with Node installed
- 18. Install NodeJS Tools for Visual Studio
- 19. NodeJS Tools available from Codeplex
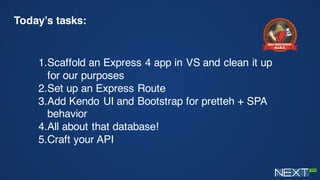
- 20. TodayŌĆÖs tasks: 1.Scaffold an Express 4 app in VS and clean it up for our purposes 2.Set up an Express Route 3.Add Kendo UI and Bootstrap for pretteh + SPA behavior 4.All about that database! 5.Craft your API
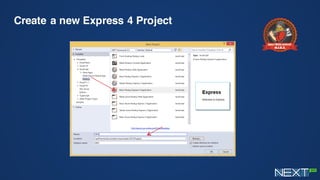
- 21. Create a new Express 4 Project
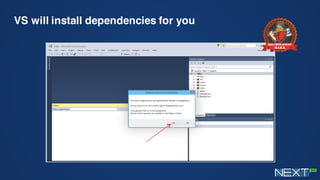
- 22. VS will install dependencies for you
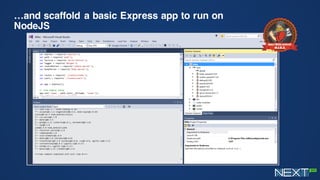
- 23. ŌĆ”and scaffold a basic Express app to run on NodeJS
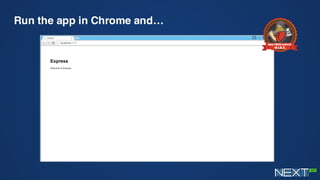
- 24. Run the app in Chrome andŌĆ”
- 25. What just happened? A bunch of dependencies were installed Public folder > images, CSS, JS Routes > ŌĆśtraffic signalsŌĆÖ Views > jade templates for each view app.js > base file package.json > lists dependencies to install
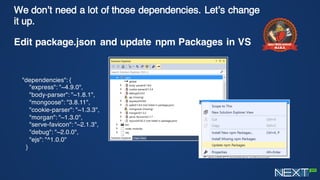
- 26. We donŌĆÖt need a lot of those dependencies. LetŌĆÖs change it up. Edit package.json and update npm Packages in VS "dependencies": { "express": "~4.9.0", "body-parser": "~1.8.1", "mongoose": "3.8.11", "cookie-parser": "~1.3.3", "morgan": "~1.3.0", "serve-favicon": "~2.1.3", "debug": "~2.0.0", "ejs": "^1.0.0" }
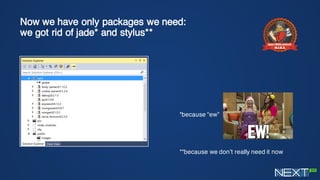
- 27. Now we have only packages we need: we got rid of jade* and stylus** *because ŌĆ£ewŌĆØ **because we donŌĆÖt really need it now
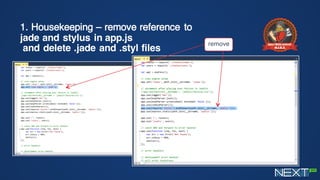
- 28. 1. Housekeeping ŌĆō remove reference to jade and stylus in app.js and delete .jade and .styl files remove
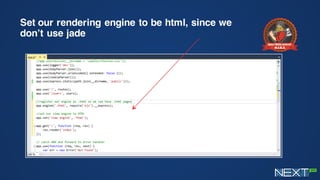
- 29. Set our rendering engine to be html, since we donŌĆÖt use jade
- 30. Replace the .jade templates with some simple html (for now)
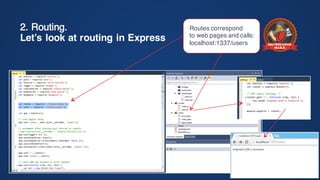
- 31. 2. Routing. LetŌĆÖs look at routing in Express Routes correspond to web pages and calls: localhost:1337/users
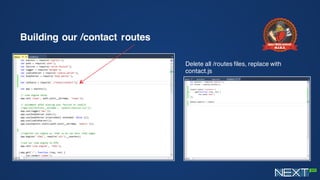
- 32. Building our /contact routes Delete all /routes files, replace with contact.js
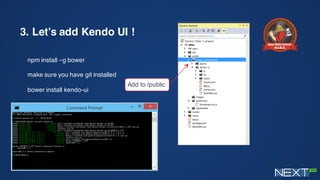
- 33. 3. LetŌĆÖs add Kendo UI ! npm install ŌĆōg bower make sure you have git installed bower install kendo-ui Add to /public
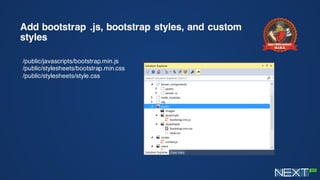
- 34. Add bootstrap .js, bootstrap styles, and custom styles /public/javascripts/bootstrap.min.js /public/stylesheets/bootstrap.min.css /public/stylesheets/style.css
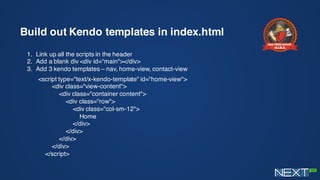
- 35. Build out Kendo templates in index.html 1. Link up all the scripts in the header 2. Add a blank div <div id=ŌĆ£main"></div> 3. Add 3 kendo templates ŌĆō nav, home-view, contact-view <script type="text/x-kendo-template" id="home-view"> <div class="view-content"> <div class="container content"> <div class="row"> <div class="col-sm-12"> Home </div> </div> </div> </div> </script>
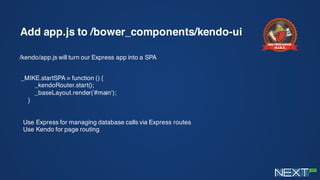
- 36. Add app.js to /bower_components/kendo-ui /kendo/app.js will turn our Express app into a SPA _MIKE.startSPA = function () { _kendoRouter.start(); _baseLayout.render('#main'); } Use Express for managing database calls via Express routes Use Kendo for page routing
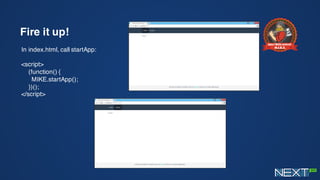
- 37. Fire it up! In index.html, call startApp: <script> (function() { MIKE.startApp(); })(); </script>
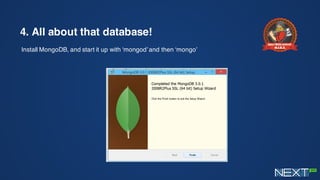
- 38. 4. All about that database! Install MongoDB, and start it up with ŌĆśmongodŌĆÖ and then ŌĆśmongoŌĆÖ
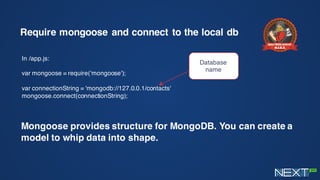
- 39. Require mongoose and connect to the local db In /app.js: var mongoose = require('mongoose'); var connectionString = 'mongodb://127.0.0.1/contacts' mongoose.connect(connectionString); Mongoose provides structure for MongoDB. You can create a model to whip data into shape. Database name
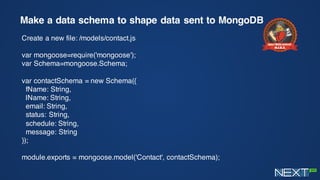
- 40. Make a data schema to shape data sent to MongoDB Create a new file: /models/contact.js var mongoose=require('mongoose'); var Schema=mongoose.Schema; var contactSchema = new Schema({ fName: String, lName: String, email: String, status: String, schedule: String, message: String }); module.exports = mongoose.model('Contact', contactSchema);
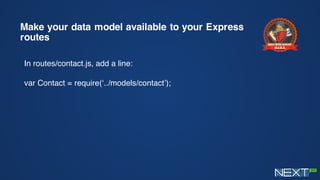
- 41. Make your data model available to your Express routes In routes/contact.js, add a line: var Contact = require(ŌĆś../models/contactŌĆÖ);
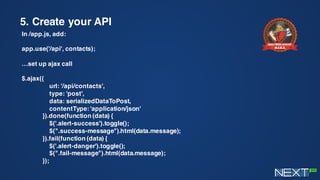
- 42. 5. Create your API In /app.js, add: app.use('/api', contacts); ŌĆ”set up ajax call $.ajax({ url: '/api/contacts', type: 'post', data: serializedDataToPost, contentType: 'application/json' }).done(function (data) { $('.alert-success').toggle(); $(".success-message").html(data.message); }).fail(function (data) { $('.alert-danger').toggle(); $(".fail-message").html(data.message); });
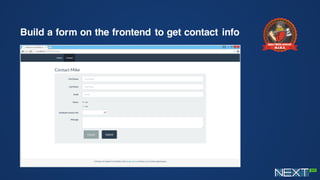
- 43. Build a form on the frontend to get contact info
- 44. See the pretty widgets! (I spy Kendo UI) <input id="schedule" name="schedule" data- role="timepicker" data-bind="value: schedule" value="10:00 AM">
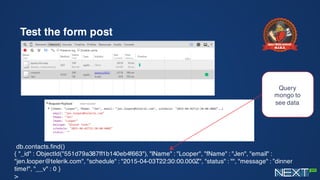
- 45. Test the form post db.contacts.find() { "_id" : ObjectId("551d79a387ff1b140eb4f663"), "lName" : "Looper", "fName" : "Jen", "email" : "jen.looper@telerik.com", "schedule" : "2015-04-03T22:30:00.000Z", "status" : "", "message" : ŌĆØdinner time!", "__v" : 0 } > Query mongo to see data
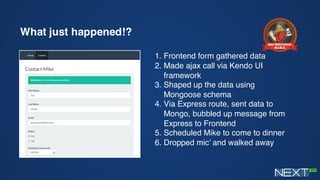
- 46. What just happened!? 1. Frontend form gathered data 2. Made ajax call via Kendo UI framework 3. Shaped up the data using Mongoose schema 4. Via Express route, sent data to Mongo, bubbled up message from Express to Frontend 5. Scheduled Mike to come to dinner 6. Dropped micŌĆÖ and walked away
- 47. Trivia question!!! For a prize! What is the name of the company that builds the Node.js add-ons for Visual Studio?
- 48. LetŌĆÖs take Mike to Production! Charlie Key Co-Founder, Modulus @Zwigby
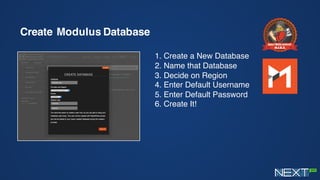
- 49. Create Modulus Database 1. Create a New Database 2. Name that Database 3. Decide on Region 4. Enter Default Username 5. Enter Default Password 6. Create It!
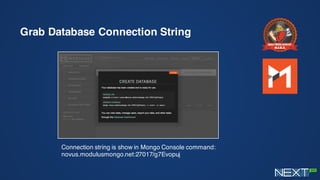
- 50. Grab Database Connection String Connection string is show in Mongo Console command: novus.modulusmongo.net:27017/g7Evopuj
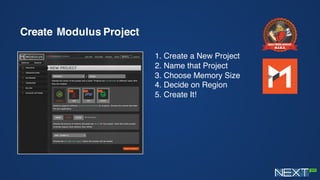
- 51. Create Modulus Project 1. Create a New Project 2. Name that Project 3. Choose Memory Size 4. Decide on Region 5. Create It!
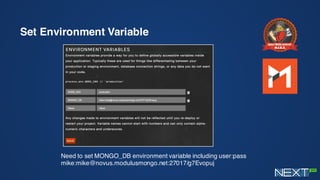
- 52. Set Environment Variable Need to set MONGO_DB environment variable including user:pass mike:mike@novus.modulusmongo.net:27017/g7Evopuj
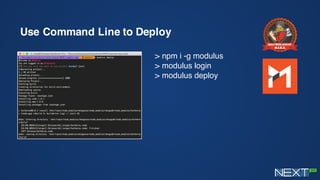
- 53. Use Command Line to Deploy > npm i -g modulus > modulus login > modulus deploy
- 54. Thank you! Charlie Key Co-Founder, Modulus @Zwigby Jen Looper Developer Advocate, Telerik @jenlooper