Open save file vb6 program
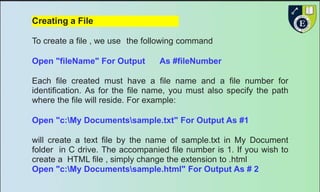
- 3. Creating a File To create a file , we use the following command Open "fileName" For Output As #fileNumber Each file created must have a file name and a file number for identification. As for the file name, you must also specify the path where the file will reside. For example: Open "c:My Documentssample.txt" For Output As #1 will create a text file by the name of sample.txt in My Document folder in C drive. The accompanied file number is 1. If you wish to create a HTML file , simply change the extension to .html Open "c:My Documentssample.html" For Output As # 2
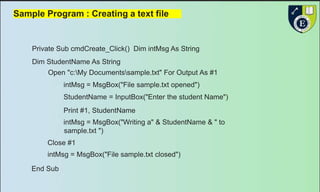
- 4. Sample Program : Creating a text file Private Sub cmdCreate_Click() Dim intMsg As String Dim StudentName As String Open "c:My Documentssample.txt" For Output As #1 intMsg = MsgBox("File sample.txt opened") StudentName = InputBox("Enter the student Name") Print #1, StudentName intMsg = MsgBox("Writing a" & StudentName & " to sample.txt ") Close #1 intMsg = MsgBox("File sample.txt closed") End Sub
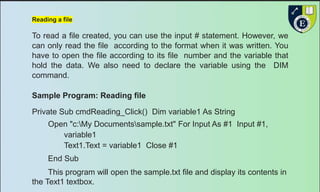
- 5. Reading a file To read a file created, you can use the input # statement. However, we can only read the file according to the format when it was written. You have to open the file according to its file number and the variable that hold the data. We also need to declare the variable using the DIM command. Sample Program: Reading file Private Sub cmdReading_Click() Dim variable1 As String Open "c:My Documentssample.txt" For Input As #1 Input #1, variable1 Text1.Text = variable1 Close #1 End Sub This program will open the sample.txt file and display its contents in the Text1 textbox.
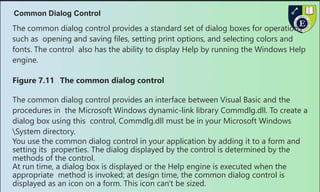
- 6. Common Dialog Control The common dialog control provides a standard set of dialog boxes for operations such as opening and saving files, setting print options, and selecting colors and fonts. The control also has the ability to display Help by running the Windows Help engine. Figure 7.11 The common dialog control The common dialog control provides an interface between Visual Basic and the procedures in the Microsoft Windows dynamic-link library Commdlg.dll. To create a dialog box using this control, Commdlg.dll must be in your Microsoft Windows System directory. You use the common dialog control in your application by adding it to a form and setting its properties. The dialog displayed by the control is determined by the methods of the control. At run time, a dialog box is displayed or the Help engine is executed when the appropriate method is invoked; at design time, the common dialog control is displayed as an icon on a form. This icon can't be sized.
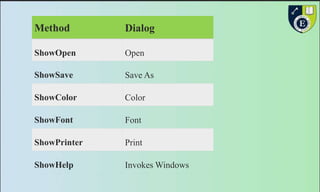
- 7. The common dialog control allows you to display these commonly used dialog boxes: ï· Open ï· Save As ï· Color ï· Font ï· Print To use the common dialog control 1. If you haven't already done so, add the common dialog control to the toolbox by selecting Components from the Project menu. Locate and select the control in the Controls tabbed dialog, then click the OK button. 2. On the toolbox, click the CommonDialog control and draw it on a form. When you draw a common dialog control on a form, it automatically resizes itself. Like the timer control, the common dialog control is invisible at run time. 3. At run time, use the appropriate method, as listed in the following table, to display the desired dialog.
- 8. Method Dialog ShowOpen Open ShowSave Save As ShowColor Color ShowFont Font ShowPrinter Print ShowHelp Invokes Windows
- 9. Creating and Reading files using Common Dialog Box This example uses the common dialog box to create and read the text file, which is much easier than the previous examples.Many operations are handled by the common dialog box. The following is the program: Dim linetext As String Private Sub cmdOpen_Click() CommonDialog1.Filter = "Text files{*.txt)|*.txt" CommonDialog1.ShowOpen If CommonDialog1.FileName <> "" Then Form1.Caption = CommonDialog1.FileName Open CommonDialog1.FileName For Input As #1 Do Input #1, linetext Text1.Text = Text1.Text & linetext Loop Until EOF(1) End If Close #1 End Sub
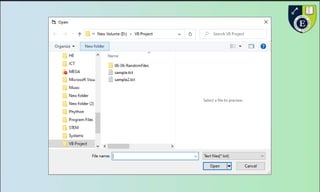
- 10. Private Sub cmdSave_Click() CommonDialog1.Filter = "Text files{*.txt)|*.txt" CommonDialog1.ShowSave If CommonDialog1.FileName <> "" Then Open CommonDialog1.FileName For Output As #1 Print #1, Text1.Text Close #1 End If Form1.Caption = "Saved to " & CommonDialog1.FileName End Sub The syntax CommonDialog1.Filter = "Text files{*.txt)|*.txt" ensures that only the textfile is read or saved .The statement CommonDialog1.ShowOpen is to display the open file dialog box and the statementCommonDialog1.ShowSave is to display the save file dialog box. Text1.Text = Text1.Text & linetext is to read the data and display them in the Text1 textbox The Output window is shown below:

