Raspberry Pi Base - A flexible support frame for Raspberry Pi projects
- 1. PI BASE The flexible support frame for the Raspberry Pi Ideal for school projects and hobbyists 10th September 2014 SF Innovations
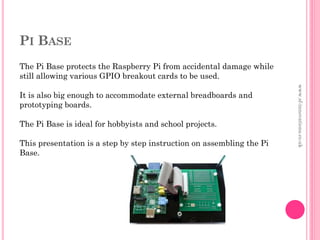
- 2. PI BASE www.sf-innovations.co.uk The Pi Base protects the Raspberry Pi from accidental damage while still allowing various GPIO breakout cards to be used. It is also big enough to accommodate external breadboards and prototyping boards. The Pi Base is ideal for hobbyists and school projects. This presentation is a step by step instruction on assembling the Pi Base.
- 3. www.sf-innovations.co.uk COMPONENTS SUPPLIED The size of the base is 18 cm x 12 cm
- 4. www.sf-innovations.co.uk COMPONENTS SUPPLIED Part Quantity Base 1 Nylon Hex 6mm spacers 8 Bolts M3 6mm Pozi Pan head 8 M3 Nylon nuts 8 20 x 20 x 8mm Rubber feet 4
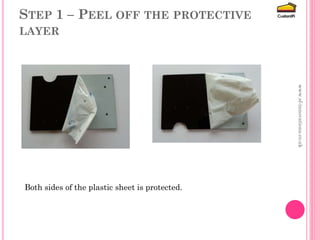
- 5. www.sf-innovations.co.uk STEP 1 ¨C PEEL OFF THE PROTECTIVE LAYER Both sides of the plastic sheet is protected.
- 6. www.sf-innovations.co.uk RASPBERRY PI: MODEL B & MODEL B+ The mounting method for the two models are different. Steps 2A & 2B outline the method for Raspberry Pi model A & B: These have only two holes for mounting. Steps 2B & 3B outline the method for Raspberry Pi model B+ which has 4 mounting holes.
- 7. www.sf-innovations.co.uk STEP 2A ¨C ATTACH THE 4 PILLARS FOR THE PI (MODEL A & B) The four threaded pillars are held in place by the 4 bolts. Two of the pillars go through holes in the Raspberry Pi and The other 2 are for support. Clip the threaded pillar off the 2 supports.
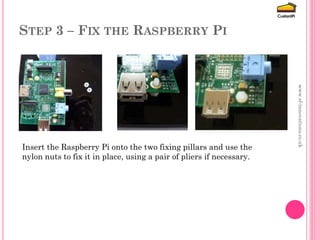
- 8. www.sf-innovations.co.uk STEP 3A ¨C FIX THE RASPBERRY PI MODELS A & B Insert the Raspberry Pi onto the two fixing pillars and use the nylon nuts to fix it in place, using a pair of pliers if necessary.
- 9. www.sf-innovations.co.uk STEP 2B ¨C ATTACH THE 4 PILLARS FOR THE PI (MODEL B+) Attach the four threaded pillars to the Raspberry Pi
- 10. www.sf-innovations.co.uk STEP 3B ¨C FIX THE RASPBERRY PI MODEL B+ Fix the Raspberry Pi Model B+ onto the base using the 4 bolts supplied. Use the nylon nuts to fix it in place, using a pair of pliers if necessary.
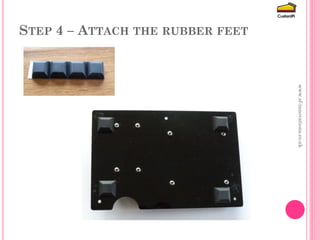
- 11. www.sf-innovations.co.uk STEP 4 ¨C ATTACH THE RUBBER FEET
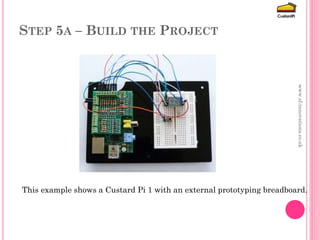
- 12. www.sf-innovations.co.uk STEP 5A ¨C BUILD THE PROJECT This example shows a Custard Pi 1 with an external prototyping breadboard.
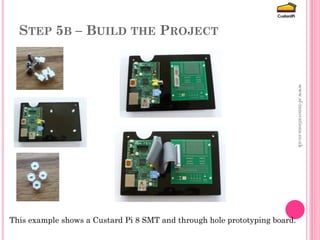
- 13. www.sf-innovations.co.uk STEP 5B ¨C BUILD THE PROJECT This example shows a Custard Pi 8 SMT and through hole prototyping board.
- 14. www.sf-innovations.co.uk The Pi Base is a flexible support frame for Raspberry Pi GPIO projects. Further information: www.sf-innovations.co.uk Blog dedicated to electronics & Raspberry Pi
