Presentation on adobe photoshop® tools
ŌĆó
173 likesŌĆó60,710 views

This document summarizes several selection and retouching tools in Photoshop including the marquee, lasso, and magic wand tools for making selections and the clone stamp, blur, sharpen, smudge, dodge, burn, and sponge tools for retouching images. The marquee tools allow for rectangular, elliptical, single row, and single column selections. The lasso tools create irregular selections through freehand, polygonal, or magnetic paths. The magic wand selects areas of similar color. The clone stamp duplicates areas, blur and sharpen smooth or enhance edges, and the dodge and burn tools lighten or darken specific tones. The smudge and sponge tools blend and adjust saturation respectively.


Presentation on adobe photoshop® tools
- 1. Efforts By:-
- 2. ’āśMarquee Tools. ’āśLasso Tools. ’āśMagic Wand Tool.
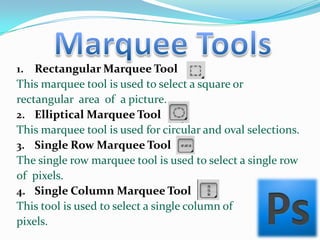
- 3. 1. Rectangular Marquee Tool This marquee tool is used to select a square or rectangular area of a picture. 2. Elliptical Marquee Tool This marquee tool is used for circular and oval selections. 3. Single Row Marquee Tool The single row marquee tool is used to select a single row of pixels. 4. Single Column Marquee Tool This tool is used to select a single column of pixels.
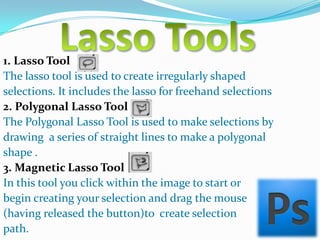
- 4. 1. Lasso Tool The lasso tool is used to create irregularly shaped selections. It includes the lasso for freehand selections 2. Polygonal Lasso Tool The Polygonal Lasso Tool is used to make selections by drawing a series of straight lines to make a polygonal shape . 3. Magnetic Lasso Tool In this tool you click within the image to start or begin creating your selection and drag the mouse (having released the button)to create selection path.
- 5. Magic Wand Tool ’üČThe Magic Wand Tool lets you to select a consistently colored area (for example , a red flower) without having to trace it`s outline. you specify the color range, or tolerance ,for the magic wand tool`s selection .
- 6. Some of the widely used Photoshop tools are:- ’āśClone Stamp Tool. ’āśBlur Tool ’āśSharpen Tool ’āśSmudge Tool ’āśDodge Tool ’āśBurn Tool ’āśSponge Tool
- 7. The Clone Stamp Tool operates like a brush Tool except that rather than selecting a color to paint with, you select an area of the image to duplicate or clone by Alt+Clicking the area you wish to duplicate. As you paint with the Clone Stamp Tool a cross-hair passes over the area youŌĆÖve selected for reference. The size of the brush you select in the Brushes Palette determines the size or radius of the cloning area. This tool is an outstanding tool for retouching photographs
- 8. The Blur Tool is used to blur areas of the image by painting over them . Blur Tool has various types of options like mode , strength, size & hardness of the brush being used. The different types of modes are Normal, Lighten, Darken, Hue, Saturation, Color and Luminosity. The Blur Tool is normally used to create mirror images and to make a normal image look like a HD image.
- 9. The Sharpen Tool is used to sharpen areas and edges of The image by painting over them. The sharpen tool is useful primarily for popping out highlights on shiny objects, or maybe to give an important object a little extra "pop" after you've resampled an image. Remember to use it sparingly, though, and always create a snapshot first because it's so easy to redo it.
- 10. The Smudge Tool is grouped with the retouching tools, but it's actually used more often in painting. For retouching purposes it can be used to quickly rub out a minor blemish, touch up the shine on someone, and so on. It can also be useful for blending out the jaggies that can sometimes occur when sizing up an image. This is another tool you want to be careful not to overdo and be sure to keep the pressure setting low.
- 11. Dodge ToolThe Dodge Tool work best on grayscale images. On color image the dodge tool will wash out color and details. In a grayscale image, this tool is used to lighten shadows or overexposed areas and to darken underexposed areas. It has a unique option for "range" with choices of highlights, midtones, and shadows. In grayscale images, one example where the dodge tool is useful would be for removing dark shadows from under a person's eyes.
- 12. The Burn Tool also works best on grayscale images. the burn tool will just turn the area black or sunburned-looking. In a grayscale image, these tools are used to lighten shadows or overexposed areas and to darken underexposed areas. When set to highlights, only the lightest areas are affected. When set to shadows, only the darkest areas are affected. When set to midtones, only the middle tones are affected. An example where the burn tool would be useful would be to reduce the shine on a persons face from light reflecting off it.
- 13. The Sponge Tool allows you to adjust the color saturation where you paint. It has two modes: desaturate and saturate. The pressure option controls how strong the effect is applied. Desaturate mode dulls the colors, turning them grey. Saturate mode intensifies the color, making them brighter. In desaturate mode, the sponge tool is also useful for toning down colors in the background of an image when you want to make a foreground object stand out, or for giving a color photo a vintage, colorized appearance.