Sap navigation 2013
- 1. SAP Basic Navigation Work Instruction Guide November 2013 SAP Basic Navigation 1/27 SAP Basic Navigation SAP Basic Navigation
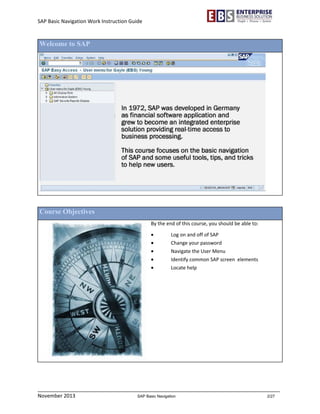
- 2. SAP Basic Navigation Work Instruction Guide November 2013 SAP Basic Navigation 2/27 Welcome to SAP Course Objectives By the end of this course, you should be able to: ď‚· Log on and off of SAP ď‚· Change your password ď‚· Navigate the User Menu ď‚· Identify common SAP screen elements ď‚· Locate help
- 3. SAP Basic Navigation Work Instruction Guide November 2013 SAP Basic Navigation 3/27 Getting Started Getting Started - Section Objectives Section Objectives By the end of this section, you should be able to: ď‚· Log on to SAP ď‚· Change your password at log on ď‚· Log off of SAP
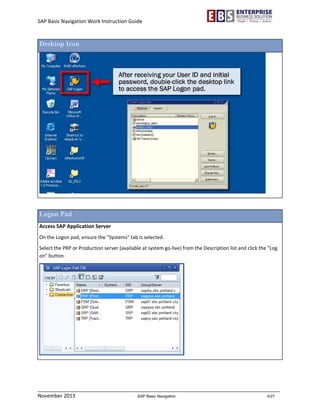
- 4. SAP Basic Navigation Work Instruction Guide November 2013 SAP Basic Navigation 4/27 Desktop Icon Logon Pad Access SAP Application Server On the Logon pad, ensure the "Systems" tab is selected. Select the PRP or Production server (available at system go-live) from the Description list and click the "Log on" button.
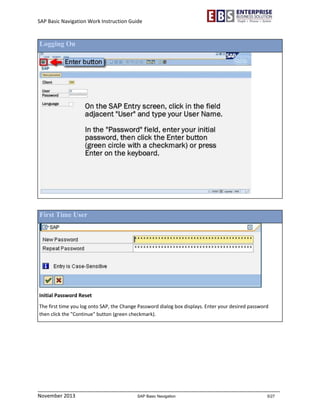
- 5. SAP Basic Navigation Work Instruction Guide November 2013 SAP Basic Navigation 5/27 Logging On First Time User Initial Password Reset The first time you log onto SAP, the Change Password dialog box displays. Enter your desired password then click the "Continue" button (green checkmark).
- 6. SAP Basic Navigation Work Instruction Guide November 2013 SAP Basic Navigation 6/27 Logging Off Multiple Log Off Methods There are four ways to log off SAP, but the simplest is to click the Exit button (yellow circle with the white up-arrow). This triggers a pop-up box asking you to confirm your log off request. Click "Yes" to exit. Easy Access Screen
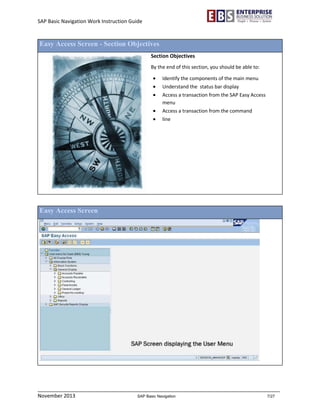
- 7. SAP Basic Navigation Work Instruction Guide November 2013 SAP Basic Navigation 7/27 Easy Access Screen - Section Objectives Section Objectives By the end of this section, you should be able to: ď‚· Identify the components of the main menu ď‚· Understand the status bar display ď‚· Access a transaction from the SAP Easy Access menu ď‚· Access a transaction from the command ď‚· line Easy Access Screen
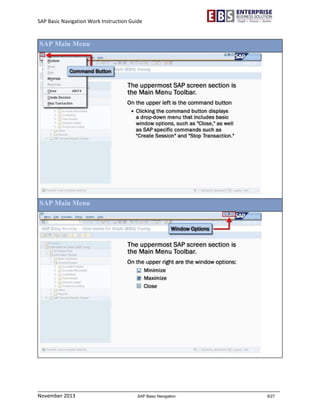
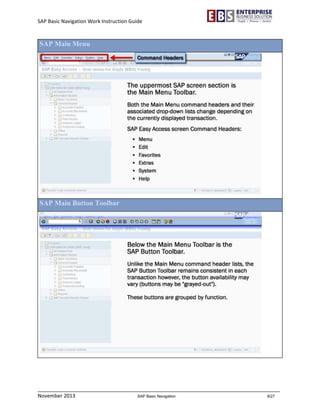
- 8. SAP Basic Navigation Work Instruction Guide November 2013 SAP Basic Navigation 8/27 SAP Main Menu SAP Main Menu
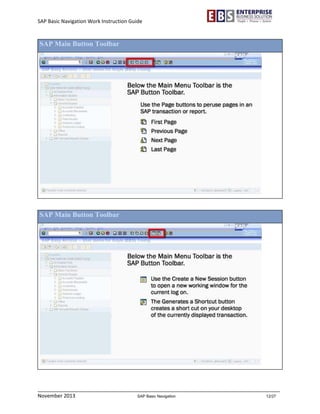
- 9. SAP Basic Navigation Work Instruction Guide November 2013 SAP Basic Navigation 9/27 SAP Main Menu SAP Main Button Toolbar
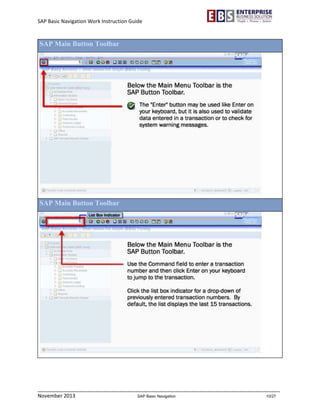
- 10. SAP Basic Navigation Work Instruction Guide November 2013 SAP Basic Navigation 10/27 SAP Main Button Toolbar SAP Main Button Toolbar
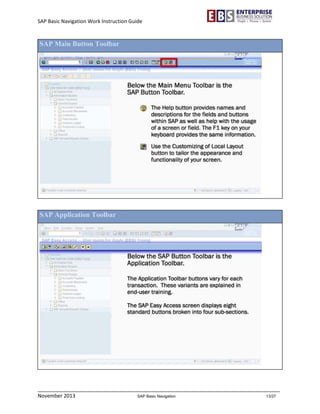
- 11. SAP Basic Navigation Work Instruction Guide November 2013 SAP Basic Navigation 11/27 SAP Main Button Toolbar SAP Main Button Toolbar
- 12. SAP Basic Navigation Work Instruction Guide November 2013 SAP Basic Navigation 12/27 SAP Main Button Toolbar SAP Main Button Toolbar
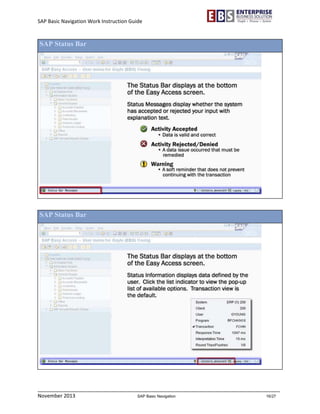
- 13. SAP Basic Navigation Work Instruction Guide November 2013 SAP Basic Navigation 13/27 SAP Main Button Toolbar SAP Application Toolbar
- 14. SAP Basic Navigation Work Instruction Guide November 2013 SAP Basic Navigation 14/27 SAP Application Toolbar SAP Application Toolbar
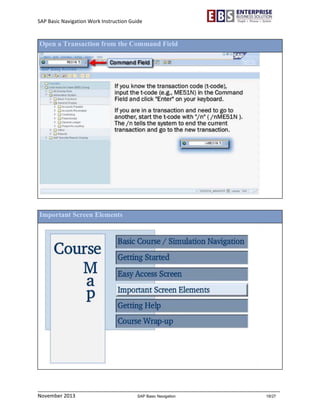
- 15. SAP Basic Navigation Work Instruction Guide November 2013 SAP Basic Navigation 15/27 SAP Menu Tree SAP Status Bar
- 16. SAP Basic Navigation Work Instruction Guide November 2013 SAP Basic Navigation 16/27 SAP Status Bar SAP Status Bar
- 17. SAP Basic Navigation Work Instruction Guide November 2013 SAP Basic Navigation 17/27 Opening a Transaction Open a Transaction from the Menu Tree The menu tree is arranged in folders. The folders are organized by groups of modules, module, the processes within the module and, finally, transaction. Groups of Modules > Module > Process > Transaction Transactions are identified by their associated white cube. Once you locate the transaction to open, double-click the transaction name in the menu tree and the transaction displays in a blank, ready for data entry format.
- 18. SAP Basic Navigation Work Instruction Guide November 2013 SAP Basic Navigation 18/27 Open a Transaction from the Command Field Important Screen Elements
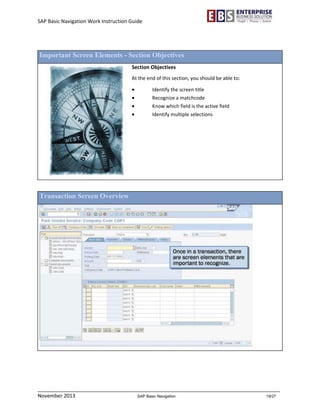
- 19. SAP Basic Navigation Work Instruction Guide November 2013 SAP Basic Navigation 19/27 Important Screen Elements - Section Objectives Section Objectives At the end of this section, you should be able to: ď‚· Identify the screen title ď‚· Recognize a matchcode ď‚· Know which field is the active field ď‚· Identify multiple selections Transaction Screen Overview
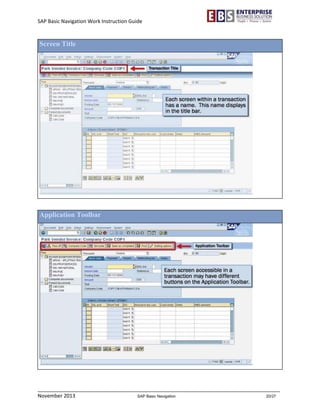
- 20. SAP Basic Navigation Work Instruction Guide November 2013 SAP Basic Navigation 20/27 Screen Title Application Toolbar
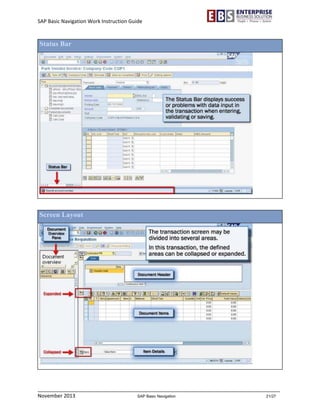
- 21. SAP Basic Navigation Work Instruction Guide November 2013 SAP Basic Navigation 21/27 Status Bar Screen Layout
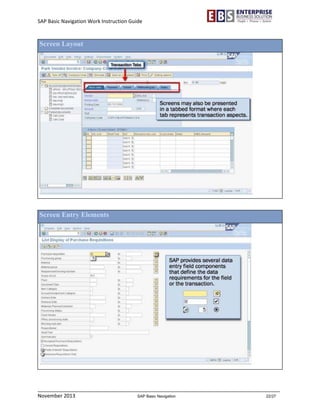
- 22. SAP Basic Navigation Work Instruction Guide November 2013 SAP Basic Navigation 22/27 Screen Layout Screen Entry Elements
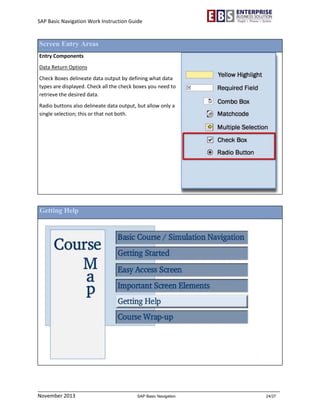
- 23. SAP Basic Navigation Work Instruction Guide November 2013 SAP Basic Navigation 23/27 Screen Entry Areas Entry Components Transaction screens employ several input field types to assist in completing the transaction or manipulate output data. Input Fields A yellow highlighted box is the active field where your cursor currently lies. Required fields contain a box with checkmark icon and must be completed to finish the transaction. Screen Entry Areas Entry Components Search/Selection Fields Combo boxes denote a drop-down list of standardized selectable items. Matchcode is a button to the right of a selected field where defined lists or search options are available. Multiple Selection (range) buttons offer the ability to build both contiguous and non-adjoining data sets (e.g., to - from or this plus that).
- 24. SAP Basic Navigation Work Instruction Guide November 2013 SAP Basic Navigation 24/27 Screen Entry Areas Entry Components Data Return Options Check Boxes delineate data output by defining what data types are displayed. Check all the check boxes you need to retrieve the desired data. Radio buttons also delineate data output, but allow only a single selection; this or that not both. Getting Help
- 25. SAP Basic Navigation Work Instruction Guide November 2013 SAP Basic Navigation 25/27 Getting Help - Section Objectives Section Objectives At the end of this section, you should be able to: ď‚· Set up CoP Custom Help ď‚· Access CoP Custom Help ď‚· Access online training documentation through EBS Training Website: SAP Learning Center ď‚· Open field help for field level information SAP Learning Center Website Website Location: www.portlandoregon.gov/SAPLC The SAP Learning Center is located on PortlandOregon.gov and can be accessed from anywhere. Help content includes user guides, job aids and work instructions.
- 26. SAP Basic Navigation Work Instruction Guide November 2013 SAP Basic Navigation 26/27 Getting Help Overview City of Portland Custom Help CoP Custom Help Before using CoP custom help, select the CoP Custom Help Setup option from the Help drop-down on the Main menu. This enables field level transaction assistance when selecting the CoP Custom Help. These Help files are also freely accessible at the SAP Learning Center website: www.portlandoregon.gov/saplc
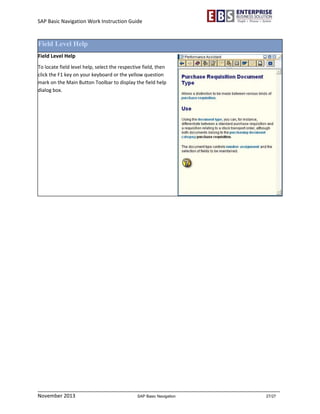
- 27. SAP Basic Navigation Work Instruction Guide November 2013 SAP Basic Navigation 27/27 Field Level Help Field Level Help To locate field level help, select the respective field, then click the F1 key on your keyboard or the yellow question mark on the Main Button Toolbar to display the field help dialog box.

