Set up vs code for salesforce
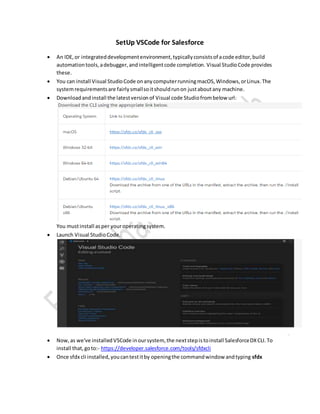
- 1. SetUp VSCode for Salesforce ’éĘ An IDE,or integrateddevelopmentenvironment,typicallyconsistsof acode editor,build automationtools,adebugger,andintelligentcode completion. Visual StudioCode provides these. ’éĘ You can install Visual StudioCode onanycomputerrunningmacOS,Windows,orLinux.The systemrequirementsare fairlysmallsoitshouldrunon justaboutany machine. ’éĘ Downloadandinstall the latestversionof Visual code Studiofrombelow url: You mustinstall asper youroperatingsystem. ’éĘ Launch Visual StudioCode. ’éĘ Now,as we've installedVSCode inoursystem, the nextstepistoinstall SalesforceDXCLI.To install that,goto:- https://developer.salesforce.com/tools/sfdxcli ’éĘ Once sfdx cli installed,youcantestitby openingthe commandwindow andtyping sfdx
- 2. ’éĘ You can alsotest,cli from VScode: ’éĘ If by any of the above waysmentionedabove,givesyousimilarresultthanyourcli isperfectly installed. ’éĘ Install SalesforceExtensionPack, Onthe lefttoolbar, clickthe Extensionsicon. The icon ishighlightedbyblue circleinbelow picture:
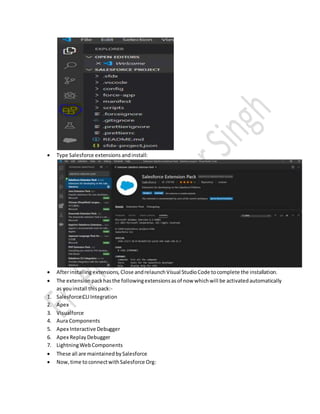
- 3. ’éĘ Type Salesforce extensions andinstall: ’éĘ Afterinstallingextensions, Close andrelaunchVisual StudioCode tocomplete the installation. ’éĘ The extensionpackhasthe followingextensionsasof now whichwill be activatedautomatically as youinstall thispack:- 1. Salesforce CLIIntegration 2. Apex 3. Visualforce 4. Aura Components 5. Apex Interactive Debugger 6. Apex ReplayDebugger 7. LightningWebComponents ’éĘ These all are maintainedbySalesforce ’éĘ Now,time to connectwithSalesforce Org:
- 4. 1. Ctrl + Shift+ P or go to the View ->CommandPalette andyou'll see the command palette.Startwriting:- Create ProjectwithManifestand pressenteronthe firstoption as shownbelow:- 2. Enter,projectname: 3. Selectthe locationwhere youwantthe projecttobe created.Move to the desired locationinthe dialogbox as shownbelow andclickon Create Project 4. Your projecthas beencreated,like mine:
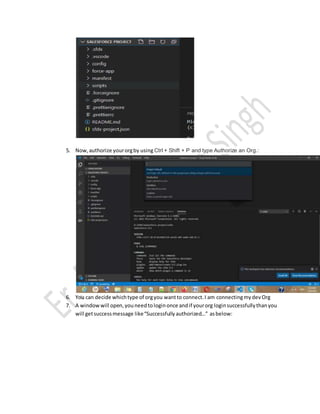
- 5. 5. Now,authorize yourorgby using Ctrl + Shift + P and type Authorize an Org.: 6. You can decide whichtype of orgyou wantto connect.I am connectingmydevOrg 7. A windowwill open,youneedtologinonce andif yourorg loginsuccessfullythanyou will getsuccessmessage likeŌĆ£Successfully authorizedŌĆ”ŌĆØ asbelow:


