Techsmith Morae Manager Guide for Training
- 1. Morae Manager! Morae Training Session 2 / Fall 2014 Simmons SLIS Usability Lab Hey, letŌĆÖs play withŌĆ”
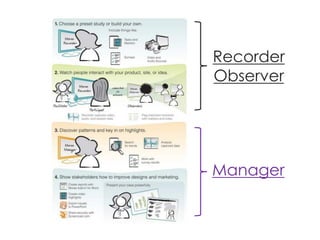
- 2. Morae Recorder Morae Observer Morae Manager Do your own research! TODAY
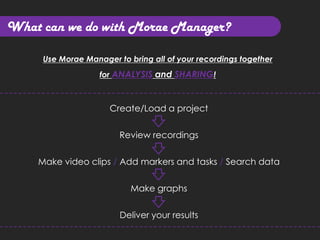
- 4. What can we do with Morae Manager? Create/Load a project Review recordings Make video clips / Add markers and tasks / Search data Make graphs Deliver your results Use Morae Manager to bring all of your recordings together for ANALYSIS and SHARING!
- 5. Big 3 in Morae Manager 1 Analyze 2 Graph 3 Present
- 6. 0) Setting up Morae Manager 0 Setting Up ’ü¼ Open Morae Manager ’ü¼ Create New Project ŌĆó So we can combine participants ŌĆó Name project and save in SAME FOLDER as everything else ’ü¼ Add files ŌĆó All files you have from recorder and observer in your file
- 7. 1) Analyze > Interface
- 8. 1) Analyze > Tasks 1 Analyze You can review your videos, take notes, add markers, and etc. ’ü¼ Time bar ŌĆó Zoom in and zoom out, change playing speed, and select start or end ŌĆó Create and edit markers, tasks, and movie clips here ’ü¼ Add marker ŌĆó Select a point on the time bar ’āĀ click the ŌĆ£Log MarkerŌĆØ ’āĀ choose type, add notes, put your name, etc. ŌĆó Edit marker definitions: ŌĆ£Edit - Marker DefinitionŌĆØ ’ü¼ Create task ŌĆó Select starting & end point ’āĀ click the ŌĆ£Log TaskŌĆØ
- 9. 1) Analyze > Tasks 1 Analyze You can review your videos, take notes, add markers, and etc. ’ü¼ Create movie clip ŌĆó Select starting & end point ’āĀ click the ŌĆ£Movie ClipŌĆØ ’ü¼ Create image clip ŌĆó Select a point on the time bar ’āĀ click the ŌĆ£Create ImageŌĆØ ’ü¼ View Survey answers ŌĆó ŌĆ£View ŌĆō Survey ResultsŌĆØ ’ü¼ Search data ŌĆó Search across all or select recording sessions in a study for data ŌĆó View mode: ŌĆ£List ViewŌĆØ, ŌĆ£Chart ViewŌĆØ
- 10. 3) Graph > Interface
- 11. 2) Graph > Tasks 2 Graph Create graphs depending on your data. ’ü¼ Graph template ŌĆó For frequently used analysis, just click and customize yours ’ü¼ Create graphs ŌĆó Click ŌĆ£Create New GraphŌĆØ ’āĀ Pick analysis type depending on data (2 steps) ’āĀ Graph by Participant / by Task is available ’āĀ Pick a metric ’ü¼ Edit graphs ŌĆó Graph preview ŌĆó Control ŌĆ£Graph PropertiesŌĆØ ŌĆó Edit graph type, metric, axis, design, etc. ’ü¼ Save & Export a graph (DonŌĆÖt forget!) ŌĆó Save graph and name appropriately ŌĆó Export as images or Excel files
- 12. 3) Present > Interface
- 13. 3) Present > Tasks 3 Present You can make video or image clips for your presentation! ŌĆó Combine clips ŌĆó Drag and drop videos/images/graphs from ŌĆ£Clip BinŌĆØ to ŌĆ£StoryboardŌĆØ ŌĆó Make transitions between clips ŌĆó Create title clip ŌĆó Right click on ŌĆ£Clip BinŌĆØ area ’āĀ Click ŌĆ£Create Title ClipŌĆØ ’āĀ Define details ŌĆó Save and export ŌĆó Right click on ŌĆ£StoryboardŌĆØ area ’āĀ Click ŌĆ£Highlight VideoŌĆØ to save storyboard and export ’āĀ Produce to PowerPoint of file ŌĆó ALWAYS the same folder
- 14. Oh no, Did you Forget Everything? DonŌƤt worry, just go to our Moodle or search ŌĆ×Morae TutorialŌƤ on Google!
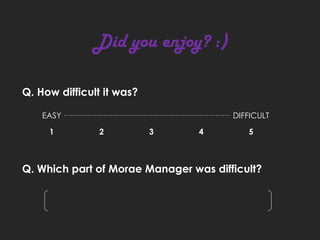
- 15. Q. How difficult it was? Q. Which part of Morae Manager was difficult? Did you enjoy? :) EASY DIFFICULT 1 2 3 4 5
- 16. Simmons SLIS Usability Lab http://gslis.simmons.edu/usability


