Training crimp
- 1. ECCO Hybrid Crimp Process vs Machine PTEI by Jacson Cardoso
- 2. 2 Machine Specification and Settings Lonjun Crimping Machine Model LG 22169 Year 2014 Serial N: 142216B1026 RED Bottom = Emergency Air Pressure Control Set: 4 – 5 Bar Side Blade L/R adjustment(Gap) Actual Use 1 Ps. Can be adjustable as per different material substance General Control Panel Side Blades Temp 50 - 60 Top Blade 80 – 100 Temp Timer 20 – 25 Seg Power ON/OFF Speed control for Top Blade Setting Slow ( No measure Tool to define the real Timer)
- 3. 3 Blade Side Adjustment (Leather control for substance) Please before adjust the CLOCK make sure the ADJUSTER SW(SIDE WIDTH) are ON Plus+Minus-
- 4. 4 Control General Panel Make sure all Lights are On in Panel BladeSide Temp Top Blade Temp Timer
- 5. 5 Air Pressure Control Control Bottom +/- Manometer to control the Pressure Make sure we don’t have Leaking Water Control Speed of Top Blade (Back of machine)
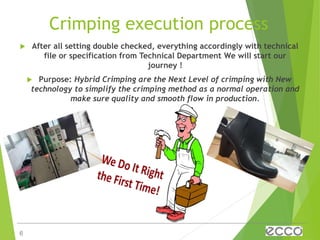
- 6. 6 Crimping execution process ? After all setting double checked, everything accordingly with technical file or specification from Technical Department We will start our journey ! ? Purpose: Hybrid Crimping are the Next Level of crimping with New technology to simplify the crimping method as a normal operation and make sure quality and smooth flow in production.
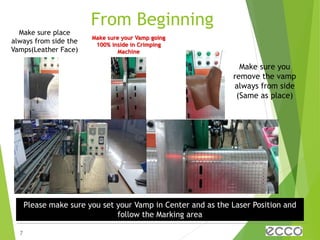
- 7. 7 From Beginning Make sure place always from side the Vamps(Leather Face) Make sure your Vamp going 100% inside in Crimping Machine Make sure you remove the vamp always from side (Same as place) Please make sure you set your Vamp in Center and as the Laser Position and follow the Marking area
- 8. 8 Operations Make sure machine On Manual to Blade go Down(In Steps) Make sure you have adjust well the Deep of the Blade !!! Vamp always 100% inside. OK NOT OK Be Passionate per Details
- 9. 9 ON Machine and Move Blade + Safety But How the Top Blade move down ? Power ON Press ON Operator Safety Make sure you have all check up everyday before Start your work Press for Emergency
- 10. 10 Possible problems Why we have wrinkles in the center of the Vamp ???
- 11. 11 Solutions Check if you have the Right Temperature ! Check if you have the Right Pressure! MAKE SURE YOUR TOP MOLD SPEED IS ACCORDINLY WITH ECCO TRAINING STANDARD ! The examples showed here are the principal cause of problems with in the center of the Vamp !
- 12. 12 Wrinkles in the side ??? Why To prevent wrinkles in the molded Vamp, please adjust the “Gap” between the two pressing plates. Make sure your Leather Vamp substance are accordingly. Do you know me ???
- 13. 13 Remove and place your Vamp in the Right way
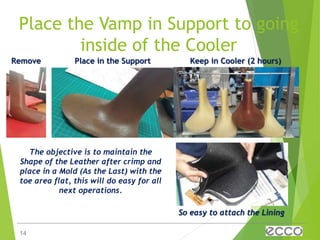
- 14. 14 Place the Vamp in Support to going inside of the Cooler Remove Place in the Support Keep in Cooler (2 hours) The objective is to maintain the Shape of the Leather after crimp and place in a Mold (As the Last) with the toe area flat, this will do easy for all next operations. So easy to attach the Lining
- 15. 15 Fracture in the Leather !!! Again have a Problem ??? Fracture in the Leather ???
- 16. 16 Team Work – Focus Solution Be Positive To prevent fracture like the photo please make sure you have the “Gap” enlarge accordingly with your Leather Substance
- 17. 17 Never Say Never !!! Cut the IM of your Life !!!
- 18. 18 The Past !!!
- 19. 19 The Present The Future !!!


