WordPress Biratnagar Meetup #1Wordpress Installation : By Sajjal Neupane
- 1. Installation And Customization OF Wordpress By :- Sajjal Neupane
- 2. Local Host Or Web Server? ď‚— Local host refers to your computer. Installing Wordpress in Localhost allows you to design, customize and manage your site locally in your computer without internet connection. ď‚— Use WAMP or XAMPP for Windows, LAMP for Linux and MAMP for MAC os computers as local servers.
- 3. Then, What is Web Server? ď‚— Web server refers to the internet space where your site is hosted. Installing Wordpress in a web server requires internet connection and you can design, customize and manage it from any computer that is connected to the internet.
- 4. Is There Any Difference in Installation Procedure? ď‚— Basically there is no any vast difference in installing Wordpress locally or in web server but there might be some tiny difference according to the services provided by your hosting company.
- 5. Ok, I Understand. Now What? ď‚— Now, we will start learning about how to install Wordpress locally in your computer? ď‚— First we have to install the local server in your computer according to your OS platform. As previously mentioned, Choose WAMP or XAMPP for windows, LAMP for Linux and MAMP for Mac os.
- 6. Lets Assume, We have WAMP.  Installing Wordpress in WAMP is quite easier. If you don’t have WAMP server then download it from :- http://www.wampserver.com/en/  Install it in your computer and Run it.
- 7. Now, Installing Wordpress. ď‚— First you have to download the installation package from http://wordpress.org. ď‚— Now extract the installation package into the WWW folder inside Wamp in C drive. ď‚— Now open any web browser and type http://localhost in the address bar.
- 8. Set up The Database.  Wordpress stores data in backend format (In a Database) So, it requires database configuration in your server.  Go to PhpMyAdmin in your localhost and select create a database.  Type anything in the name field, say “Wordpress” and click Create.
- 9. Add a User in A Dabase. ď‚— You must add at least one user in your database to install wordpress. ď‚— Select the database that you have just created and click on the Privilege option in top right corner. ď‚— Select add new user and give any username and password. Say username = root and password = pass.
- 10. Grant Privilege to User. ď‚— You have to grant all privilege ( Give Permissions) to user. ď‚— To do so, Click on the Check All option in the middle of Privilege page and click on Add New User. ď‚— Now you have done. Just note down the Database Name, User Name and Password.
- 11. The Final Step. ď‚— Now again type http://localhost in your web browser and Click on Wordpress in Your Projects section. ď‚— It will ask to create a configuration file. Click OK. ď‚— Now you have to input the database details in the required fields.
- 12. Here Is How?
- 13. Provide your Site Details. ď‚— After Database configuration, It will ask you to provide the details of your site. ď‚— Give a Title and Subtitle to your Site, Choose a username and set the Password for the new user.
- 14. Run and Install. ď‚— After providing all the correct informations, just click on Run And Install.
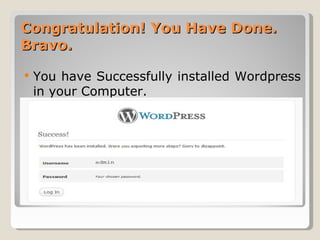
- 15. Congratulation! You Have Done. Bravo. ď‚— You have Successfully installed Wordpress in your Computer.
- 16. Next Step is to Design and Customize. ď‚— After a successful installation you have to design and customize your newly create Wordpress site. ď‚— There are thousands of free themes that you can install in your site and customize them as per your requirements. ď‚— You just try to do it yourself. It is very easy. If not then the Designing and Customization procedure will be explained in the next meetup.
- 17. Thank You ď‚— Thank you for providing your valuable Time and Attention. ď‚— We would like to hear your review. ď‚— Please do not Hesitate giving Negative Feedback. ď‚— See you in The Next Meetup.


