Juliet evangelista
Download as pptx, pdf0 likes78 views

This document provides a basic tutorial on how to use GIMP, an open-source graphic design program, to blend images, create partial transparency, superimpose images, and remove backgrounds. It outlines the following steps: (1) choose two pictures and add a layer mask to blend them; (2) use the gradient tool to create partial transparency; (3) merge layers and paste one image onto another to superimpose them; and (4) use the fuzzy select tool and layer transparency settings to remove backgrounds and add other backgrounds or paste selections into new images. The goal is to teach basic image editing and manipulation techniques in GIMP.
1 of 18
Download to read offline


Ad
Recommended
Marie christine joyce buena
Marie christine joyce buenaVirgilio Galemba
╠²
The document provides instructions for blending two images together in GIMP and removing an image's background.
To blend images, the second image is given a layer mask initialized to white. The Gradient tool is used to create partial transparency from right to left. The layers are then merged.
To remove a background, the Fuzzy Select tool selects the background which is then given an alpha channel for transparency. The Delete key removes the selected background, leaving the image on a transparent layer. The edges are smoothed before saving.Tutorial in Gimp 2.10.2
Tutorial in Gimp 2.10.2RalphEmmanuelBaesa
╠²
The document is a tutorial for blending images using GIMP version 2.10.2, detailing steps such as merging photos, adding layer masks, and removing backgrounds. It also explains how to change the color of a dress in an image using various tools and options in GIMP. Each step includes menu navigation and tool selection to achieve the desired outcome.Background Editing Tutorials
Background Editing TutorialsMrLawler
╠²
The document provides instructions for several photo editing techniques in Photoshop:
1. Extending the background by cropping an image and using the clone stamp tool to fill in the extra white space.
2. Replacing colors in an image using the color replacement tool by sampling one color and replacing it with another.
3. Faking differential focus or depth of field by using the quick mask tool and gradients or paintbrush to selectively blur parts of the image.
4. Removing objects from photos using the clone stamp tool to sample and replace areas with background elements.GIMP Tutorial by Juan Rodrigo Badiola
GIMP Tutorial by Juan Rodrigo BadiolaJuanRodrigoBadiola
╠²
The document provides instructions for removing the background of an image in 4 steps:
1. Use the Fuzzy Select Tool to select the image background and add transparency.
2. Add an alpha channel to make the background transparent.
3. Delete the selected background.
4. Apply a Gaussian blur to smooth the edges of the selection.Edgy Colors
Edgy Colorssnshnangel04
╠²
The document provides instructions for selectively coloring the eyes in a black and white photo using layers and masks in Photoshop. The steps are: 1) Duplicate the photo layer twice; 2) Apply high pass filters to layers to sharpen details; 3) Desaturate the top layer and change its blend mode; 4) Repeat for another layer; 5) Add a curves adjustment layer and paint with white on the mask to color the eyes; 6) Invert the mask selection and desaturate to remove color from the rest of the photo. Fine-tuning of the eye color is done by adjusting the curves layer.GIMP BASICS by Aedam Ampongan
GIMP BASICS by Aedam AmponganAedamIsidoreAmpongan
╠²
This tutorial teaches how to remove image backgrounds in GIMP. It takes the reader through 5 steps: 1) Select the background using the Fuzzy Select Tool, 2) Add an alpha channel for transparency, 3) Delete the selected background, 4) Fix any jagged edges, and 5) Save the image, choosing "Export" if saving as a JPG. Additional tips are provided for making accurate background selections. A second document demonstrates how to blend two images by opening them as layers, resizing the canvas, arranging the images, adding a layer mask to the top image, and using the Blend Tool to blend the overlap area.Nyssa angela bayos
Nyssa angela bayosVirgilio Galemba
╠²
Gimp is image editing software that contains various tools. It displays the main toolbox with selection, cropping, and erasing tools. Below the toolbox are options for the selected tool. The image window shows the work and layers panel shows the image's layer structure. Below the layers panel are brush, pattern, and gradient options. To blend images in Gimp, select two images and add a layer mask to one with an initialized white mask. Use the gradient tool to make a gradient from right to left across the image. Merge the layers to combine them. You can then copy and paste images between files and move them as desired before saving. To change colors, outline the desired area, remove saturation, create a new color layerMenggunakan Radial blur
Menggunakan Radial blurasyarifaisal
╠²
This document provides steps to add a motion blur effect to images to create a sense of movement:
1. Duplicate the background layer to make it editable.
2. Use the Quick Selection tool to select the main subject while excluding background areas.
3. Apply a layer mask to the selection to hide the background and reveal the subject.
6. Apply a Radial Blur filter to the image to create the motion blur effect.Paths, Masks And Blend Modes
Paths, Masks And Blend ModesShan
╠²
The document provides instructions for creating a composite image using paths, layer masks, and blend modes in Photoshop. The 11 step process involves: 1) selecting a high resolution photo, 2) using the pen tool to create a path around the photo, 3) refining the edge selection, 4) creating a layer mask filled with black, 5) adding a gradient overlay to create a fading backlight effect, 6) blending additional images using blend modes and opacity adjustments, and 7) fine tuning the blend using curves adjustments.Tutorial in gimp
Tutorial in gimpMaTheresaFlorendo
╠²
This document provides instructions for three image editing techniques in GIMP: blending images, removing backgrounds, and changing the color of clothing in an image. To blend images, the user opens two images as layers, adds a layer mask, and uses the gradient tool to fade between the images. To remove a background, the fuzzy select tool is used to select the area to keep, and the alpha channel is locked and deleted. To change clothing color, the user outlines the clothing with the paths tool, desaturates the layer, creates a new color layer, fills the selection with the new color, changes the layer mode to overlay, and blurs the edge.Photo shop cs5-watercolor-painting-effect-tutorial
Photo shop cs5-watercolor-painting-effect-tutorialMenSagam Technologies
╠²
This document provides a tutorial for applying a watercolor painting effect to a photo using Photoshop layers and filters. The tutorial involves duplicating the background layer 3 times, hiding the top two layers, applying the Cutout filter to simplify the image, and changing the blend mode to Luminosity. Next, the Dry Brush filter is applied to the next layer with the blend mode changed to Screen. Finally, the Median filter is used on the top layer with the blend mode set to Soft Light to complete the watercolor effect.Basics of gimp
Basics of gimpshanneprincesspanamb
╠²
This document provides instructions for basic tasks in GIMP including changing the size of an image, cropping an image, changing the opacity of a layer, adding a layer mask, and creating partial transparency with a gradient tool. To change the size of an image, select it and choose scale image before entering the desired size. Cropping involves using the crop tool to select the area and pressing enter. Opacity is adjusted by selecting the layer and changing the number above the layers. Adding a layer mask involves clicking the layer, choosing add layer mask, and initializing it as white. Partial transparency is made using the gradient tool with a black to white gradient from the edge to middle of an image.217 quick guide to photoshop cs6
217 quick guide to photoshop cs6Rodel Morales
╠²
This document provides a quick guide to fundamental Photoshop tools and techniques for modifying images, including opening and resizing images, applying adjustments, working with layers and history, using selection tools, and saving images. Key steps outlined are resizing an image using the Image Size option, applying adjustments from the Adjustments panel, using the Lasso and Quick Mask tools to extract an image subject, and saving images in formats like PNG that maintain transparency.Writing ED material
Writing ED material┘ģ┘䞦┘ģžŁ ž┤┘üž¦┘üž®
╠²
This document provides instructions for a Photoshop lesson on basic photo corrections. The lesson contains 3 sections - straightening and cropping an image, replacing colors in an image, and adjusting lightness with the dodge tool. The sections provide step-by-step instructions for using tools like the crop tool, replace color dialog box, and dodge tool to improve a sample photo.Tutorial photoshop
Tutorial photoshopnova arianty
╠²
The document provides instructions for applying a zoom blur effect to an image to highlight the central subject and create a sense of dynamism. The key steps are: 1) Selecting the central subject with an elliptical marquee and feathering the edges; 2) Inverting the selection to apply blur to the surrounding areas; 3) Applying a radial blur with the zoom method at 10-15 amount to pull the blurred areas toward the corners. The result highlights the central subject and lends a dynamic quality to the photo.Making a Circular Cropping in Photoshop
Making a Circular Cropping in Photoshopds2kGTS
╠²
This document provides instructions for resizing and cropping an image in Photoshop. It explains how to resize an image using the Image Size option, how to switch between the Rectangular and Elliptical Marquee tools, and the three types of marquee styles. It also describes how to invert a selection and delete the unselected area to crop an image.5 combining images and applying filters
5 combining images and applying filtersMarty Sison
╠²
This document provides instructions for applying different filters and effects to images in Photoshop. It describes how to add textures and objects to images using layer blending modes and layer masks. It also explains how to replace backgrounds and blur images using smart filters. Filters can be applied and adjusted non-destructively through the Filter Gallery or by converting layers to smart filters.How to copy a layer style in photoshop
How to copy a layer style in photoshopSibghatullah Khattak
╠²
The document provides an overview of using layers and masks in Photoshop CS6, detailing shortcuts, techniques for adding and manipulating masks, and various tasks such as blending images and creating collages. It explains the differences between layer masks and clipping masks, emphasizing non-destructive editing and functionalities like fill colors, gradient tools, and blend modes. The document includes step-by-step tasks to apply these methods effectively in photo editing.Photo retouching tips and tricks in photoshop
Photo retouching tips and tricks in photoshopRemon Mia
╠²
The document provides various tips and tricks for photo retouching in Photoshop, covering color definition, folder management, split-toning effects, and skin retouching techniques. It includes step-by-step instructions for creating non-destructive vignettes, adjusting lighting, achieving distinguished paleness, and utilizing dodge and burn techniques. Additionally, it offers contact information for graphic design services.Information Communication Technology
Information Communication TechnologyNancyDaro
╠²
This document provides instructions for basic image editing techniques in Photoshop, including inserting and resizing images, cropping, changing backgrounds, adjusting layers and opacity, editing brightness/contrast and colors, fixing imperfections, and adding/editing text. It also provides step-by-step instructions for changing an image's opacity, adjusting brightness and contrast using adjustment layers, using different tools like the clone stamp and healing brush to hide imperfections, and adding subtle details.Do not open your computers! part 2
Do not open your computers! part 2Jenina Romulo
╠²
Layer masks allow selective modification of a layer's opacity, unlike adjusting overall opacity. They are a fundamental image editing tool. Gaussian blur reduces noise and detail through blurring with a Gaussian function. Desaturation involves mixing a color with white. The document then provides instructions on using layer masks to combine images with varying opacity, erase portions without destroying layers, and apply blur and cropping effects. Assignments include combining two photos with a screen blend mode, applying Gaussian blur to a photo, and desaturating a photo.Create a canvas banner in photoshop
Create a canvas banner in photoshopNaomiPB
╠²
This document provides a 11 step tutorial for creating a canvas eyelet banner in Photoshop. The steps include setting up a new document, placing an image, duplicating layers, adding texture effects to make it look like canvas, adding photo filters, creating shiny beveled eyelets using shapes and layer styles, and cutting holes through the banner layer for the eyelets. Ruler guides are used to evenly space multiple duplicated eyelet layers across the top of the banner.Changing how your picture looks like (Paint Tool)
Changing how your picture looks like (Paint Tool)Mirea Mizushima
╠²
To resize an image, select Image > Attributes and set the size units and dimensions. Zooming in and out can be done with the zoom tool slider or View > Zoom > Custom. Gridlines can be displayed by selecting View > Zoom > Custom and a percentage, then View > Show Grid. Images can be flipped, rotated, stretched or skewed using options under Image > Flip/Rotate or Image > Resize, Skew.How to Edit in Photoshop (Part 2): Adding Background and Using Adjustment Tools
How to Edit in Photoshop (Part 2): Adding Background and Using Adjustment ToolsMaria Eloisa Blanza
╠²
The document is a guide on basic image manipulation techniques in Photoshop. It covers key topics such as inserting and resizing images, cropping, adjusting brightness and contrast, and using tools like the healing brush and clone stamp for fixing imperfections. Detailed steps are provided for changing layer opacity, adding text, and enhancing images effectively.Dramatic Wrinkles effect Tutorial
Dramatic Wrinkles effect TutorialRAVE19u3
╠²
The document provides steps to create a dramatic wrinkled skin effect in Photoshop:
1. Add a black and white adjustment layer to alter the color to a moody effect.
2. Set the blending mode of the adjustment layer to Overlay.
3. Duplicate the background layer and apply a plastic wrap filter with the blending mode set to Multiply to darken the skin. Animation step by step instruction
Animation step by step instructionManamiIshimura
╠²
The document provides step-by-step instructions for creating a stop animation video in Photoshop. It outlines how to open photos as layers, check the layer orientation and fix any issues, create frames from the layers, adjust the timeline, and save the final animation as a GIF or MP4 file. Troubleshooting tips are also included, such as how to rotate individual layers, make layers the same size, and reduce file size if Photoshop refuses to render large images.Photoshop technical skills
Photoshop technical skillsFigen232
╠²
The document provides instructions for applying a motion blur effect and color tint to an image in Photoshop in 4 steps:
1. Open an image and duplicate its background layer. Apply a motion blur filter to the duplicate layer.
2. Use the rubber tool to erase parts of the blurred duplicate layer, revealing the underlying background image.
3. Create another layer set to the Hue blend mode and fill it with a color picked from the image. Erase parts of this layer with the rubber tool.
4. Merge all layers and save the final image.Writing With Water
Writing With Watersnshnangel04
╠²
1. The document provides instructions for creating a water-like text effect in Photoshop using layers, channels, and filters.
2. Key steps include typing or drawing on an alpha channel, blurring the channel, loading it as a texture, and applying effects like drop shadow, glow, and bevel & emboss to make the text appear as if written in water.
3. Settings are provided as examples, but the instructions emphasize experimenting with different options to achieve a realistic water texture effect.Crazy Photos: An Introduction to GIMP
Crazy Photos: An Introduction to GIMPRino Landa
╠²
The document is a comprehensive guide on using GIMP, an open-source image editing program similar to Photoshop. It details various tools, techniques for cropping, layering, adding filters, and special effects, including basic and advanced editing methods. Additionally, it provides step-by-step instructions for implementing these features to achieve creative outcomes with images.Tutorial in gimp
Tutorial in gimpOscarContreras102
╠²
This tutorial by Oscar B. Contreras Jr. demonstrates how to use GIMP for blending images, removing backgrounds, and changing clothing colors. It provides step-by-step instructions for each process, including the use of layer masks, the fuzzy select tool, and the paths tool. The document concludes with tips on adjusting colors and applying effects to enhance the final results.More Related Content
What's hot (20)
Paths, Masks And Blend Modes
Paths, Masks And Blend ModesShan
╠²
The document provides instructions for creating a composite image using paths, layer masks, and blend modes in Photoshop. The 11 step process involves: 1) selecting a high resolution photo, 2) using the pen tool to create a path around the photo, 3) refining the edge selection, 4) creating a layer mask filled with black, 5) adding a gradient overlay to create a fading backlight effect, 6) blending additional images using blend modes and opacity adjustments, and 7) fine tuning the blend using curves adjustments.Tutorial in gimp
Tutorial in gimpMaTheresaFlorendo
╠²
This document provides instructions for three image editing techniques in GIMP: blending images, removing backgrounds, and changing the color of clothing in an image. To blend images, the user opens two images as layers, adds a layer mask, and uses the gradient tool to fade between the images. To remove a background, the fuzzy select tool is used to select the area to keep, and the alpha channel is locked and deleted. To change clothing color, the user outlines the clothing with the paths tool, desaturates the layer, creates a new color layer, fills the selection with the new color, changes the layer mode to overlay, and blurs the edge.Photo shop cs5-watercolor-painting-effect-tutorial
Photo shop cs5-watercolor-painting-effect-tutorialMenSagam Technologies
╠²
This document provides a tutorial for applying a watercolor painting effect to a photo using Photoshop layers and filters. The tutorial involves duplicating the background layer 3 times, hiding the top two layers, applying the Cutout filter to simplify the image, and changing the blend mode to Luminosity. Next, the Dry Brush filter is applied to the next layer with the blend mode changed to Screen. Finally, the Median filter is used on the top layer with the blend mode set to Soft Light to complete the watercolor effect.Basics of gimp
Basics of gimpshanneprincesspanamb
╠²
This document provides instructions for basic tasks in GIMP including changing the size of an image, cropping an image, changing the opacity of a layer, adding a layer mask, and creating partial transparency with a gradient tool. To change the size of an image, select it and choose scale image before entering the desired size. Cropping involves using the crop tool to select the area and pressing enter. Opacity is adjusted by selecting the layer and changing the number above the layers. Adding a layer mask involves clicking the layer, choosing add layer mask, and initializing it as white. Partial transparency is made using the gradient tool with a black to white gradient from the edge to middle of an image.217 quick guide to photoshop cs6
217 quick guide to photoshop cs6Rodel Morales
╠²
This document provides a quick guide to fundamental Photoshop tools and techniques for modifying images, including opening and resizing images, applying adjustments, working with layers and history, using selection tools, and saving images. Key steps outlined are resizing an image using the Image Size option, applying adjustments from the Adjustments panel, using the Lasso and Quick Mask tools to extract an image subject, and saving images in formats like PNG that maintain transparency.Writing ED material
Writing ED material┘ģ┘䞦┘ģžŁ ž┤┘üž¦┘üž®
╠²
This document provides instructions for a Photoshop lesson on basic photo corrections. The lesson contains 3 sections - straightening and cropping an image, replacing colors in an image, and adjusting lightness with the dodge tool. The sections provide step-by-step instructions for using tools like the crop tool, replace color dialog box, and dodge tool to improve a sample photo.Tutorial photoshop
Tutorial photoshopnova arianty
╠²
The document provides instructions for applying a zoom blur effect to an image to highlight the central subject and create a sense of dynamism. The key steps are: 1) Selecting the central subject with an elliptical marquee and feathering the edges; 2) Inverting the selection to apply blur to the surrounding areas; 3) Applying a radial blur with the zoom method at 10-15 amount to pull the blurred areas toward the corners. The result highlights the central subject and lends a dynamic quality to the photo.Making a Circular Cropping in Photoshop
Making a Circular Cropping in Photoshopds2kGTS
╠²
This document provides instructions for resizing and cropping an image in Photoshop. It explains how to resize an image using the Image Size option, how to switch between the Rectangular and Elliptical Marquee tools, and the three types of marquee styles. It also describes how to invert a selection and delete the unselected area to crop an image.5 combining images and applying filters
5 combining images and applying filtersMarty Sison
╠²
This document provides instructions for applying different filters and effects to images in Photoshop. It describes how to add textures and objects to images using layer blending modes and layer masks. It also explains how to replace backgrounds and blur images using smart filters. Filters can be applied and adjusted non-destructively through the Filter Gallery or by converting layers to smart filters.How to copy a layer style in photoshop
How to copy a layer style in photoshopSibghatullah Khattak
╠²
The document provides an overview of using layers and masks in Photoshop CS6, detailing shortcuts, techniques for adding and manipulating masks, and various tasks such as blending images and creating collages. It explains the differences between layer masks and clipping masks, emphasizing non-destructive editing and functionalities like fill colors, gradient tools, and blend modes. The document includes step-by-step tasks to apply these methods effectively in photo editing.Photo retouching tips and tricks in photoshop
Photo retouching tips and tricks in photoshopRemon Mia
╠²
The document provides various tips and tricks for photo retouching in Photoshop, covering color definition, folder management, split-toning effects, and skin retouching techniques. It includes step-by-step instructions for creating non-destructive vignettes, adjusting lighting, achieving distinguished paleness, and utilizing dodge and burn techniques. Additionally, it offers contact information for graphic design services.Information Communication Technology
Information Communication TechnologyNancyDaro
╠²
This document provides instructions for basic image editing techniques in Photoshop, including inserting and resizing images, cropping, changing backgrounds, adjusting layers and opacity, editing brightness/contrast and colors, fixing imperfections, and adding/editing text. It also provides step-by-step instructions for changing an image's opacity, adjusting brightness and contrast using adjustment layers, using different tools like the clone stamp and healing brush to hide imperfections, and adding subtle details.Do not open your computers! part 2
Do not open your computers! part 2Jenina Romulo
╠²
Layer masks allow selective modification of a layer's opacity, unlike adjusting overall opacity. They are a fundamental image editing tool. Gaussian blur reduces noise and detail through blurring with a Gaussian function. Desaturation involves mixing a color with white. The document then provides instructions on using layer masks to combine images with varying opacity, erase portions without destroying layers, and apply blur and cropping effects. Assignments include combining two photos with a screen blend mode, applying Gaussian blur to a photo, and desaturating a photo.Create a canvas banner in photoshop
Create a canvas banner in photoshopNaomiPB
╠²
This document provides a 11 step tutorial for creating a canvas eyelet banner in Photoshop. The steps include setting up a new document, placing an image, duplicating layers, adding texture effects to make it look like canvas, adding photo filters, creating shiny beveled eyelets using shapes and layer styles, and cutting holes through the banner layer for the eyelets. Ruler guides are used to evenly space multiple duplicated eyelet layers across the top of the banner.Changing how your picture looks like (Paint Tool)
Changing how your picture looks like (Paint Tool)Mirea Mizushima
╠²
To resize an image, select Image > Attributes and set the size units and dimensions. Zooming in and out can be done with the zoom tool slider or View > Zoom > Custom. Gridlines can be displayed by selecting View > Zoom > Custom and a percentage, then View > Show Grid. Images can be flipped, rotated, stretched or skewed using options under Image > Flip/Rotate or Image > Resize, Skew.How to Edit in Photoshop (Part 2): Adding Background and Using Adjustment Tools
How to Edit in Photoshop (Part 2): Adding Background and Using Adjustment ToolsMaria Eloisa Blanza
╠²
The document is a guide on basic image manipulation techniques in Photoshop. It covers key topics such as inserting and resizing images, cropping, adjusting brightness and contrast, and using tools like the healing brush and clone stamp for fixing imperfections. Detailed steps are provided for changing layer opacity, adding text, and enhancing images effectively.Dramatic Wrinkles effect Tutorial
Dramatic Wrinkles effect TutorialRAVE19u3
╠²
The document provides steps to create a dramatic wrinkled skin effect in Photoshop:
1. Add a black and white adjustment layer to alter the color to a moody effect.
2. Set the blending mode of the adjustment layer to Overlay.
3. Duplicate the background layer and apply a plastic wrap filter with the blending mode set to Multiply to darken the skin. Animation step by step instruction
Animation step by step instructionManamiIshimura
╠²
The document provides step-by-step instructions for creating a stop animation video in Photoshop. It outlines how to open photos as layers, check the layer orientation and fix any issues, create frames from the layers, adjust the timeline, and save the final animation as a GIF or MP4 file. Troubleshooting tips are also included, such as how to rotate individual layers, make layers the same size, and reduce file size if Photoshop refuses to render large images.Photoshop technical skills
Photoshop technical skillsFigen232
╠²
The document provides instructions for applying a motion blur effect and color tint to an image in Photoshop in 4 steps:
1. Open an image and duplicate its background layer. Apply a motion blur filter to the duplicate layer.
2. Use the rubber tool to erase parts of the blurred duplicate layer, revealing the underlying background image.
3. Create another layer set to the Hue blend mode and fill it with a color picked from the image. Erase parts of this layer with the rubber tool.
4. Merge all layers and save the final image.Writing With Water
Writing With Watersnshnangel04
╠²
1. The document provides instructions for creating a water-like text effect in Photoshop using layers, channels, and filters.
2. Key steps include typing or drawing on an alpha channel, blurring the channel, loading it as a texture, and applying effects like drop shadow, glow, and bevel & emboss to make the text appear as if written in water.
3. Settings are provided as examples, but the instructions emphasize experimenting with different options to achieve a realistic water texture effect.How to Edit in Photoshop (Part 2): Adding Background and Using Adjustment Tools
How to Edit in Photoshop (Part 2): Adding Background and Using Adjustment ToolsMaria Eloisa Blanza
╠²
Similar to Juliet evangelista (20)
Crazy Photos: An Introduction to GIMP
Crazy Photos: An Introduction to GIMPRino Landa
╠²
The document is a comprehensive guide on using GIMP, an open-source image editing program similar to Photoshop. It details various tools, techniques for cropping, layering, adding filters, and special effects, including basic and advanced editing methods. Additionally, it provides step-by-step instructions for implementing these features to achieve creative outcomes with images.Tutorial in gimp
Tutorial in gimpOscarContreras102
╠²
This tutorial by Oscar B. Contreras Jr. demonstrates how to use GIMP for blending images, removing backgrounds, and changing clothing colors. It provides step-by-step instructions for each process, including the use of layer masks, the fuzzy select tool, and the paths tool. The document concludes with tips on adjusting colors and applying effects to enhance the final results.Tutorial in GIMP
Tutorial in GIMPArabhelaBarrameda
╠²
This tutorial document provides instructions for three tasks in GIMP: blending images, changing a background color, and changing an outfit color. To blend images, users open two images as layers and add a layer mask before using the blend tool to merge the images. To change a background color, users add transparency and select areas to remove before changing the background layer color. Finally, to change an outfit color, users make paths of areas to change, adjust hue and saturation, create new layers, color the selections, and optionally blur edges. The document provides step-by-step guidance for completing each task.Unit 6 - Masters Tutorials (11)
Unit 6 - Masters Tutorials (11)MrLawler
╠²
The document provides instructions for 5 image editing techniques:
1. Converting an image to sepia tone using photo filters, color balance, hue/saturation, or layer styles.
2. Applying blur to duplicate layers set to multiply or screen blending modes to emphasize or de-emphasize parts of an image.
3. Creating double exposures by nudging and blurring duplicate layers set to multiply or screen blending modes.
4. Applying a threshold to remove gray values, then diffusing to stylize images with geometric shapes.
5. Creating a negative border by drawing shapes and frames, blurring, and experimenting with opacity and layer blending modes.Photoshop basics
Photoshop basicsJanani Satheshkumar
╠²
This document provides an overview of the photo editing software Photoshop. It covers basic topics like opening and saving images, using panels and layers, and viewing and zooming. It also covers editing techniques like cropping, resizing, rotating, blending, cloning and sharpening images. Additionally, it discusses fixing lighting issues, using histograms to evaluate tones, and applying filters. The document is intended as a tutorial for beginners to learn the basics of using Photoshop.Basics of gimp
Basics of gimpVirgilio Galemba
╠²
This document provides instructions for using GIMP to blend two images, remove an image background using the fuzzy select tool, and change hair color. It describes:
1. How to blend images by importing one image into another, adding a layer mask, and using the gradient tool to fade between the images.
2. How to remove an image background by selecting the area to keep using the fuzzy select tool, locking the alpha channel, and deleting the selection.
3. How to change hair color by outlining the clothes with the paths tool, desaturating the clothes, creating a new color layer named "Color" set to transparency, filling the selection with the new color, and changing the layer mode to overlay.Cours photoshop
Cours photoshopmohamednacim
╠²
This document provides an overview of basic Photoshop tools and techniques for beginners. It discusses the Photoshop workspace including the toolbox, palettes and common tools. It then explains selections, layers, masks and how to perform common image editing tasks like improving underexposed and overexposed photos, removing red eye and blemishes, removing color casts, adding sepia tones, creating photo-filled text, and applying a soft focus effect. Step-by-step instructions are provided for each technique.Artwork tutorial 1 making your image
Artwork tutorial 1 making your imageXP School
╠²
The document provides instructions for finding and editing images using Photoshop tools:
1. It describes how to find suitable base images and remove plain backgrounds using the magic wand tool.
2. For busy backgrounds, it recommends using the magnetic selection tool to manually trace around objects.
3. Small eraser tools can be used to remove parts of images for further editing.
4. Images can then be combined by dragging layers between files and rearranging the layer order. The layers should eventually be merged into a single layer for the final edited image.Ppt
Pptlkpd
╠²
This document provides an introduction to basic tools and concepts in Adobe Photoshop. It outlines how Photoshop allows editing photos and graphics through tools like pixels, selection tools, layers, and adjustments. Basic tools are described like brush, eraser, clone stamp, and filters for special effects. The document demonstrates how to open, resize and save images, as well as use layers, adjustments, cropping and rotations.Program to Remove Background from Photo.pptx
Program to Remove Background from Photo.pptxJohn Buttler
╠²
Master the Art of Background Removal! This professional PowerPoint breaks down top tools like Photoshop, GIMP, and AI-powered apps for flawless photo background removal. Perfect for designers, marketers, and e-commerce.
Our Service Page:
https://www.clippingworld.com/background-removing-services/Photoshop Background
Photoshop BackgroundJerry Arnold
╠²
This document provides instructions for creating a gradient background in Photoshop using the gradient tool. It describes setting the foreground and background colors to dark blue and black. A radial gradient is dragged from the center to the right edge of the document. A new layer is filled with white and the Clouds filter is applied, then the layer mode is set to Multiply. Finally, noise is added at 20% to soften the artificial look of the background.Christine rose nd. tipones [gr. 11 abm, caritas]
Christine rose nd. tipones [gr. 11 abm, caritas]Virgilio Galemba
╠²
This document provides instructions for basic image editing and manipulation in GIMP. It includes steps to:
- Create a new black image canvas and add text
- Apply a Gaussian blur to a text layer
- Add a new color layer and change its blend mode
- Use paths and hue/saturation to change the color of hair in an image
- Open multiple images as layers and add a gradient layer mask to blend them together.Andy warhol presentation
Andy warhol presentationjs1productionstm
╠²
To create an Andy Warhol style image in Photoshop, follow these steps:
1. Open Photoshop and a photo, then duplicate the background layer. Rename one layer "cut away" and use the magic wand tool to select the background and fill with black.
2. Rename another layer "color" and use the threshold adjustment to give it a high-contrast look.
3. Create new layers for different objects like "shirt" and use the magic wand tool to select the object, then fill with color.
4. Repeat for other objects, lock layers not being edited, and fill selections with bright colors to achieve the classic Warhol style composite image.Andy warhol presentation
Andy warhol presentationjs1productionstm
╠²
To create an Andy Warhol style image in Photoshop, follow these steps:
1. Open Photoshop and a photo, then duplicate the background layer. Rename one layer "cut away" and use the magic wand tool to select the background and fill with black.
2. Rename another layer "color" and use the threshold adjustment to give it a high-contrast look.
3. Create new layers for different objects like "shirt" and use the magic wand tool to select the object, then fill with color.
4. Repeat for other objects, lock layers not being edited, and fill selections with bright colors to achieve the classic Warhol style composite image.Steps On Removing The Background
Steps On Removing The BackgroundMatteo Rimini
╠²
The document provides steps for removing a background from an image. It recommends placing the image on a new layer rather than the background layer. Using the quick selection tool, the background is highlighted and deleted by working on one side and moving across to reduce mistakes. The rubber tool is then used to neaten any sharp edges left after using the quick selection tool.Removing Background
Removing BackgroundPharwynd
╠²
The document provides instructions for removing the background from an image in GIMP:
1. Create a new 500x150 pixel document and import the sample image link provided.
2. Ensure the image layer has an alpha channel selected to allow for transparency.
3. Use the scale tool to resize the image to fit within the canvas.
4. Use the free select tool to trace around the edges of the subject and delete the selected background areas.Case Study and Tutorials
Case Study and TutorialsMrLawler
╠²
This document provides instructions for replicating the styles of several historical photographic processes from the 19th century. It includes step-by-step guides for creating daguerreotypes, ambrotypes, tintypes, calotypes, cyanotypes, carte de visites, and adding borders. Additional tips encourage experimenting with different textures and effects to mimic the look of older papers and surfaces. The final section presents a case study challenge to analyze an provided image and deduce the steps taken to create it.GIMP - R.D.Sivakumar
GIMP - R.D.SivakumarSivakumar R D .
╠²
GIMP is a free and open-source raster graphics editor used for image manipulation tasks like photo retouching and image cropping. It has tools for selecting, painting, transforming, and editing images. GIMP provides layers, brushes, an undo history, and various selection tools to edit images. Common tasks in GIMP include opening an image, creating layers, selecting portions using tools like rectangle select or freehand select, and applying edits like filling, copying, pasting, and rotating selected portions. Filters can also be used for effects like red-eye removal.Photoshop Guide
Photoshop Guidebethanyf97
╠²
Step 1. Set the page size and background transparency.
Step 2. Open a photo to cut out and select the Quick selection tool to highlight the area to cut out.
Step 3. Add a pixel mask and invert it to cut out the highlighted photo area.Ad
Recently uploaded (20)
Nueva presentaci├│n para diapositivas de power point.pdf
Nueva presentaci├│n para diapositivas de power point.pdfSubaruKun1
╠²
Presenta plantillas para powerpoint AI-Driven-Personalization-in-UX-Designing-for-One-in-a-Million.pdf
AI-Driven-Personalization-in-UX-Designing-for-One-in-a-Million.pdfSultan Shalakhti
╠²
Why you should attend this event
Talk Title: AI-Driven Personalization in UX: Designing for One in a Million
In this session, Sultan Shalakhti explores how artificial intelligence is reshaping user experience through smart, adaptive personalization. From e-commerce to banking, personalized design has become a key differentiatorŌĆöwhen done right. Learn how to apply AI tools to enhance user journeys, balance personalization with privacy, and build experiences that feel uniquely human. This talk blends strategy, ethics, and real-world use cases for UX professionals ready to embrace the future.
ŌĖ╗
ž╣┘å┘łž¦┘å ž¦┘äž¼┘äž│ž®: ž¦┘䞬ž«žĄ┘ŖžĄ ž¦┘ä┘ģž»ž╣┘ł┘ģ ž©ž¦┘äž░┘āž¦žĪ ž¦┘䞦žĄžĘ┘垦ž╣┘Ŗ ┘ü┘Ŗ ž¬ž¼ž▒ž©ž® ž¦┘ä┘ģž│ž¬ž«ž»┘ģ: ž¬žĄ┘ģ┘Ŗ┘ģ ┘Ŗ┘ä┘Ŗ┘é ž©┘ā┘ä ┘üž▒ž» ž╣┘ä┘ē žŁž»ž®
┘łžĄ┘ü ž¦┘äž¼┘äž│ž®:
┘ŖžŻž«ž░┘垦 ž│┘äžĘž¦┘å ž┤┘äž«ž¬┘Ŗ ┘ü┘Ŗ ┘ćž░┘ć ž¦┘äž¼┘äž│ž® ┘ü┘Ŗ ž¼┘ł┘äž® žŁ┘ł┘ä ┘ā┘Ŗ┘ü ┘Ŗž╣┘Ŗž» ž¦┘äž░┘āž¦žĪ ž¦┘䞦žĄžĘ┘垦ž╣┘Ŗ ž¬ž┤┘ā┘Ŗ┘ä ž¬ž¼ž▒ž©ž® ž¦┘ä┘ģž│ž¬ž«ž»┘ģ ┘ģ┘å ž«┘䞦┘ä ž¦┘䞬ž«žĄ┘ŖžĄ ž¦┘äž░┘ā┘Ŗ ┘łž¦┘ä┘ģ┘Åž¬┘ā┘Ŗ┘æ┘ü. ┘ģ┘å ž¦┘䞬ž¼ž¦ž▒ž® ž¦┘äžź┘ä┘āž¬ž▒┘ł┘å┘Ŗž® žź┘ä┘ē ž¦┘ä┘éžĘž¦ž╣ ž¦┘äž©┘å┘ā┘Ŗžī žŻžĄž©žŁ ž¦┘䞬ž«žĄ┘ŖžĄ ž╣┘åžĄž▒┘ŗž¦ ┘üž¦žĄ┘ä┘ŗž¦ ┘ü┘Ŗ ž¼┘łž»ž® ž¦┘䞬ž¼ž▒ž©ž®ŌĆö┘ł┘ä┘ā┘å ┘ü┘éžĘ ž╣┘åž» ž¬┘å┘ü┘Ŗž░┘ć ž©ž¦┘äž┤┘ā┘ä ž¦┘䞥žŁ┘ŖžŁ. ž│┘垬ž╣ž▒┘ü ž╣┘ä┘ē ┘ā┘Ŗ┘ü┘Ŗž® ž¬┘łžĖ┘Ŗ┘ü žŻž»┘łž¦ž¬ ž¦┘äž░┘āž¦žĪ ž¦┘䞦žĄžĘ┘垦ž╣┘Ŗ ┘䞬žŁž│┘Ŗ┘å ž¦┘äž▒žŁ┘䞦ž¬ ž¦┘äž▒┘é┘ģ┘Ŗž®žī ┘łž¬žŁ┘é┘Ŗ┘é ž¦┘䞬┘łž¦ž▓┘å ž©┘Ŗ┘å ž¦┘䞬ž«žĄ┘ŖžĄ ┘łž¦┘äž«žĄ┘łžĄ┘Ŗž®žī ┘łž©┘垦žĪ ž¬ž¼ž¦ž▒ž© ž▒┘é┘ģ┘Ŗž® ž¬ž©ž»┘ł ž┤ž«žĄ┘Ŗž® ┘łžź┘åž│ž¦┘å┘Ŗž®. ž¼┘äž│ž® ž║┘å┘Ŗž® ž¬ž¼┘ģž╣ ž©┘Ŗ┘å ž¦┘䞦ž│ž¬ž▒ž¦ž¬┘Ŗž¼┘Ŗž®žī ┘łž¦┘䞯ž«┘䞦┘é┘Ŗž¦ž¬žī ┘łž»ž▒ž¦ž│ž¦ž¬ ž¦┘䞣ž¦┘äž® ž¦┘ä┘łž¦┘éž╣┘Ŗž® ┘ä┘ä┘ģžŁž¬ž▒┘ü┘Ŗ┘å ┘ü┘Ŗ ┘ģž¼ž¦┘ä UX.
What you will learn in this session
Understand the Core Concepts of AI-Driven Personalization
Explore UX Design Strategies for Hyper-Personalization
Identify Key Tools and Technologies Behind Personalization
Evaluate the Ethical and Privacy Considerations
Apply Personalization Tactics to Real UX ChallengesNarrative research for qualitative research
Narrative research for qualitative researchgameghor1591
╠²
Narrative research for qualitative researchMarketplaces to Buy and Sell Social Media Accounts.pdf
Marketplaces to Buy and Sell Social Media Accounts.pdfjamedthomsn
╠²
In the bustling world of social media marketing, having a solid Facebook presence can make all the difference. But who has time to build accounts from scratch? Enter SellsUSA, a popular platform known for offering verified, ready-to-use Facebook accounts. Whether you're a marketer, small business owner, or social media manager, buying Facebook accounts from a trusted site like SellsUSA can turbocharge your growth journey. But is it really the best option out there? LetŌĆÖs dig deep into everything you need to know before making that purchase. Basic Paterns you can edit to add content
Basic Paterns you can edit to add contentELAINETUMLOSPERALTA
╠²
Basic Paterns you can edit to add content fire123xx2-blogspot-com-2025-06-fire-certificate-requirements-in-html.pdf
fire123xx2-blogspot-com-2025-06-fire-certificate-requirements-in-html.pdfriyaarenainfosloutio
╠²
Fire safety is a critical issue in modern societies, and in a fast-paced, urbanized environment like Singapore, its importance cannot be overstated. Radiation_Pollution_eLearning_Module.pptx
Radiation_Pollution_eLearning_Module.pptxkanishkaarora1496
╠²
ŌĆó Radiation pollution is caused by passages and electromagnetic radiation emitted from
natural and man-made sources.
ŌĆó These may include neutrons, x-rays, ultraviolet radiation, microwaves and alpha passages.
ŌĆó Radiation pollution also includes controlled disposal of radioactive wastes from nuclear
reactors.
ŌĆó Radiation pollution may have biological, ecological and socio-economic effects.
ŌĆó The amount of injury caused by radiation from a radioactive isotope depends on its half-life,
and on how quickly it is absorbed and how fast the body of the organism repairs the
damage.
ŌĆó Most studies of the harmful effects of radiation have been performed on single-celled
organisms.
ŌĆó Obviously, the situation is more complex in humans and other multi-cellular organisms,
because a single cell damaged by radiation may indirectly affect other cells in the individual.
ŌĆó The most sensitive regions of the human body appear to be those which have many actively
dividing cells, such as the skin, gonads, intestine and tissues that grow blood cells (spleen,
bone marrow, and lymph organs).
ŌĆó Radiation is toxic because the emitted radiations form ions when they interact with
biological molecules in cells and tissues.
ŌĆó These ions can then form free radicals, which damage proteins, membranes and nucleic
acids.
ŌĆó Radioactive radiation can damage DNA (deoxyribonucleic acid) by destroying individual
bases including thymine, breaking single strands and double strands, cross-linking different
DNA strands and cross-linking DNA and proteins.
ŌĆó Damage to DNA can lead to cancers, birth defects, and even death.FLOURISHING THROUGH SENSES: FROM AbŌĆśSENSEŌĆÖ to PreŌĆśSENSEŌĆÖ to EsŌĆśSENSEŌĆÖ to Re-...
FLOURISHING THROUGH SENSES: FROM AbŌĆśSENSEŌĆÖ to PreŌĆśSENSEŌĆÖ to EsŌĆśSENSEŌĆÖ to Re-...Samuel Thuo
╠²
A presentation By Samuel Thuo, The Senses Architect to FxD Community for a PechaKucha Format titled: Flourishing Through Senses: From AbŌĆśsenseŌĆÖ to PreŌĆśsenseŌĆÖ to EsŌĆśsenseŌĆÖ to Re-sensing the World
In a world where skyscrapers rise and senses fall, this presentation explores how architecture can either numb or nourish our humanity.
¤ö╣ Act I ŌĆō AbŌĆśsenseŌĆÖ: The Crisis of Sensory Deprivation
We begin in the concrete jungle, a habitat built for function, but not for feeling. Glass, steel, white walls. Children indoors, glued to screens. Cities that silence rain and sterilize smell. We've lost touch with the sensory essence of living. We're living in a pandemic of nonsense environments.
¤ö╣ Act II ŌĆō PreŌĆśsenseŌĆÖ: The Power of Sensory Grounding
We rediscover presence in barefoot steps on soil, bark under fingertips, beams of sunlight through timber, whispers of wind and scent of wet earth. Flourishing starts when all senses are awake, not just sight. ItŌĆÖs a return to how we once knew the world, intimately, bodily.
¤ö╣ Act III ŌĆō EsŌĆśsenseŌĆÖ: Remembering Our Sensory Nature
Flourishing is rooted in our essence, as sensing, emotional beings. We learn from natureŌĆÖs flow, from indigenous African architecture, from animals in tune with their environment, and even from cooking. These are acts of multisensory design, where wisdom is embodied, not abstract. Beauty is not in the eyes of the beholder, but all the senses of the beholder.
¤ö╣ Act IV ŌĆō Re-sensing: A Vision for the Future
ItŌĆÖs time to re-sense the world. Pallasmaa said that architecture is the art of reconciliation between ourselves and the world, and this mediation happens through the senses. We must go back to creating senseful environments that allow this dialogue between us and the world. Homes like Falling water that merge with land. Playful spaces for children. Healing cities filled with texture, sound, and smell. Bodies that root into nature. We must shift from building cold structures to designing sensescapes that foster wellbeing.Grade-9-COT.pptxGrade-9-COT.pptxGrade-9-COT.pptxGrade-9-COT.pptx
Grade-9-COT.pptxGrade-9-COT.pptxGrade-9-COT.pptxGrade-9-COT.pptxMaKristinaBuenaventu1
╠²
Grade-9-COT.pptxQuectel M10 AT commands Arduino Microcontroller
Quectel M10 AT commands Arduino MicrocontrollerAdamSunusiHaruna1
╠²
Quectel M10 AT commands Arduino Microcontroller Syrian politician opposition Randa Kassis
Syrian politician opposition Randa Kassismo820325
╠²
Syrian politician opposition
Randa Kassis is a Franco-Syrian politician and a prominent secular figure within the Syrian opposition. Born on October 8, 1970, in Damascus, Syria, she is also an anthropologist and has worked as a commentator on cultural, political, and societal topics.
Internet Download Manager (IDM) Crack Free Download 2025
Internet Download Manager (IDM) Crack Free Download 2025Designer
╠²
Copy Link & Paste in Google:¤æē¤æē¤æē http://alipc.pro/dl
Internet Download Manager increases download speed with built-in download logic accelerator, resume and schedule downloads.FLOURISHING THROUGH SENSES: FROM AbŌĆśSENSEŌĆÖ to PreŌĆśSENSEŌĆÖ to EsŌĆśSENSEŌĆÖ to Re-...
FLOURISHING THROUGH SENSES: FROM AbŌĆśSENSEŌĆÖ to PreŌĆśSENSEŌĆÖ to EsŌĆśSENSEŌĆÖ to Re-...Samuel Thuo
╠²
Ad
Juliet evangelista
- 1. BASIC TUTORIAL OF GIMP BY: MA. JULIET BERNAS EVANGELISTA GRADE 11. ABM CARITAS
- 2. BLENDING IMAGE IN GIMP
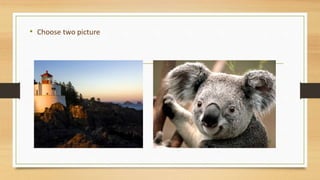
- 3. ŌĆó Choose two picture
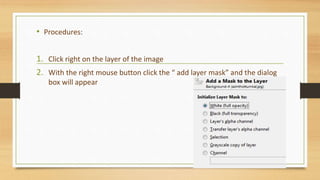
- 4. ŌĆó Procedures: 1. Click right on the layer of the image 2. With the right mouse button click the ŌĆ£ add layer maskŌĆØ and the dialog box will appear
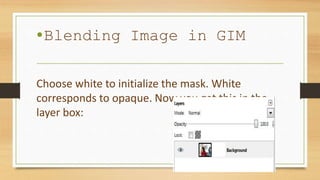
- 5. ŌĆóBlending Image in GIM Choose white to initialize the mask. White corresponds to opaque. Now you get this in the layer box:
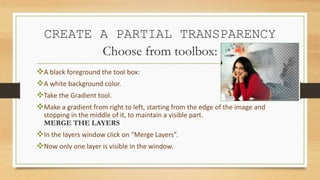
- 6. CREATE A PARTIAL TRANSPARENCY Choose from toolbox: ’üČA black foreground the tool box: ’üČA white background color. ’üČTake the Gradient tool. ’üČMake a gradient from right to left, starting from the edge of the image and stopping in the middle of it, to maintain a visible part. MERGE THE LAYERS ’üČIn the layers window click on ŌĆ£Merge LayersŌĆØ. ’üČNow only one layer is visible in the window.
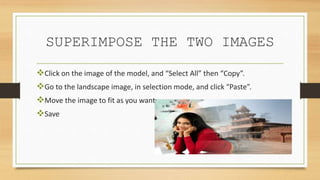
- 7. SUPERIMPOSE THE TWO IMAGES ’üČClick on the image of the model, and ŌĆ£Select AllŌĆØ then ŌĆ£CopyŌĆØ. ’üČGo to the landscape image, in selection mode, and click ŌĆ£PasteŌĆØ. ’üČMove the image to fit as you want ’üČSave
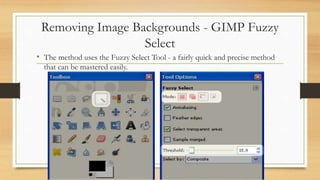
- 8. Removing Image Backgrounds - GIMP Fuzzy Select ŌĆó The method uses the Fuzzy Select Tool - a fairly quick and precise method that can be mastered easily.
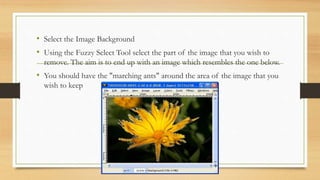
- 9. ŌĆó Select the Image Background ŌĆó Using the Fuzzy Select Tool select the part of the image that you wish to remove. The aim is to end up with an image which resembles the one below. ŌĆó You should have the "marching ants" around the area of the image that you wish to keep
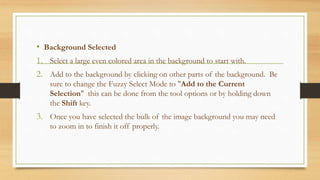
- 10. ŌĆó Background Selected 1. Select a large even colored area in the background to start with. 2. Add to the background by clicking on other parts of the background. Be sure to change the Fuzzy Select Mode to "Add to the Current Selection" this can be done from the tool options or by holding down the Shift key. 3. Once you have selected the bulk of the image background you may need to zoom in to finish it off properly.
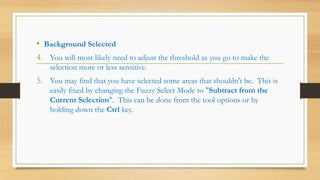
- 11. ŌĆó Background Selected 4. You will most likely need to adjust the threshold as you go to make the selection more or less sensitive. 5. You may find that you have selected some areas that shouldn't be. This is easily fixed by changing the Fuzzy Select Mode to "Subtract from the Current Selection". This can be done from the tool options or by holding down the Ctrl key.
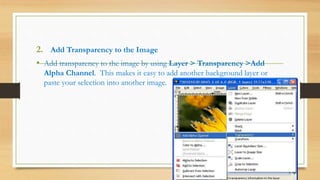
- 12. 2. Add Transparency to the Image ŌĆó Add transparency to the image by using Layer > Transparency >Add Alpha Channel. This makes it easy to add another background layer or paste your selection into another image.
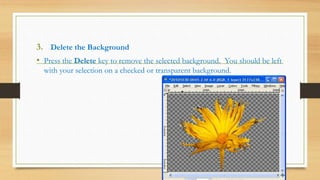
- 13. 3. Delete the Background ŌĆó Press the Delete key to remove the selected background. You should be left with your selection on a checked or transparent background.
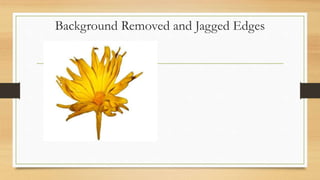
- 14. Background Removed and Jagged Edges
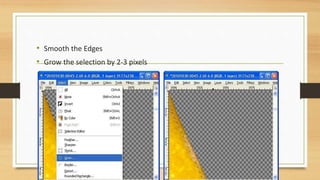
- 15. ŌĆó Smooth the Edges ŌĆó Grow the selection by 2-3 pixels
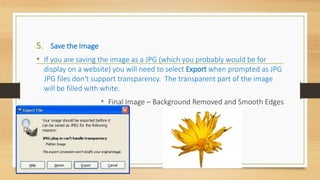
- 16. 5. Save the Image ŌĆó If you are saving the image as a JPG (which you probably would be for display on a website) you will need to select Export when prompted as JPG JPG files don't support transparency. The transparent part of the image will be filled with white. ŌĆó Final Image ŌĆō Background Removed and Smooth Edges
- 17. ŌĆóTHEN YOU HAVE IT! ŌĆóCONGRATULATIONS! ŌĆóI HOPE YOUŌĆÖVE LEARNED SOMETHING! ŌĆóTHANK YOU!